Serverless Workflow
This tutorial in a nutshell
In addition to building workflows with a Temporal.io worker (which is when we apply the Workflow as Code paradigm), it is also possible to implement serverless workflows in KuFlow.
This tutorial will guide us in building a simple Serverless workflow, creating a form to be completed, a decision instance and a notification to the requester.
The use case will be a holiday request to be authorized by a responsible and the advice of acceptance/rejection.
Prerequisites
Before starting our Serverless Workflow for the first time, we must register it in KuFlow (app.kuflow.com). After familiarizing yourself with the user interface, you are ready to perform the necessary configurations for our Worker. To do so, click on the Settings menu. If you do not see this menu, you probably do not have the necessary permissions to define processes, so you will have to request it from your Organization administrators, or simply create a FREE new account.
Create the process definition
We need to create the definition of the process that will execute our Workflow. In this section, we will configure the KuFlow tasks of which it is made up as well as the information necessary to complete said tasks, the process access rules (i.e. RBAC), as well as another series of information. To do this we go to the Setting > Processes menu and create a new process.
A Process Definition with the following data:
- Name
- A descriptive name such as Solicitud de Vacaciones.
- Description
- Free text description about the Workflow.
- Workflow
- Workflow Engine
- KuFlow Diagram Tool, because we are designing a workflow composed of human tasks.
- Workflow Engine

We will define four Tasks Definitions in the process as follows:
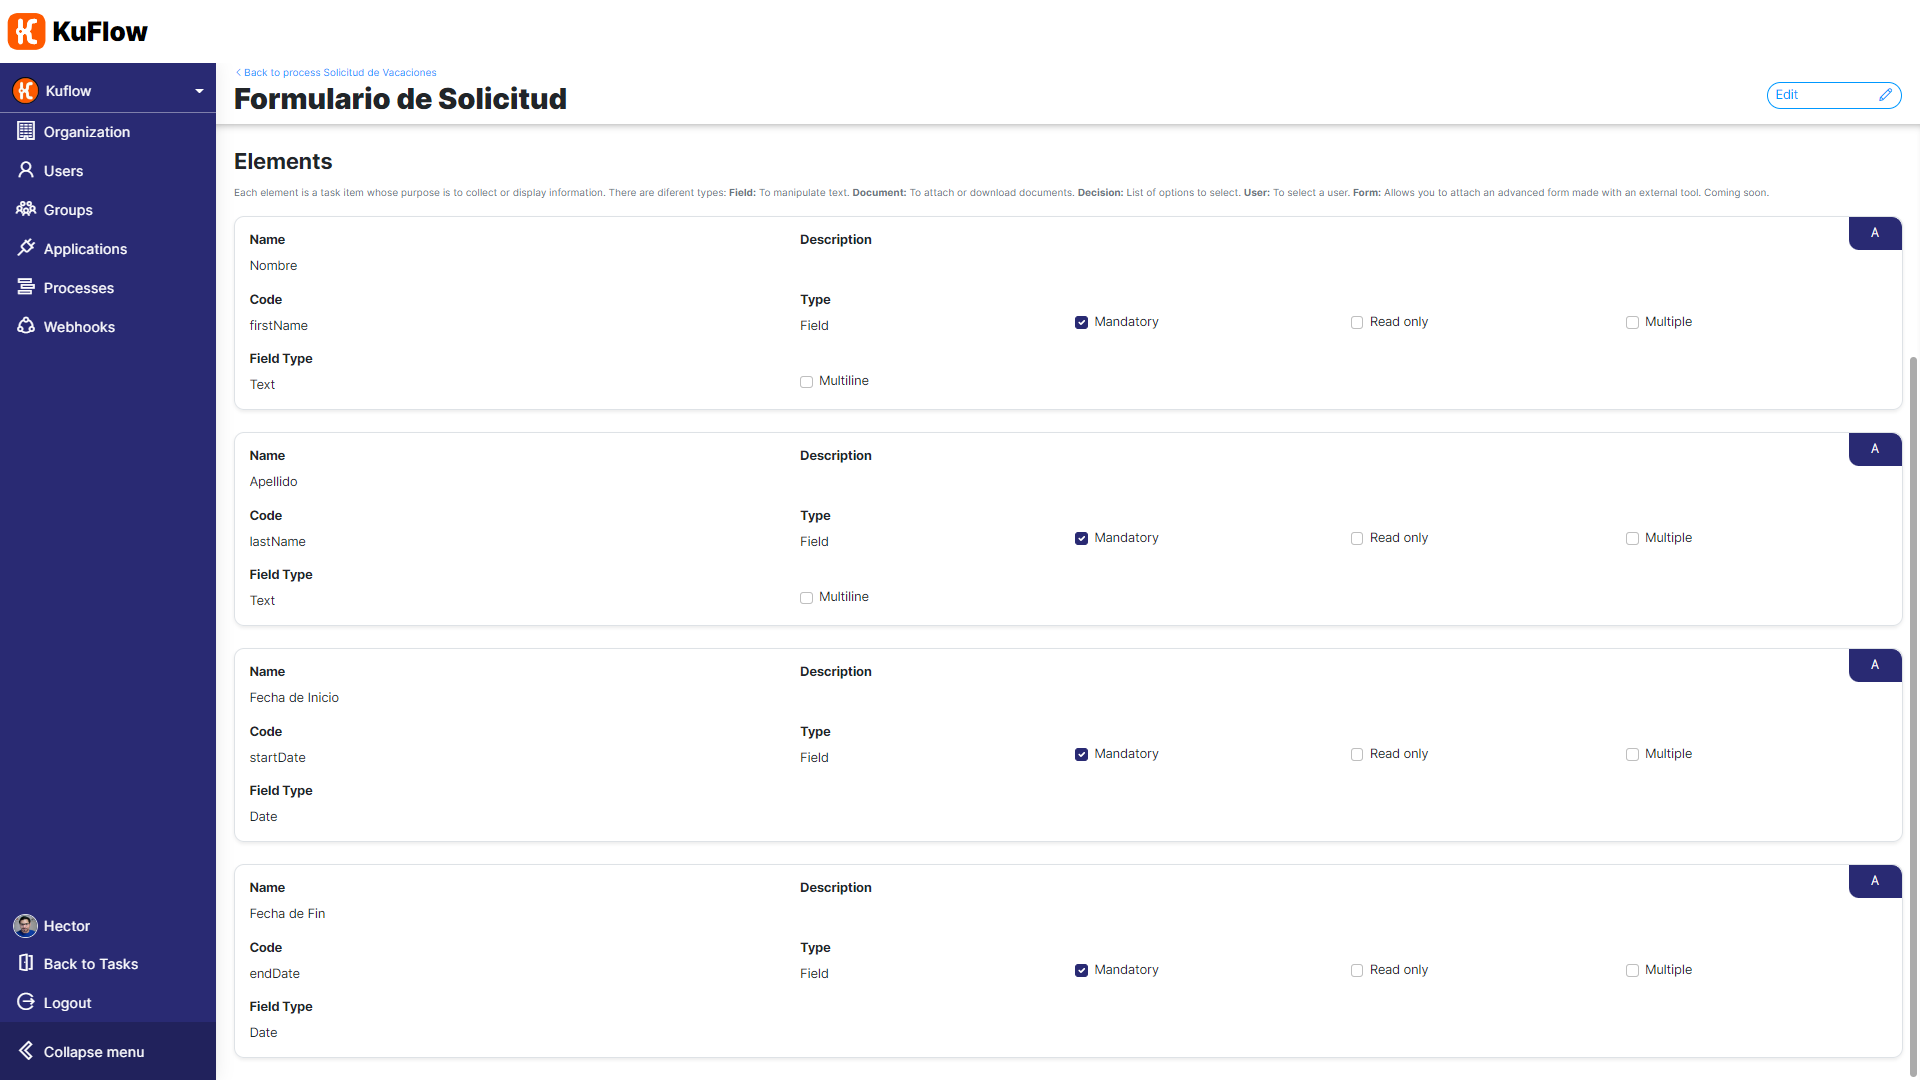
- Task nº1 "Solicitud de Soporte"
- Description: Free text description about the Task.
- Code: form1
- Candidates:
- Default Group (in this tutorial, we will allow all users from this organization to fill up our application form)
- Elements:
- Name: Nombre
- Code: firstName
- Type: Field
- Properties: Mandatory, remaining checked.
- Field Type: Text
- Name: Apellido
- Code: lastName
- Type: Field
- Properties: Mandatory, remaining checked.
- Field Type: Text
- Name: Fecha de Inicio
- Code: startDate
- Type: Field
- Properties: Mandatory, remaining checked.
- Field Type: Date
- Name: Fecha de Fin
- Code: endDate
- Type: Field
- Properties: Mandatory, remaining checked.
- Field Type: Date
- Name: Nombre
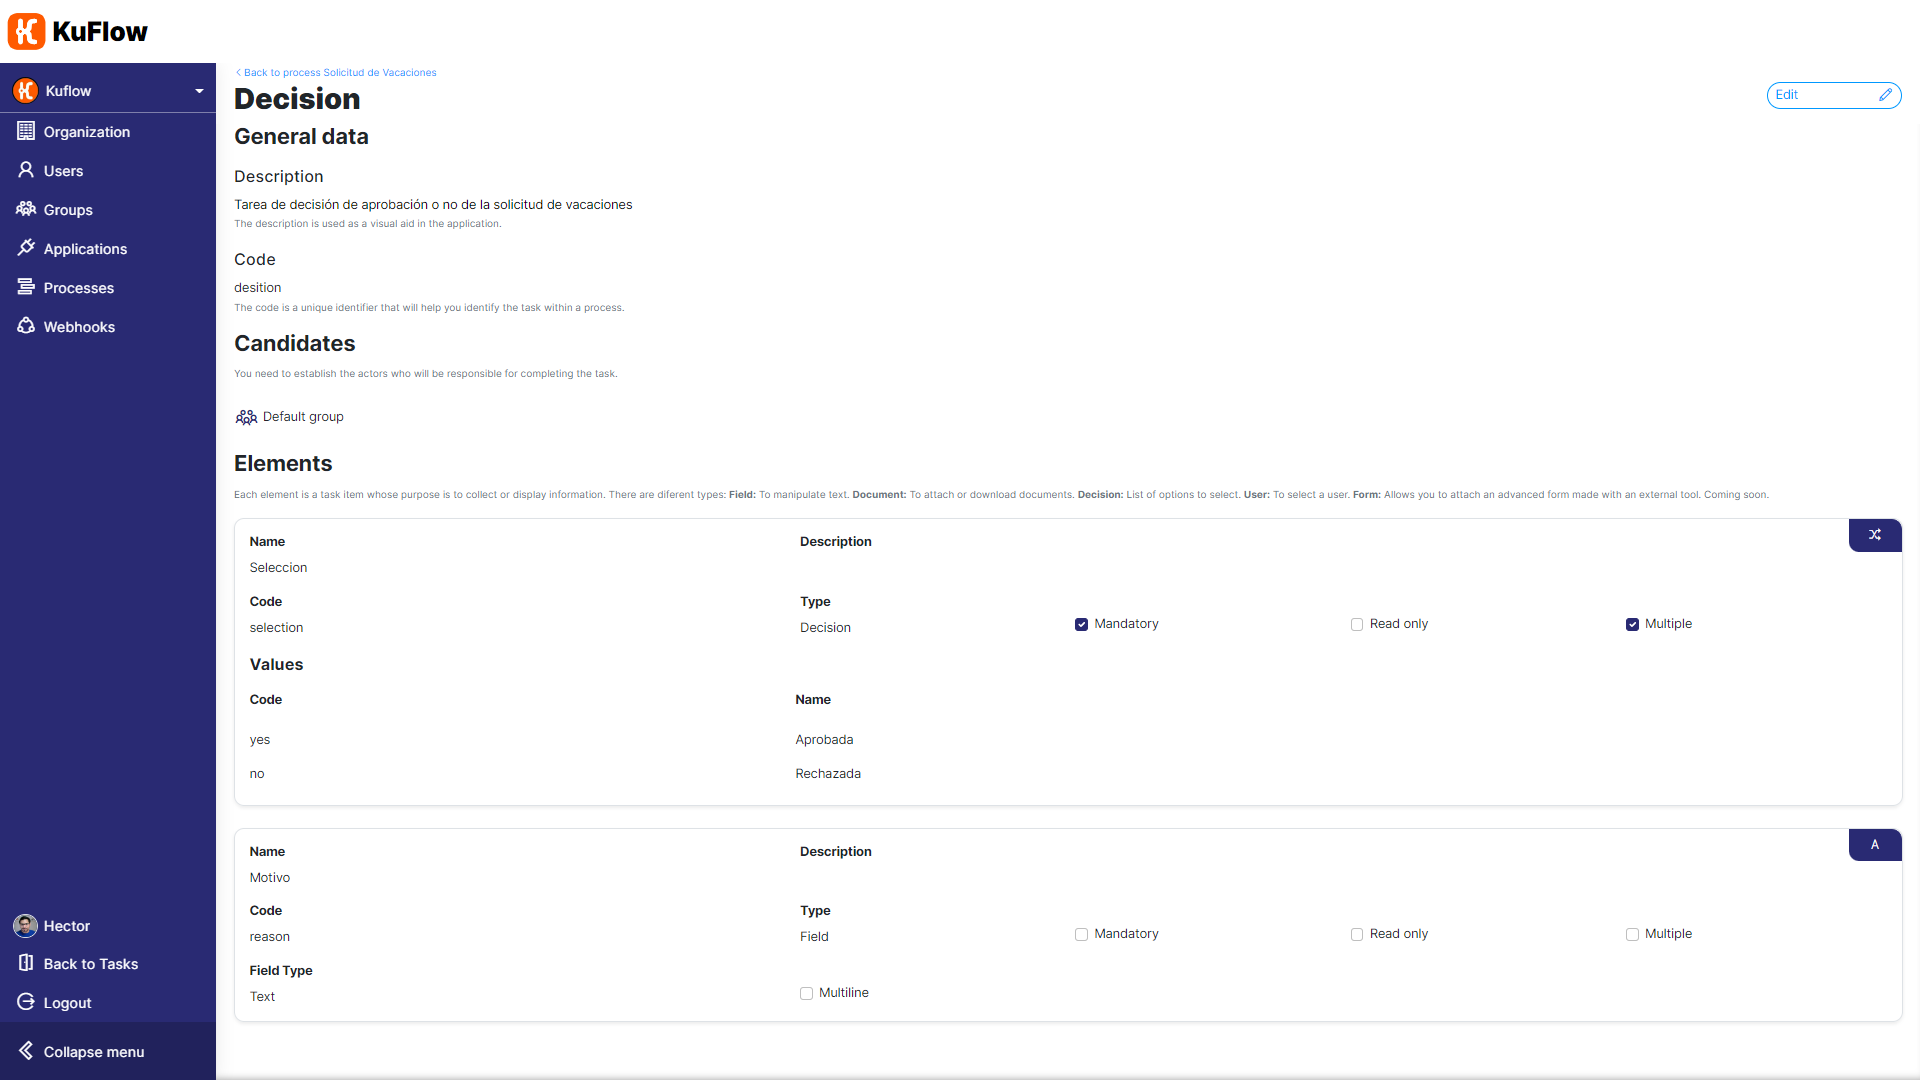
- Task nº2 "Decision"
- Description: Free text description about the Task.
- Code: desition
- Candidates:
- Default Group (in this tutorial, we will allow all users from this organization to fill up our application form)
- Elements:
- Name: Seleccion
- Code: selecttion
- Type: Decision
- Properties: Mandatory, remaining checked.
- Value 1: yes
- Name: Aprobada
- Value 2: no
- Name: Rechazada
- Name: Motivo
- Code: reason
- Type: Field
- Properties: Mandatory, optional.
- Field Type: Text
- Name: Seleccion
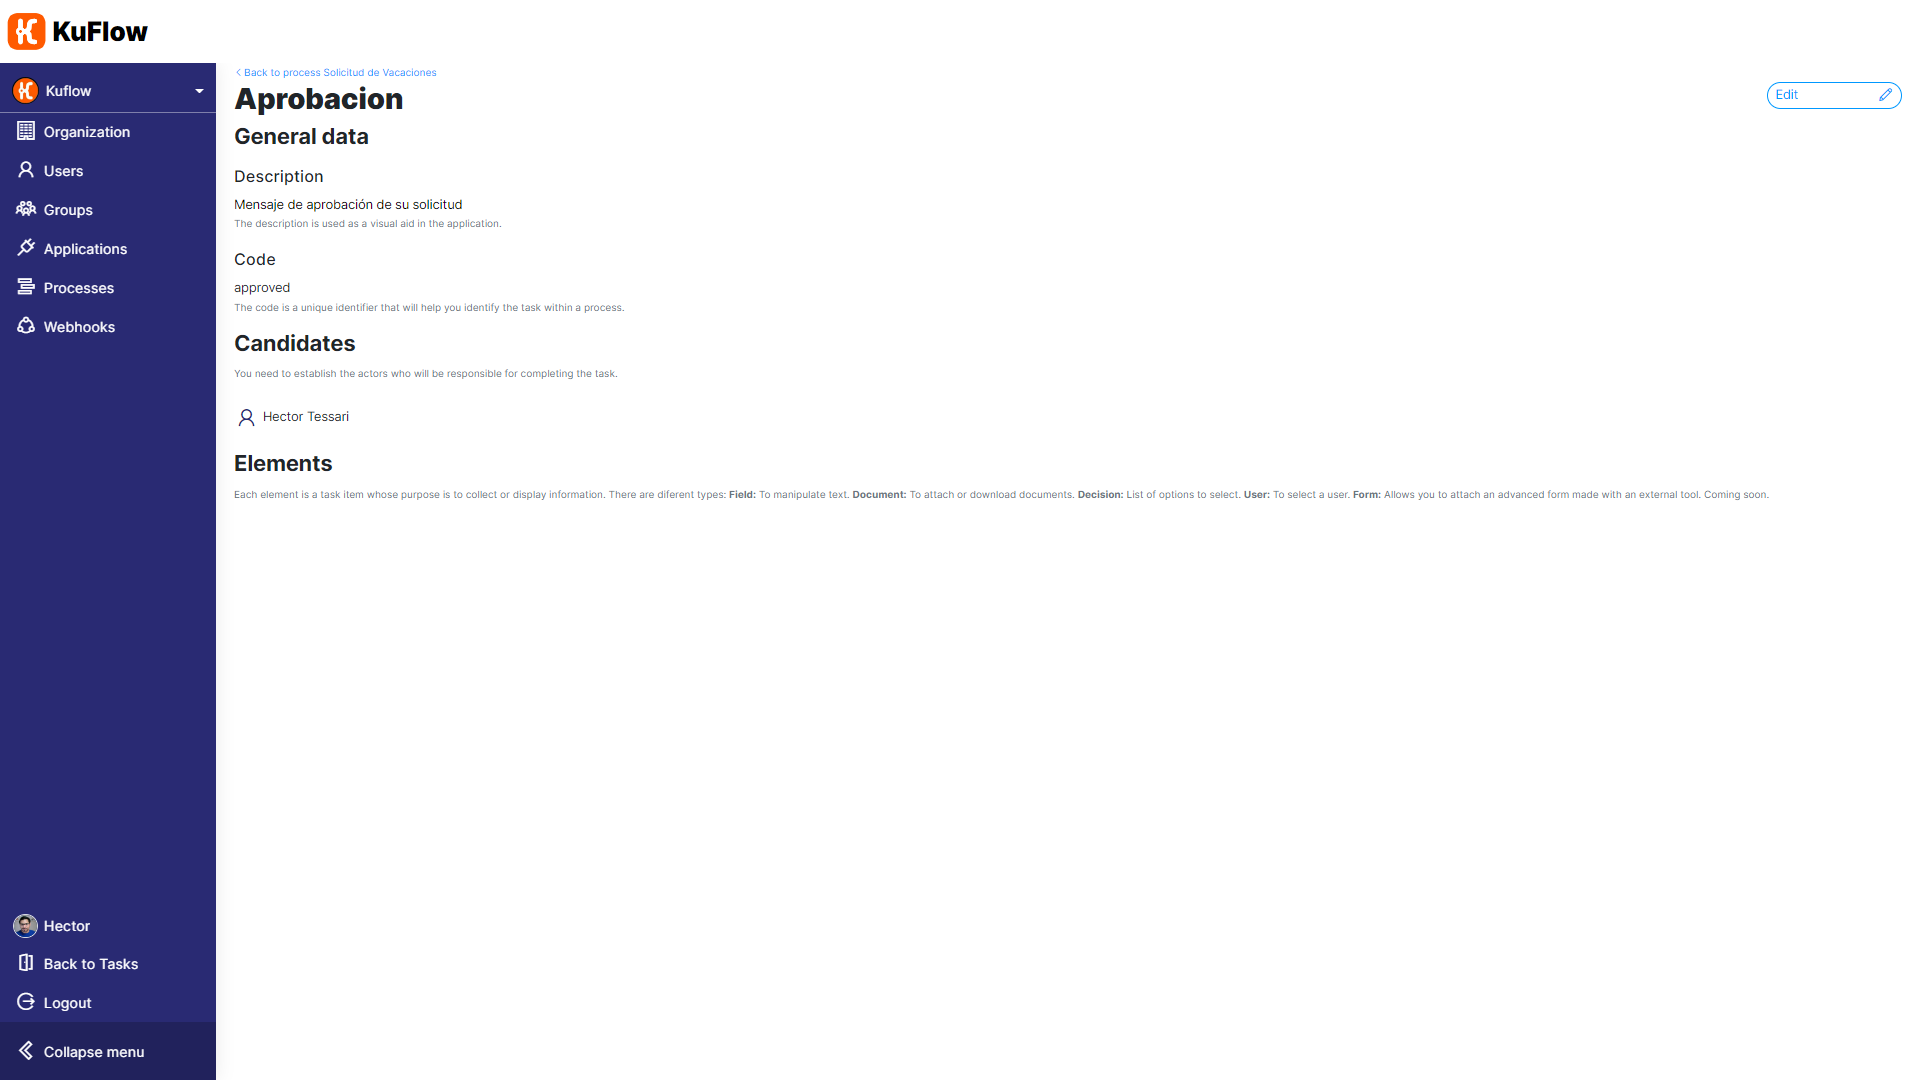
- Task nº3 "Aprobacion"
- Description: Free text description about the Task.
- Code: approved
- Candidates:
- Default Group (in this tutorial, we will allow all users from this organization to fill up our application form)
- Elements: No needed
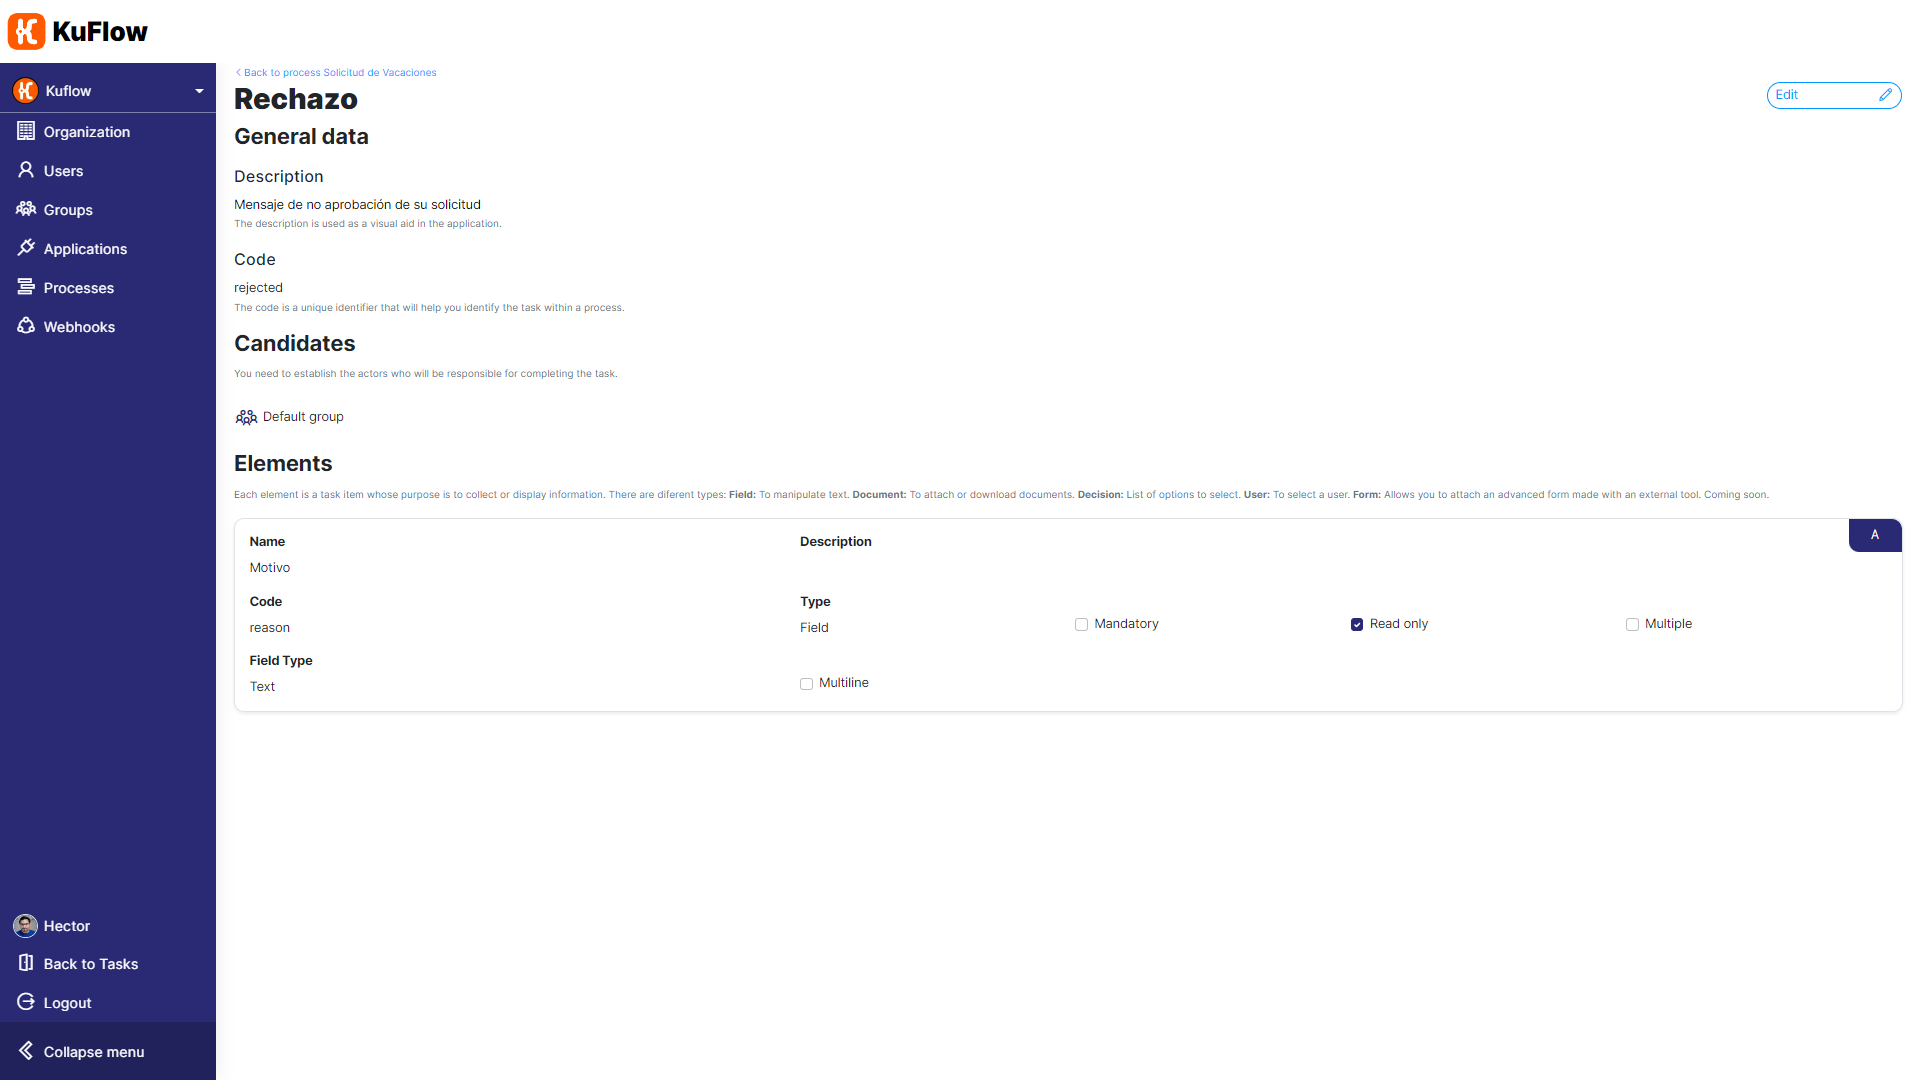
- Task nº4 "Rechazo"
- Description: Free text description about the Task.
- Code: rejected
- Candidates:
- Default Group (in this tutorial, we will allow all users from this organization to fill up our application form)
- Elements:
- Name: Motivo
- Code: reason
- Type: Field
- Properties: Read only, Checked because it will be a notification field.
- Field Type: Text
We must also define the Permissions
- At least, one user or group of users must have the role of
INITIATORin order to instantiate the process through the application. In this tutorial, we will allow all users from this organization to be able to process initiation (Default Group).
Finally, you get something like:

Opening the workflow editor (Diagram tool)
Edit the process and open the editor tool, finding a similar interface as follows.
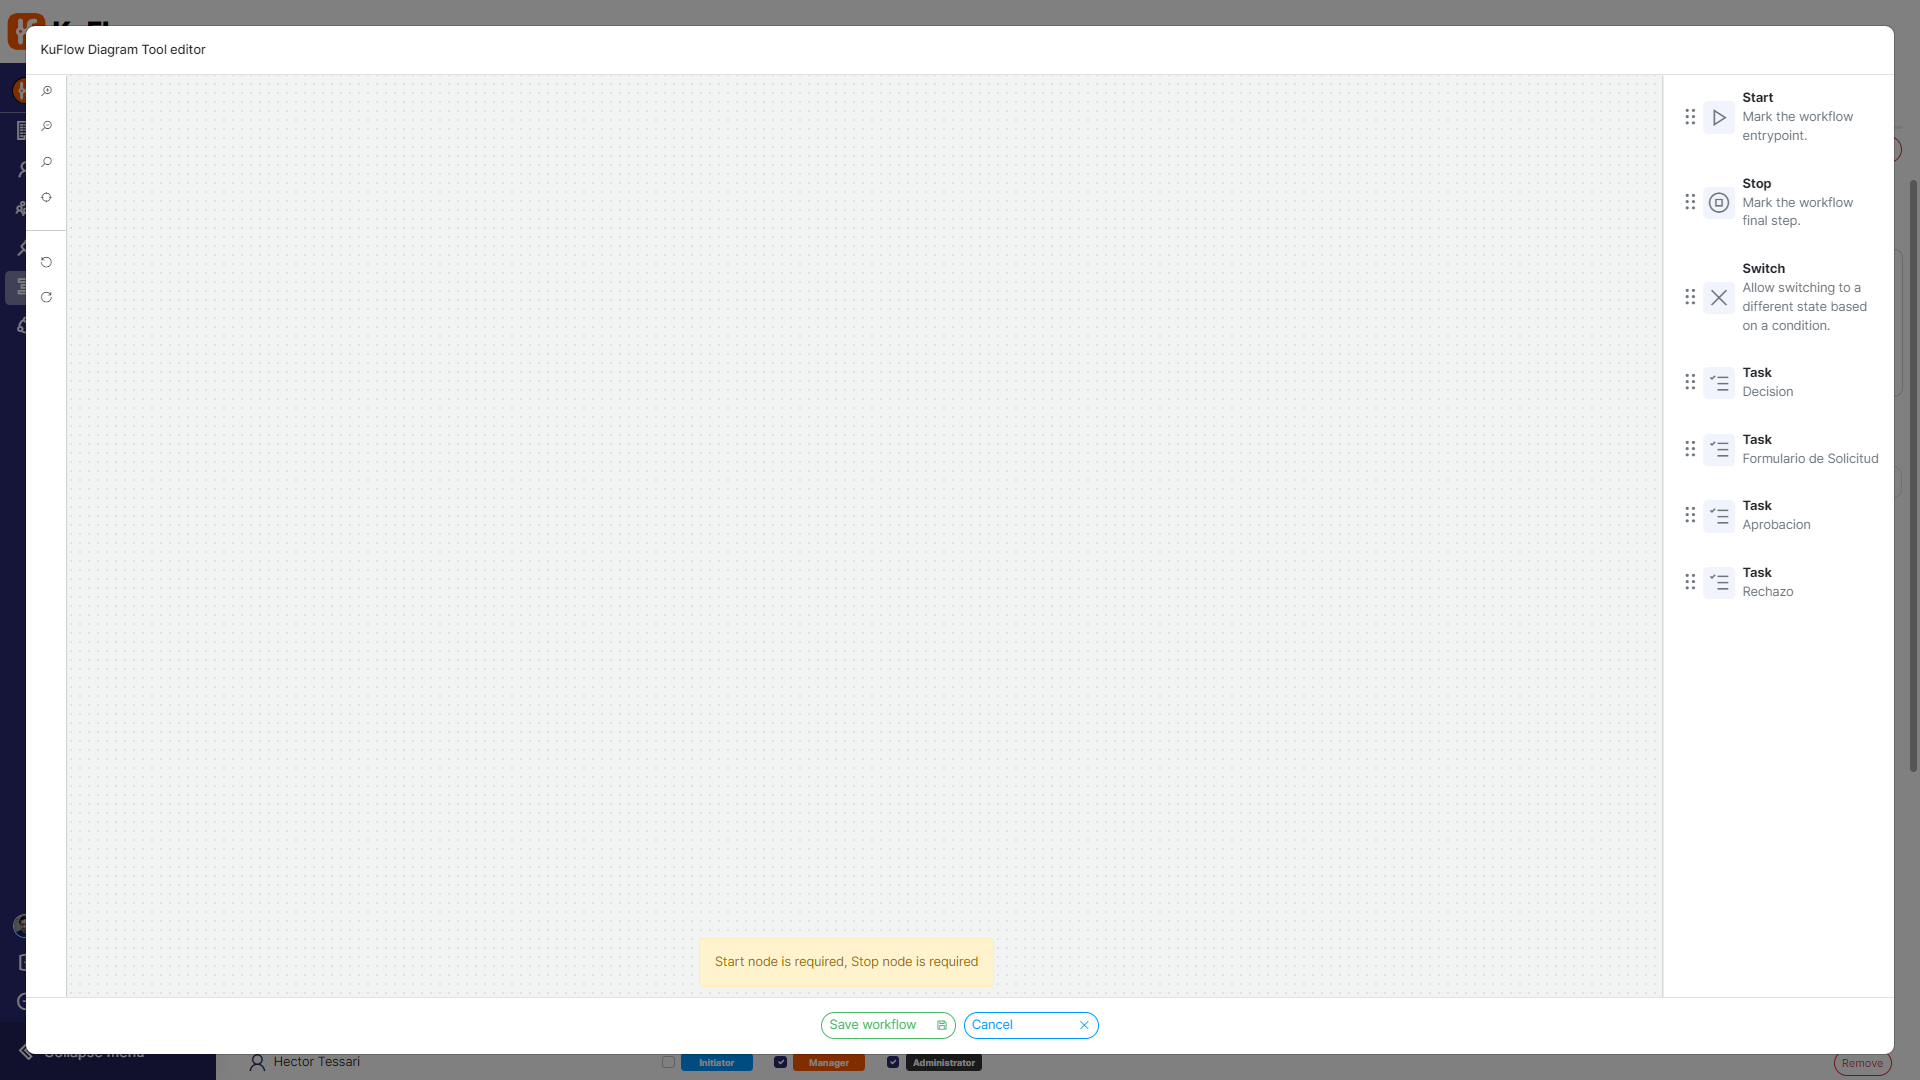
We have to structure the steps of our workflow in the order of the events will occur, this is a drag and drop method, getting something like this:
Then, with the arrows we will connect the nodes, indicating the flow of our process, and completing the textbox for "YES" and "NO". On the last one, click the "Default Transition" checkbox.
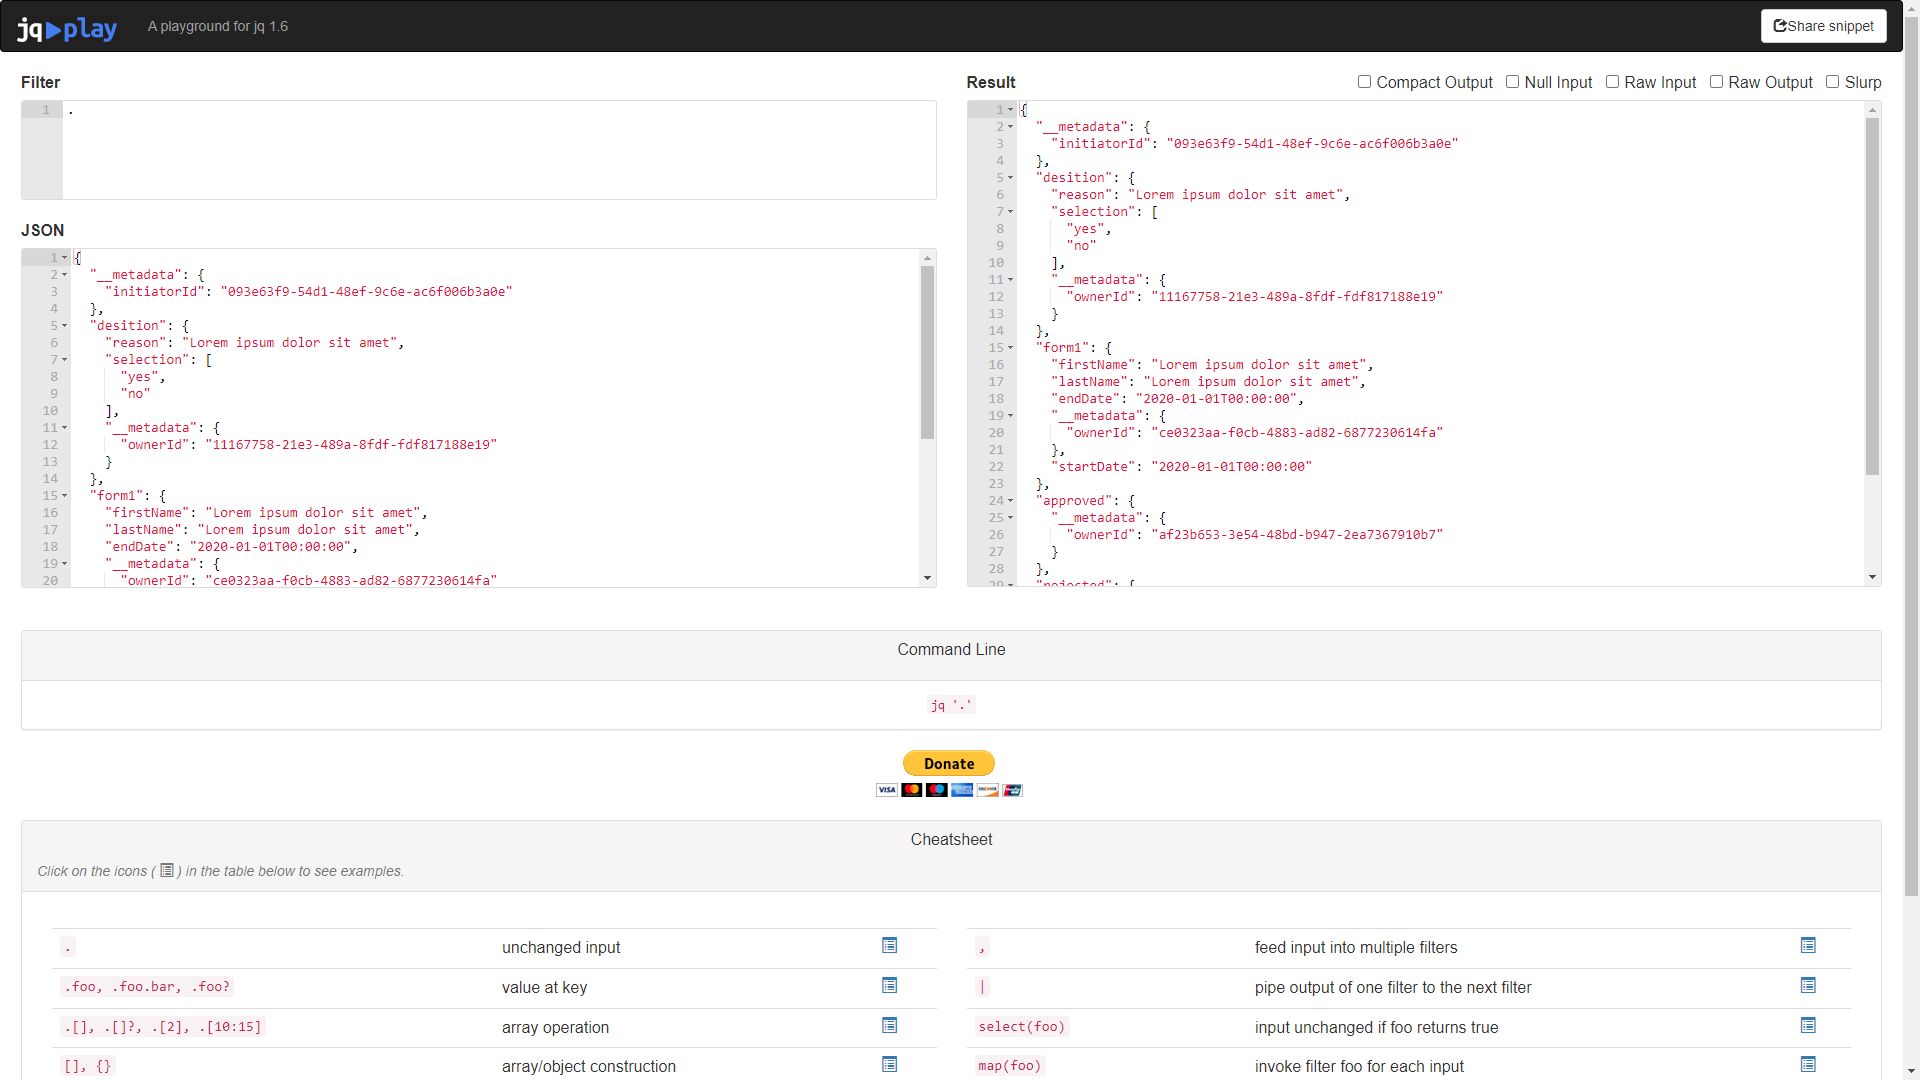
JQ Command Console
JQ is a free open source JSON processor. It allows users to display a JSON file using standard formatting retrieving certain records or attribute-value pairs from it.
To open it, just click on "Test in Playground"

The JQ command can be used with different filters using symbols such as .”, “|”, “,” or the “.[]” filter to organize JSON data.
In the new interface we will find three major sections:
The filter section, to use the symbols that allow us to print the information from the JSON section into the Result section.
We recommend read the documentation from jqplay Github and try it.
Implementation details
Scenario 1: Adding the core process logic
- Rejection message on "Rechazo"
- Select the according node. On the right hand menu find Inputs.
- In Motivo textbox write: ${.desition.reason} (If the syntax is correct, the textbox change from red to green.)
- This will print on the notification message the content on the "reason" variable from the decision.

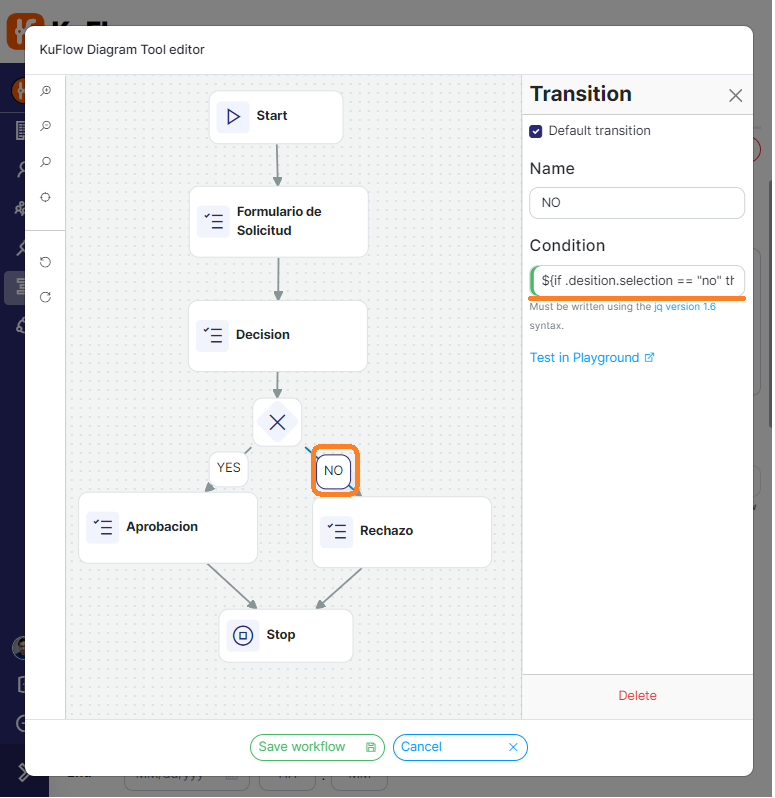
- Defining the path for the "NO" on decision answer.
- Select the according node. On the right hand menu find Condition.
- In the textbox write: ${if .desition.selection == "no" then true else false end} (If the syntax is correct, the textbox change from red to green.)
- This will evaluate the answer received in previous instance and direct the flow through the rejection notification.
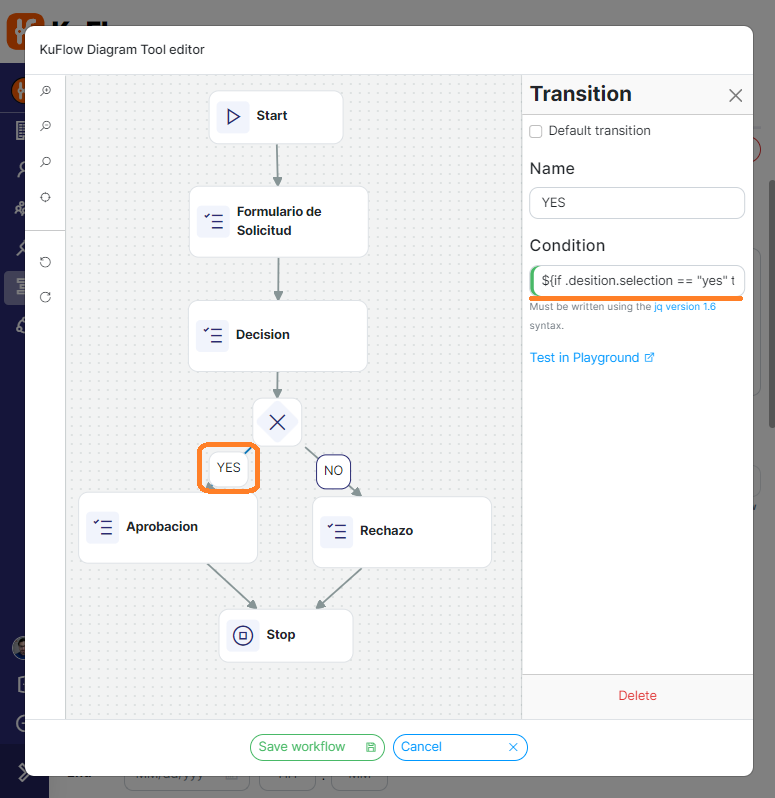
- Defining the path for the "YES" on decision answer.
- Select the according node. On the right hand menu find Inputs.
- In the textbox write: ${if .desition.selection == "yes" then true else false end} (If the syntax is correct, the textbox change from red to green.)
- This will evaluate the answer received in previous instance and direct the flow through the approval notification.
At the bottom of the screen, there is a warning that informs if the workflow has errors.
Save the workflow and edit the process:
- Permissions
At least one user or group of users with the role of
INITIATORin order to instantiate the process through the application.

Save and publish the process.
Testing Scenario 1
We can test this scenario, by initiating the process, completing the form, and wait for the notification, a decision maker (could be us in this case) will select an answer and the notification will arrive to us according to it.
You get something like this:

Here you can watch all steps of this section:
Scenario 2: Adding dates validations
In this section, we will start from the previous section and will contemplate the following details:
- Users in an organization can create a vacation request (from the previous section in this tutorial).
- The manager receives a notification with an approval/reject form and a textbox to complete comments if She/He needs to.
- The requester receives a notification with the resolution taken by the manager.
One of the problems with the previous scenario (Section 1) is that if the requestor enters an earlier period than the current day (in which the request is made) or if the start date is later than the end date. Delegates this validation to a human with no chance to correct it later, and having to repeat the process from the beginning.
We'll solve it in this Section, creating new tasks in the business process (workflow) for communicating the existence of date errors to the user who created the request.
First of all, we need to create two new Tasks Definitions in the process with the following data:
-
Task nº1 "Error Message: Current Date"
- Description: A description text about the Error.
- Code: errorMsg1
- Candidates:
- Default Group (in this tutorial, we will allow all users from this organization to fill up this form)
- No Elements needed for this task.
-
Task nº2 "Error Message: End > Start"
- Description: A description text about the Error.
- Code: errorMsg2
- Candidates:
- Default Group (in this tutorial, we will allow all users from this organization to fill up this form)
- No Elements needed for this task.
We have to slightly change the structure steps of our workflow in order to add the new business logic, remember this is a drag-and-drop method.
Then, with the arrows, we will connect the new nodes, indicating the flow of our process, completing the textbox for "YES" and "NO", and clicking the "Default Transition" checkbox in the last one, on the conditions.
An example could be like this:
Now we'll define the condition statements for the "Error Message: Current Data" Node
-
Defining the path for the "YES" on decision answer.
- Select the according node. On the right hand menu find Transition.
- In the first textbox write the Name: YES
- In the second one: ${.REQUEST.startDate >= (now|todate[0:10])} (If the syntax is correct, the textbox change from red to green.)
- This will take the date entered by the user (startDate) and check if it is later than the current day, with (now|todate[0:10]) that truncates the ISO 8601 date format to YYYY-MM-DD. If it is TRUE will move to the next step.
-
Defining the path for the "NO" on decision answer answer.
- Select the according node. On the right hand menu find Transition.
- Remember, the NO option must be the "Default Transition"
- In the first textbox write the Name: NO
- In the second one: ${.REQUEST.startDate < (now|todate[0:10])} (If the syntax is correct, the textbox change from red to green and notice the change in the condition evaluator sign.)
- This will take the date entered by the user (startDate) and check if it is earlier than the current day, with (now|todate[0:10]) that truncates the ISO 8601 date format to YYYY-MM-DD. If it is TRUE will notify the user by the "Error Message: Current Day" and will return to the previous form to correct the issue.
Define condition statements for the "Error Message: End > Start" Node
-
Defining the path for the "YES" on decision answer.
- Select the according node. On the right hand menu find Transition.
- In the first textbox write the Name: YES
- In the second one: ${.REQUEST.startDate < .REQUEST.endDate} (If the syntax is correct, the textbox change from red to green.)
- This will take the dates entered by the user and check if the startDate is earlier than the endDate. If it is TRUE will move to the next step.
-
Defining the path for the "NO" on decision answer answer.
- Select the according node. On the right hand menu find Transition.
- Remember, the NO option must be the "Default Transition"
- In the first textbox write the Name: NO
- In the second one: ${.REQUEST.startDate > .REQUEST.endDate} (If the syntax is correct, the textbox change from red to green and notice the change in the condition evaluator sign.)
- This will take the dates entered by the user and check if the startDate is later than the endDate. If it is TRUE will notify the user by the "Error Message: End > Start" and will return to the previous form to correct the issue.
Check if the workflow has no errors, and save it.
Save and publish the process.
Testing Scenario 2
We can test this second scenario, by initiating the process, completing the form, and forcing the error notifications introducing wrong dates, proceed and the notification should appear.
Here you can watch all steps of this second section:
Summary
In this tutorial, we have covered the basics of creating a serverless workflow in KuFlow with our Diagram Tool. We have defined a new process definition and we have built a workflow that contemplates the following business rules involving human tasks:
- Request form to complete.
- Inform a decision maker to choose one option.
- Notify the requester of the response.
Then we improve the workflow by adding some dates validation:
- The Start Date must be later than the date the form is completed.
- The End Date must not be earlier than the Start Date.
We have created a special video list with the entire process:
We sincerely hope that this step-by-step guide will help you to understand better how KuFlow can help your business to have better and more solid business processes.
