Expense Reimbursement - Temporal
Introduction
Expense approval is a common business process that ensures employees are reimbursed for work-related costs while maintaining financial control and compliance with company policies. In this article, we will walk through the implementation of an automated expense approval workflow using KuFlow and Python. This workflow will leverage KuFlow's capabilities to manage process automation, handle user tasks, and integrate with external systems. We will design a solution where employees submit their expenses, triggering an automated approval process based on predefined business rules. Expenses below a certain threshold are approved automatically, while higher-value expenses require manual review. The goal is to streamline the approval process, reduce manual intervention, and ensure accurate expense tracking within the organization.
Business Case Overview
The workflow we will implement follows these key steps:
- Expense Submission: Employees submit expense claims, including essential details such as:
- Date of the expense
- Total amount
- Supporting documents (e.g., receipts, invoices)
- Automatic vs. Manual Approval:
- If the expense amount is ≤ 1000 €, it is automatically approved.
- If the expense amount is > 1000 €, it requires manual review by an approver.
- Review Process
- The assigned approver can accept the expense, reject it, or request corrections.
- If corrections are needed, the request is sent back to the employee for adjustments.
- If rejected, the process ends.
- Expense Registration:
- Approved expenses are registered in the company’s financial system.
- This step is left open-ended in our example and could involve integration with an ERP, intranet, or another backend system, using APIs or an RPA (bot) solution.
Implementation Approach
KuFlow allows multiple implementation strategies for workflows:
- Diagram-based workflows
- Worker-based implementations in various languages
For this example, we will implement the workflow using a worker-based approach in Python. This method provides flexibility and allows developers to build custom logic while leveraging KuFlow’s process automation capabilities.
In the following sections, we will dive into the implementation details, covering how to set up the workflow, define tasks, and handle expense approvals efficiently.
Step-by-step implementation
Step 1: Definition of the Application
The first step of this tutorial consists of defining the Application, which is the piece that contains the information necessary to establish a communication link between our worker (our agent) and the KuFlow engine.
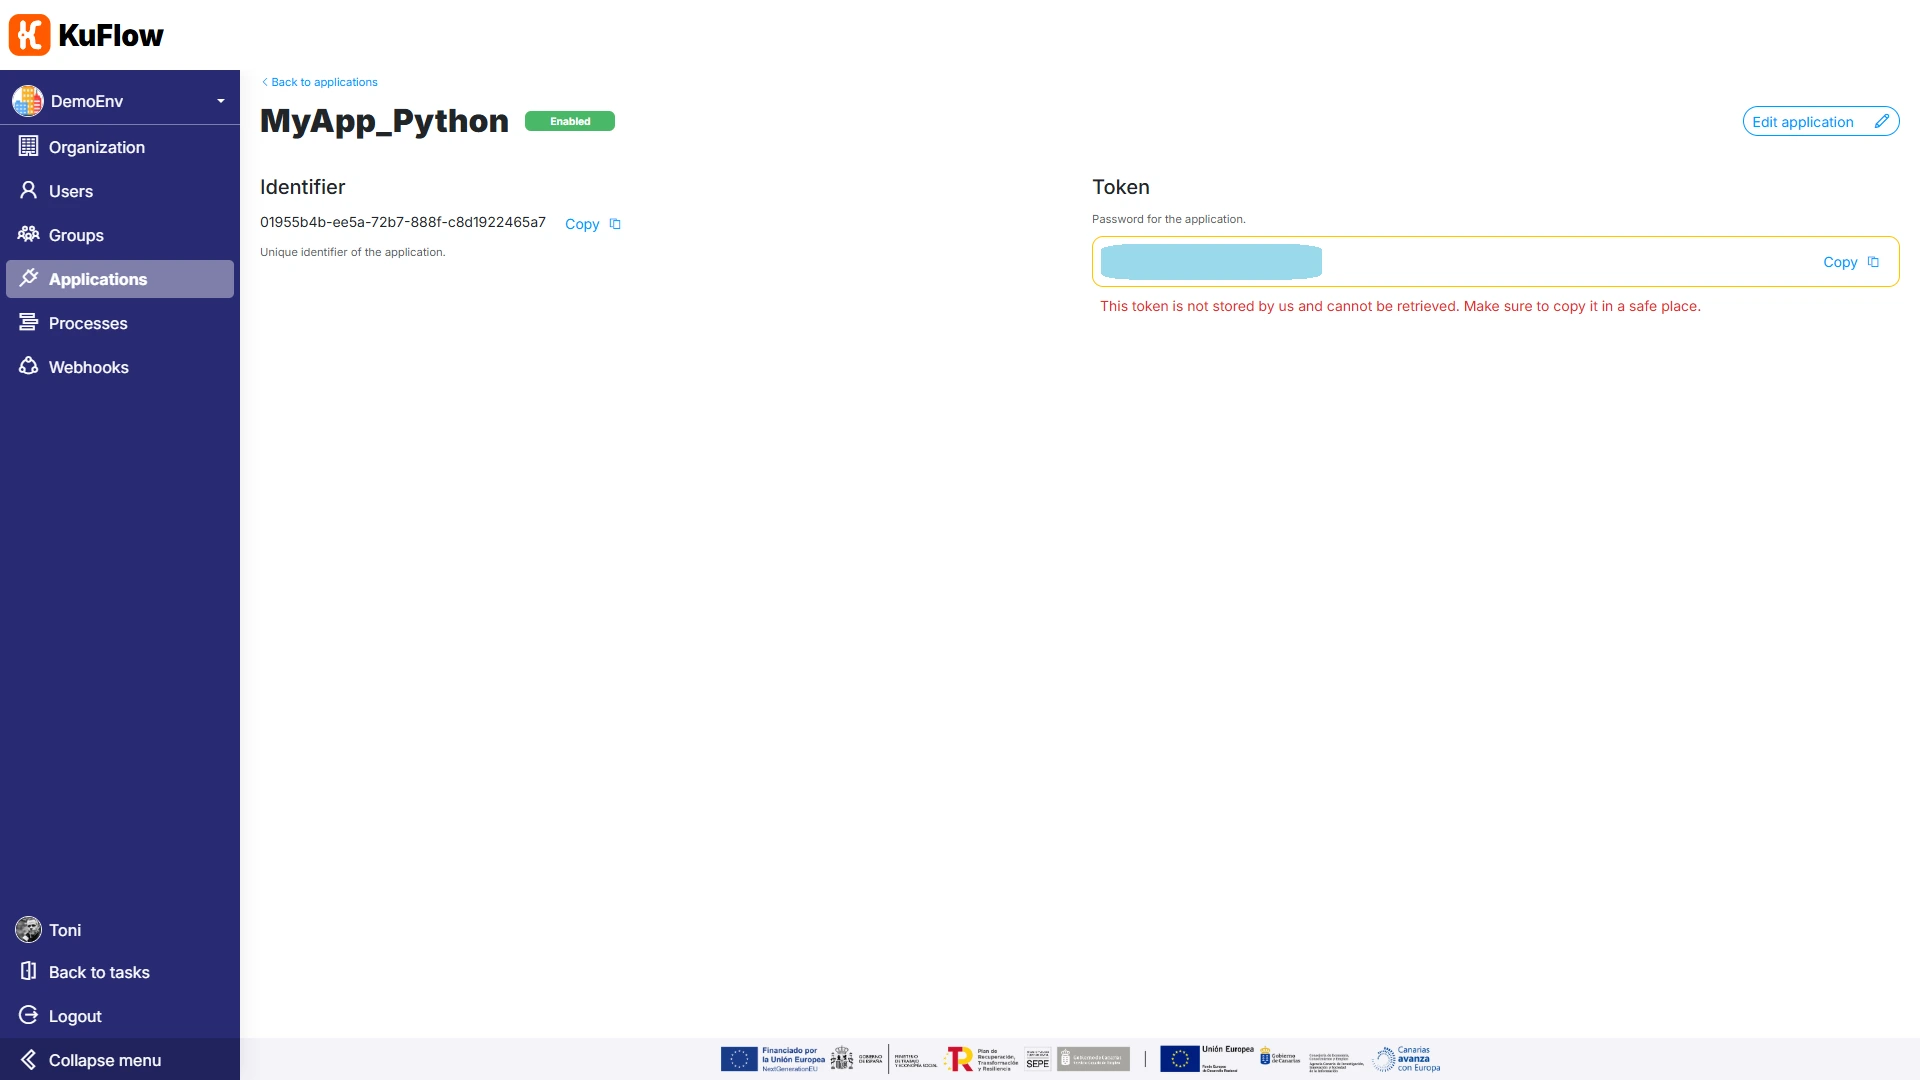
To create an application we must go to the "Applications" menu in the administrative section of the web. Click on "Add Application", set a name that will help us to identify the application and save. Automatically when saving, the system provides us with credentials for the application composed of an Identifier and a Token. It is important that you store this token securely since it is not stored in KuFlow's platform.
Step 2: Process Definition
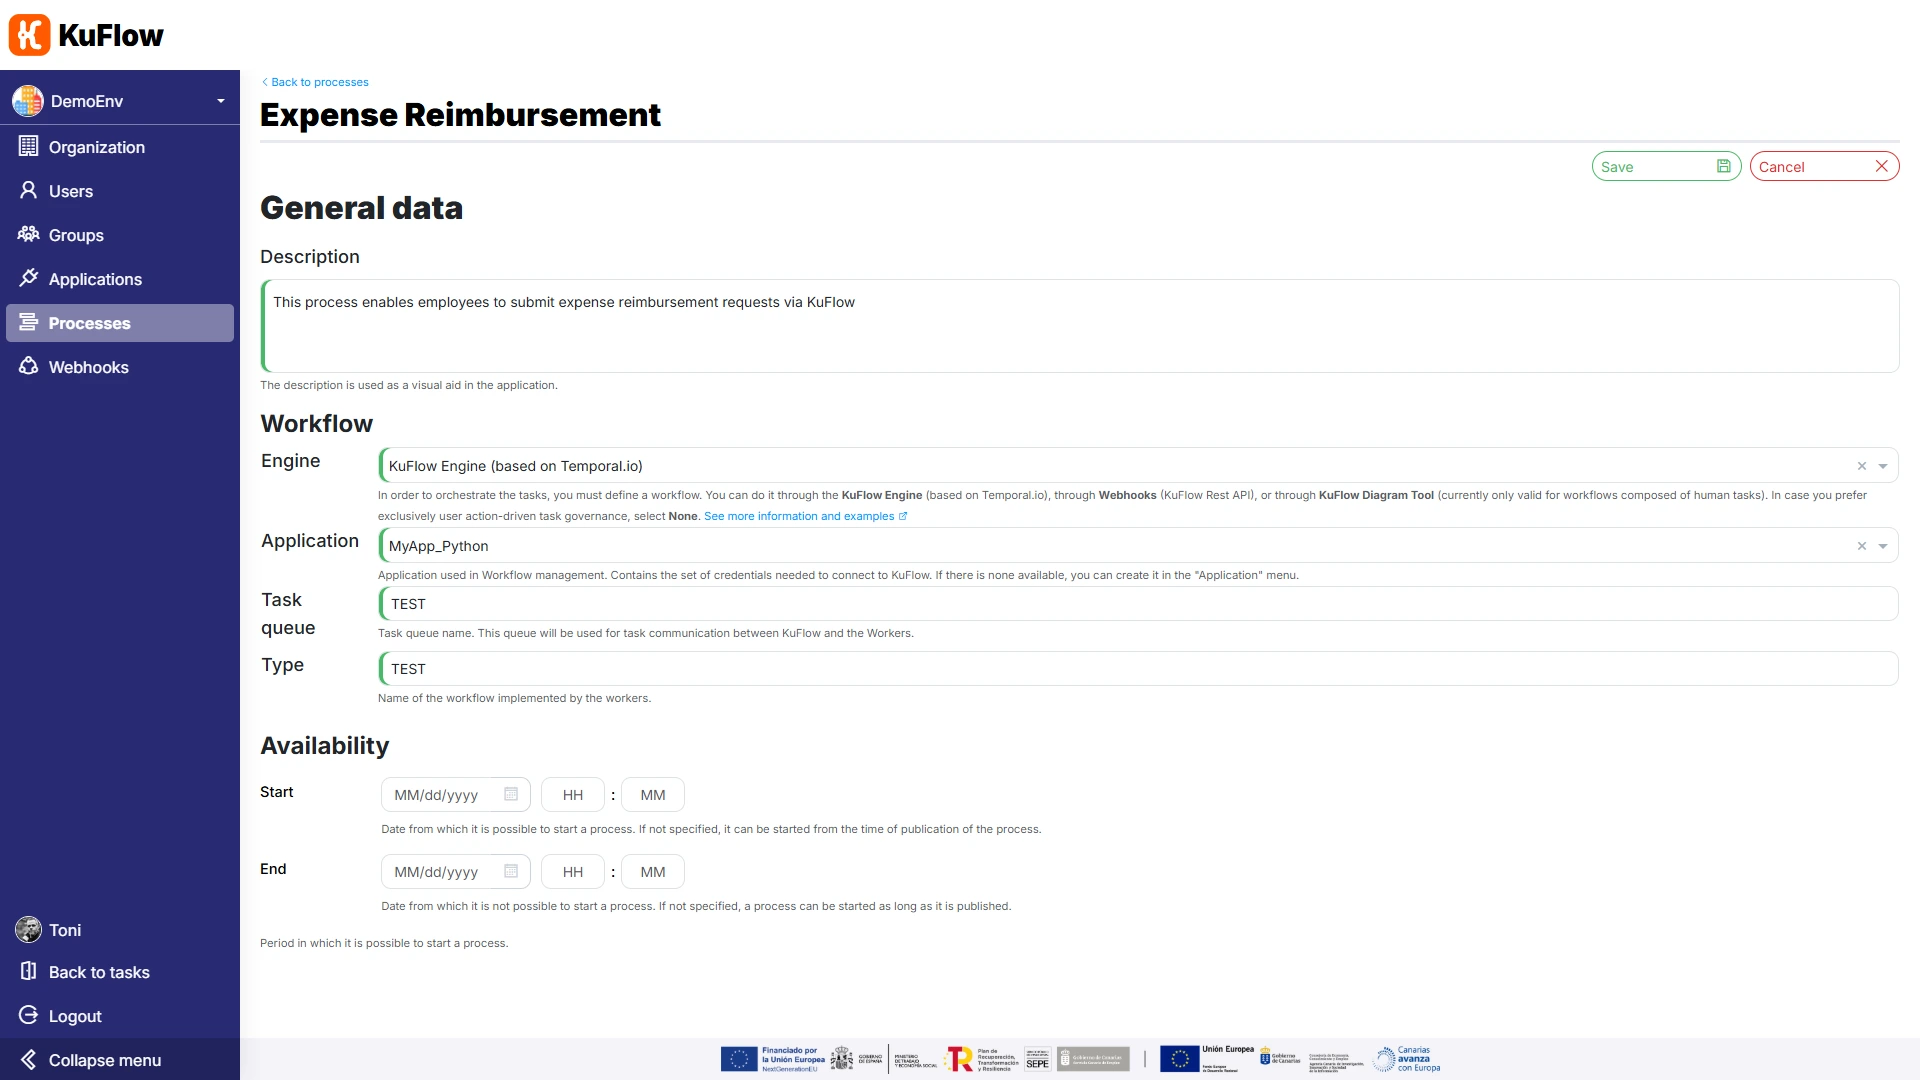
The next step is to create a process definition. We must go to the "Processes" menu in the administrative section of the web, and click on "Add new".
We specify the name of the process "Expense reiumbersement" and a brief description.
In the Workflow type, we choose "KuFlow Engine (based on Temporal.io)", and we specify the following data:
- Application: MyApp_Python
- Task Queue: TEST
- Type: TEST
Task Queue and Type allow a great level of flexibility to implement different Workers that respond to this process, or have several instances of the same Worker working with a queue, or implement a single Worker that responds to different types of workflows simultaneously. For this example, we do not need that level of complexity, so we simply put "TEST".
Step 3: Defining the Process
In this step we will proceed to define the key elements of this Process Definition: the data structures and the tasks.
Want to skip this step and have a faster implementation of the tutorial? You can download a process definition here. After importing it, you only need to adjust the permissions for the users and the worker.
Task 1: Expense Reimbursement Claim
On the Process Definition page, click on “Edit process”, go to the Data Structures section and choose “Add data structure”
We create the following data structure:
- Name: Form - Submit Expense Claim
- Code: SD_FILL_INFO
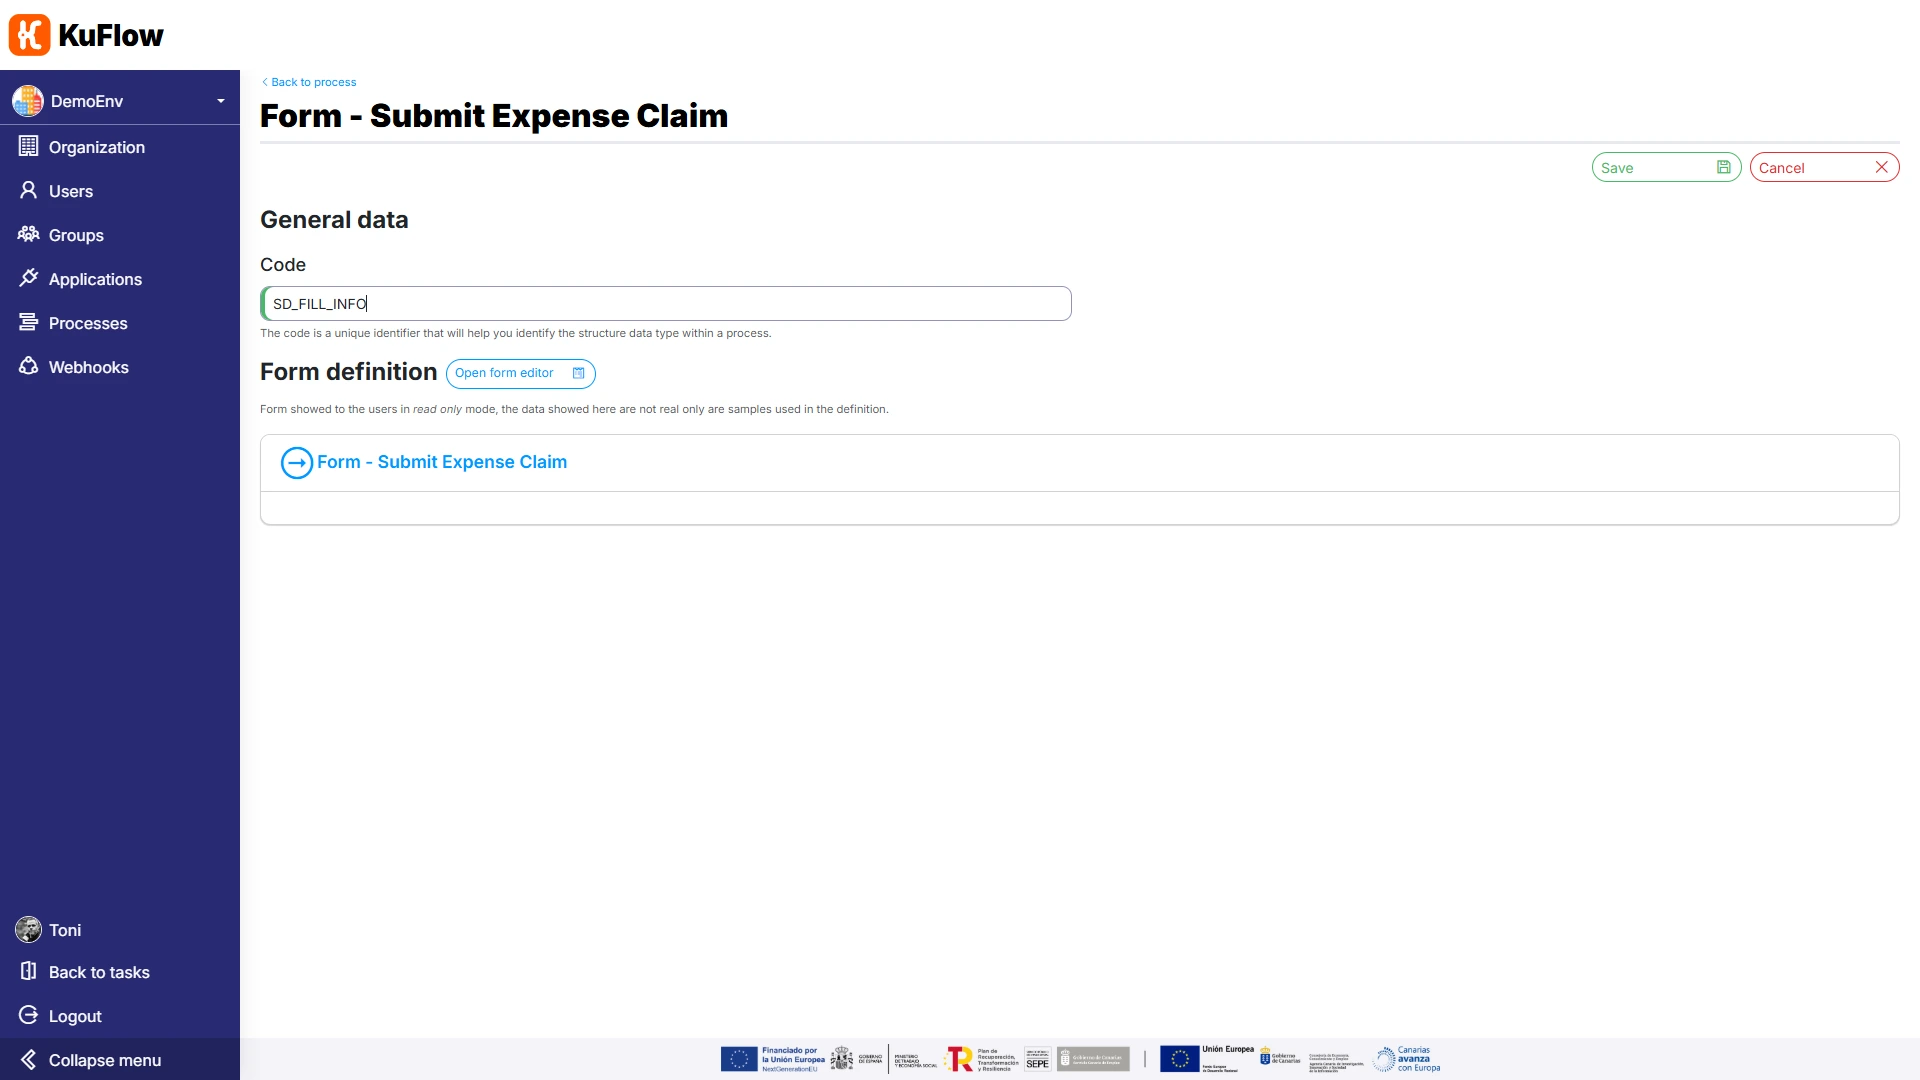
We click on “Open form editor” and specify the following form parameters:
-
Schema:
{
  "title" : "Form",
  "type" : "object",
  "additionalProperties" : false,
  "required" : [ "DATE", "AMOUNT" ],
  "properties" : {
    "DOCUMENT" : {
      "title" : "Document",
      "type" : "string",
      "format" : "kuflow-file",
      "accept" : "image/*,application/pdf",
      "maxSize" : "20MB"
    },
    "DATE" : {
      "title" : "Date",
      "type" : "string",
      "format" : "date"
    },
    "AMOUNT" : {
      "title" : "Amount",
      "type" : "number"
    }
  }
} -
UI Schema:
{
  "type": "VerticalLayout",
  "elements": [
    {
      "type": "Control",
      "scope": "#/properties/DATE",
      "options": {
        "dateFormat": "dd/MM/yyyy"
      }
    },
    {
      "type": "Control",
      "scope": "#/properties/AMOUNT"
    },
    {
      "type": "Control",
      "scope": "#/properties/DOCUMENT"
    }
  ]
}
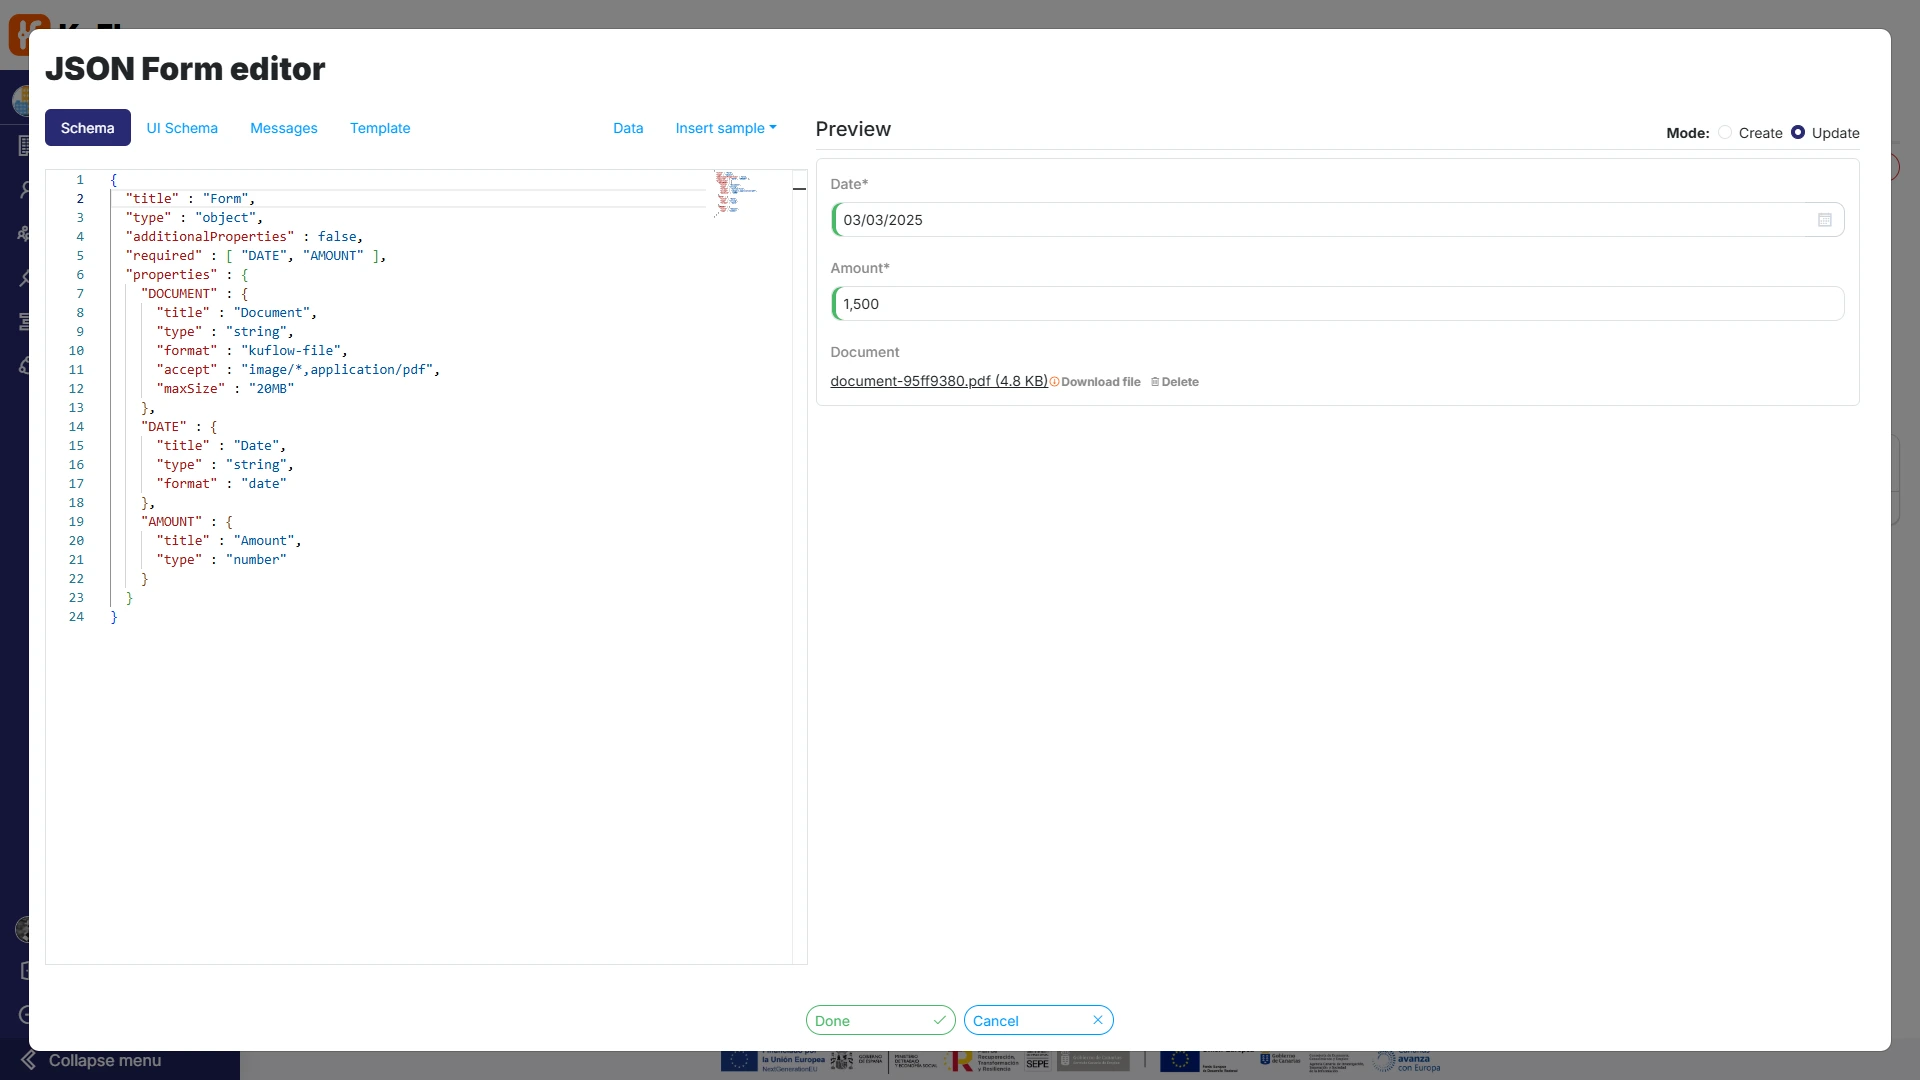
By choosing example values, we get the system to display them on the screen later, making review and debugging tasks easier.
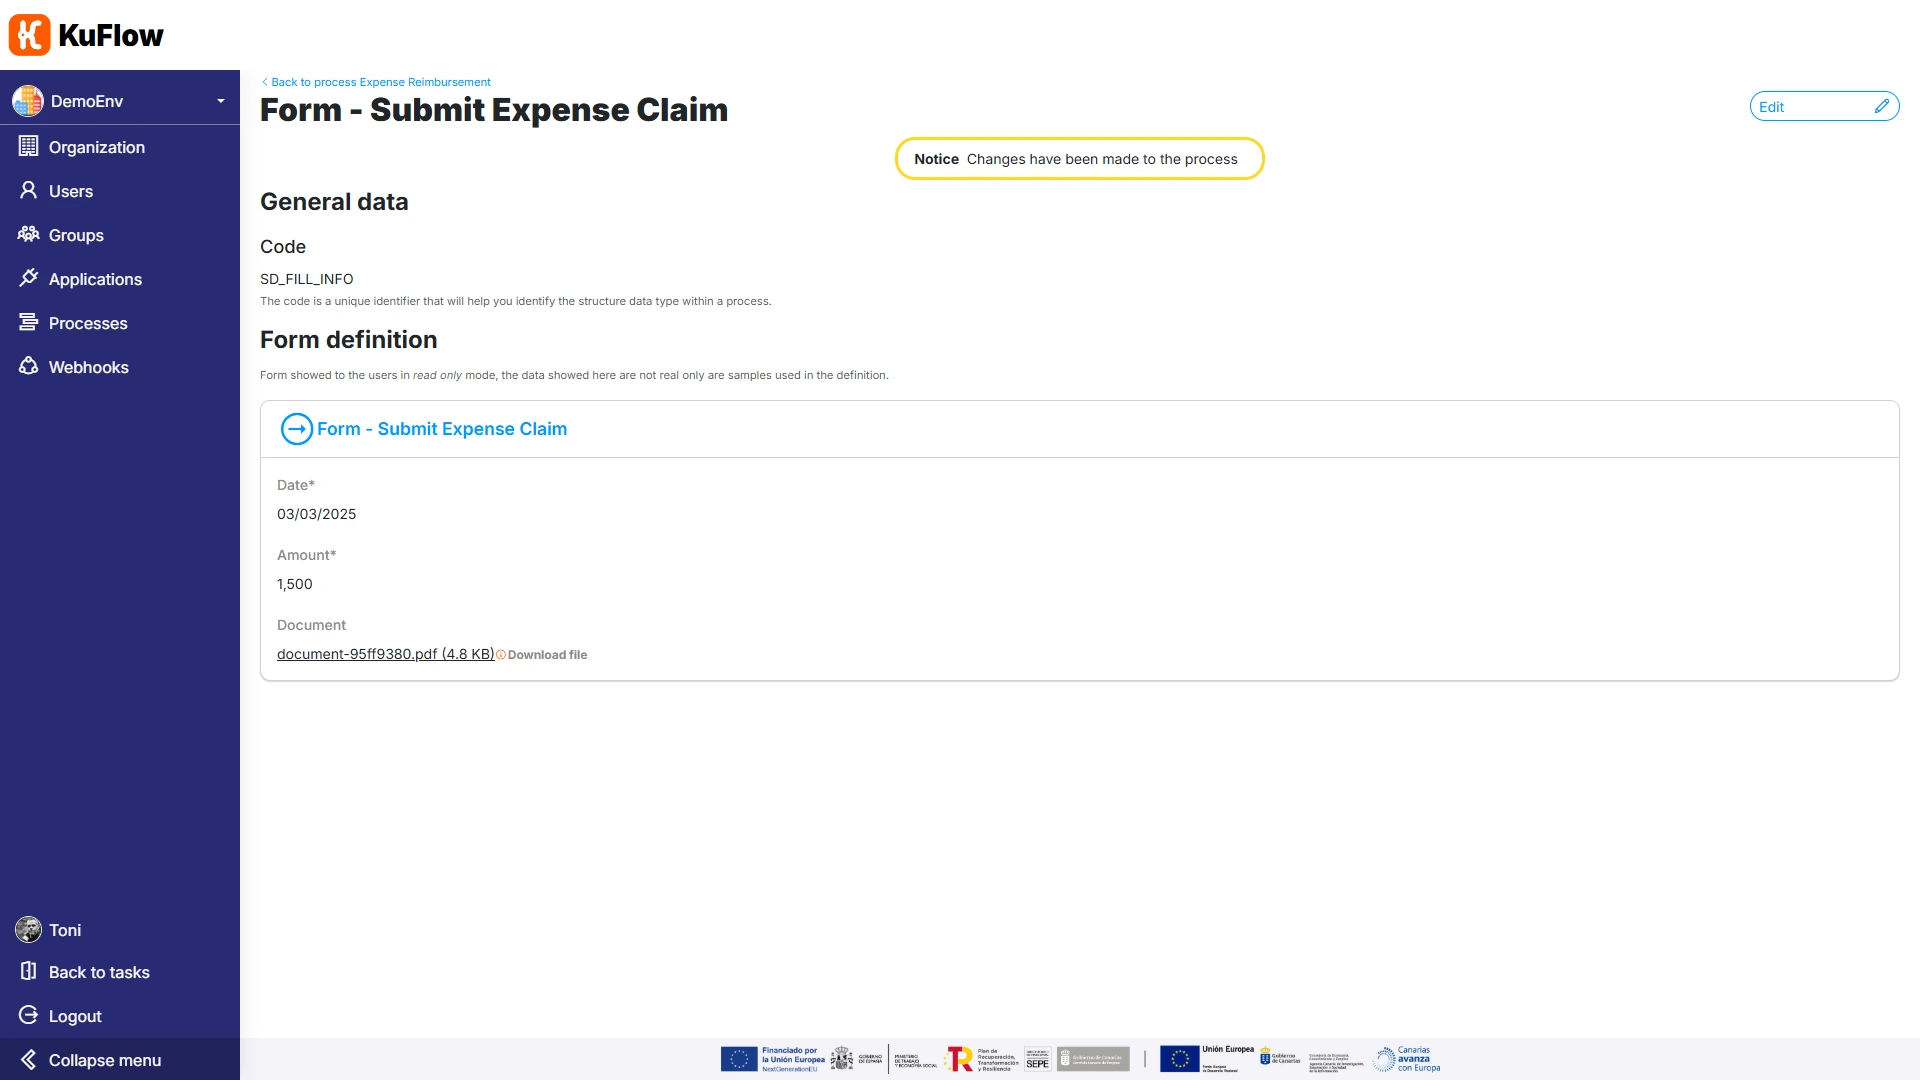
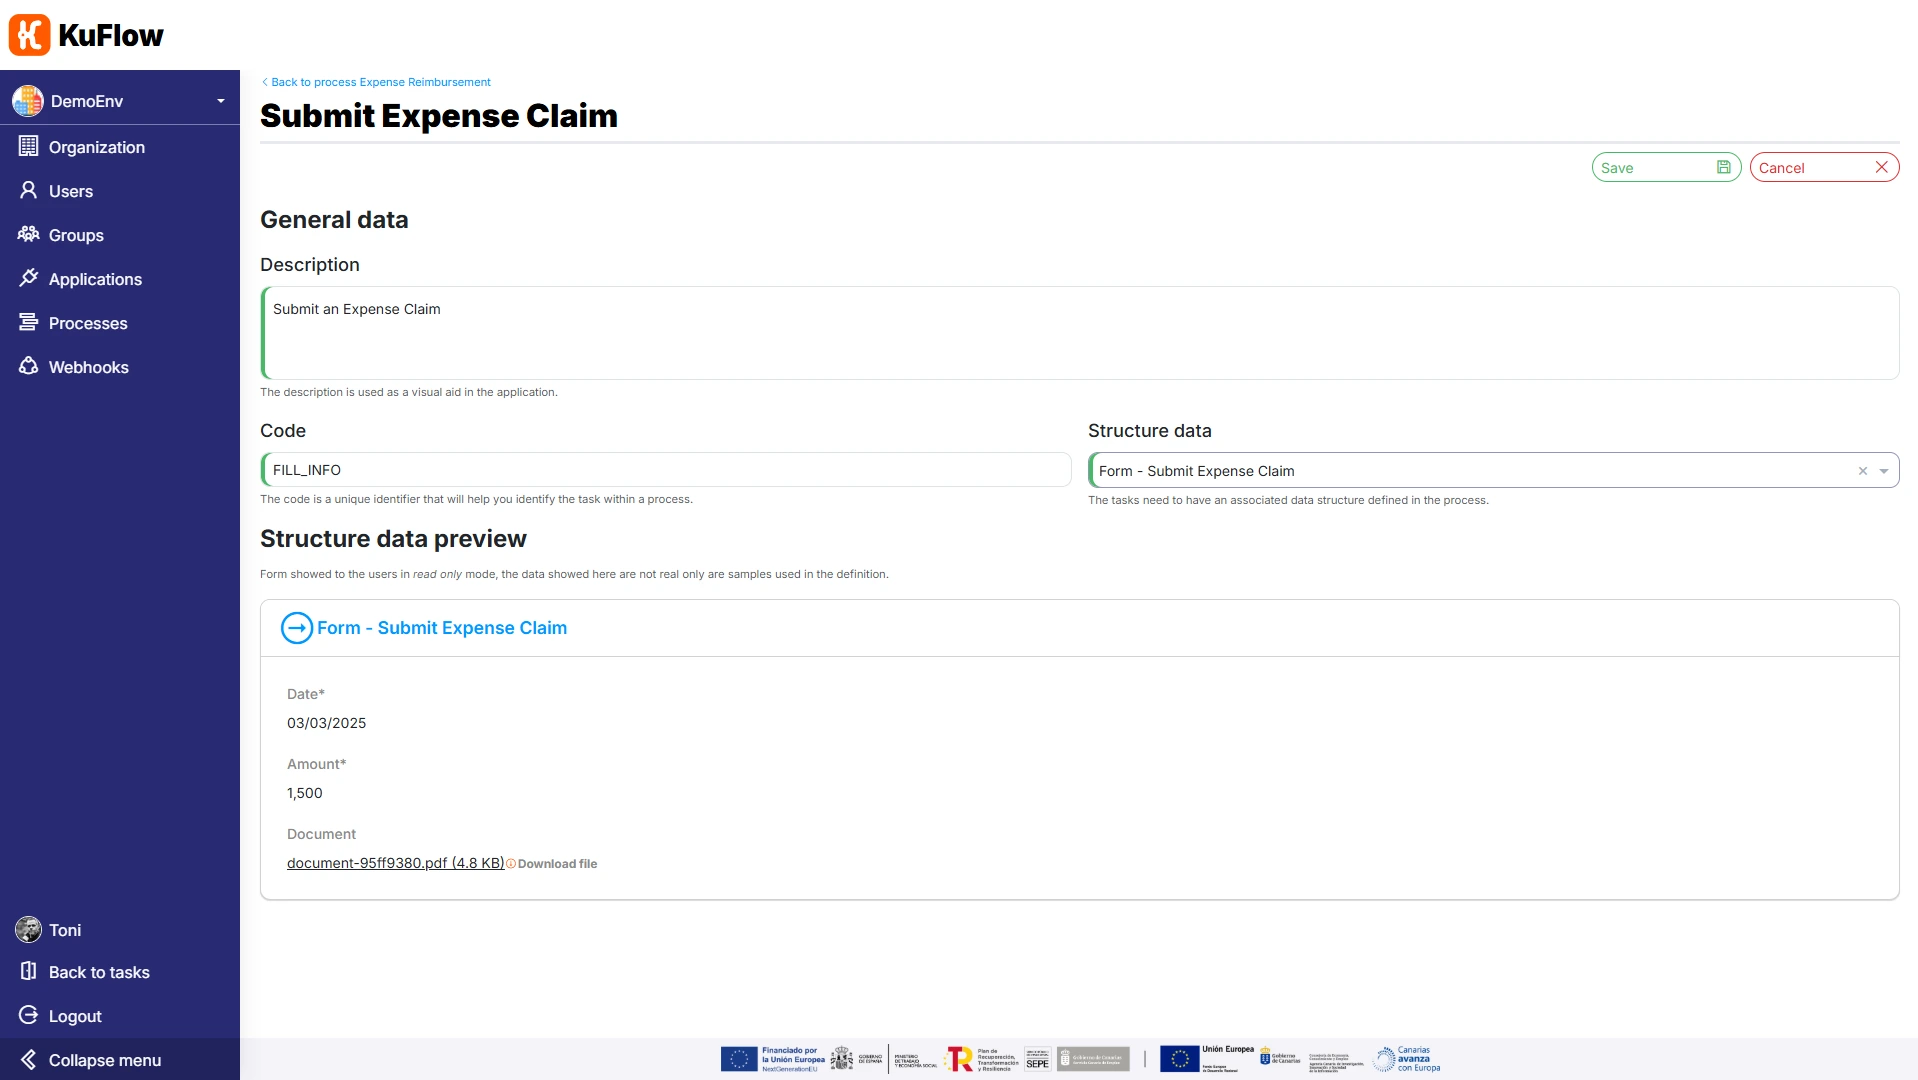
Once we have created the data structure, we are going to create the task itself. On the Process Definition page, we click on “Edit process”, go to the Tasks section and choose “Add task”
We define a task with the following information:
- Name: Submit Expense Claim
- Description: Submit an Expense Claim
- Code: FILL_INFO
- Data Structure: Form - Submit Expense Claim
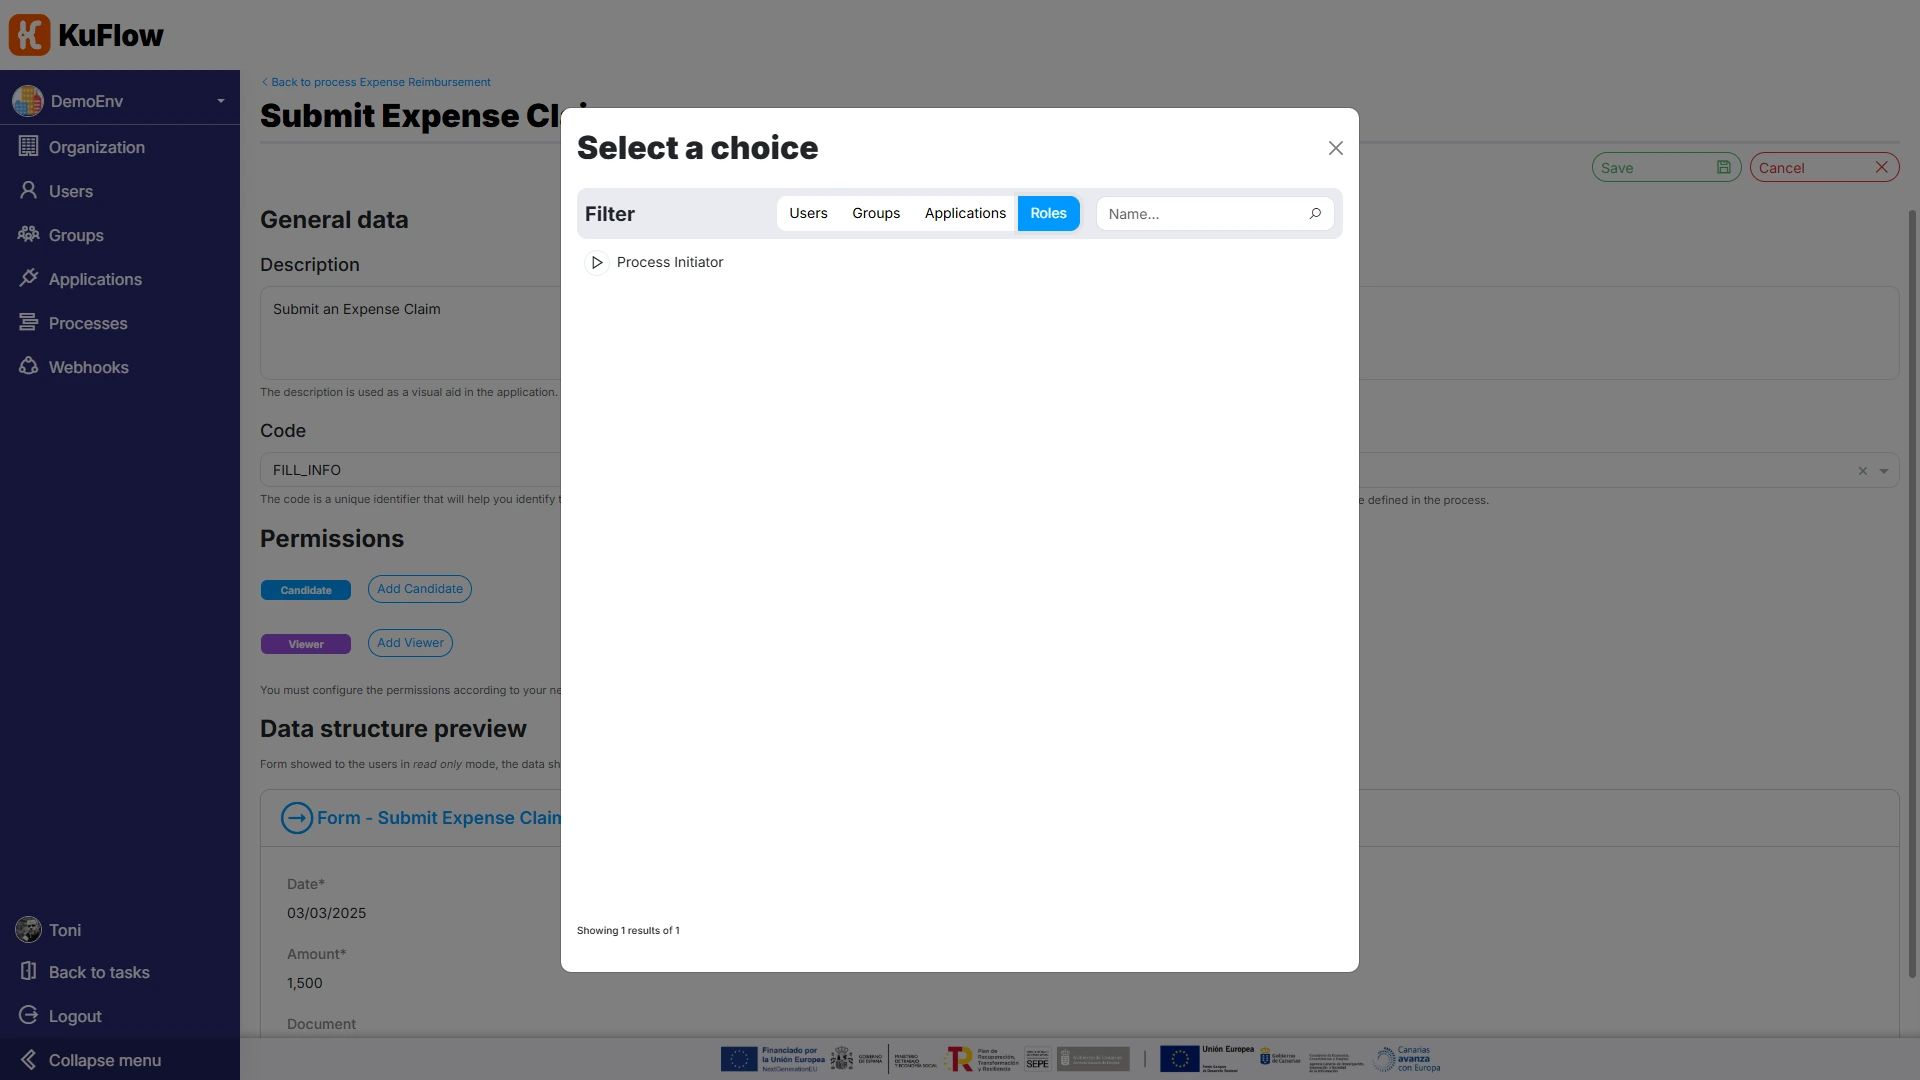
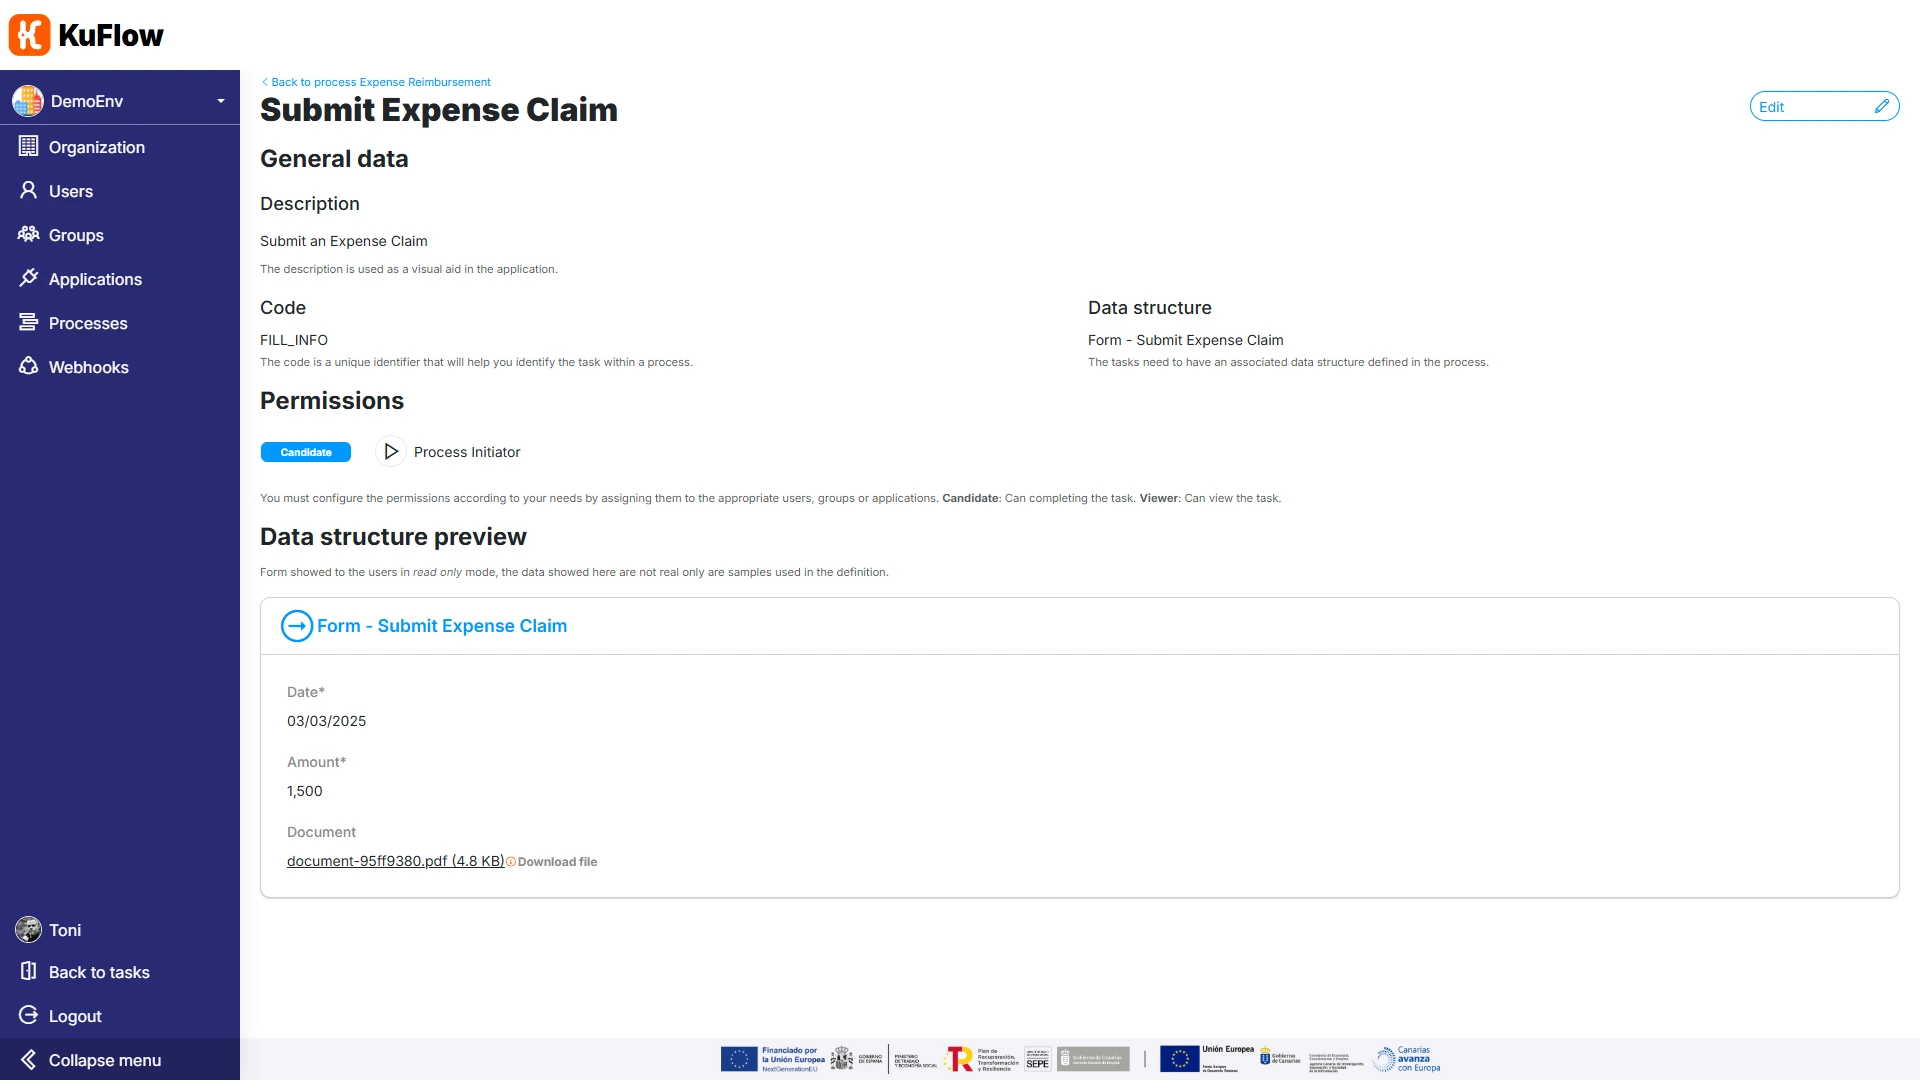
We also define the following permissions:
- Candidate: Process Initiator
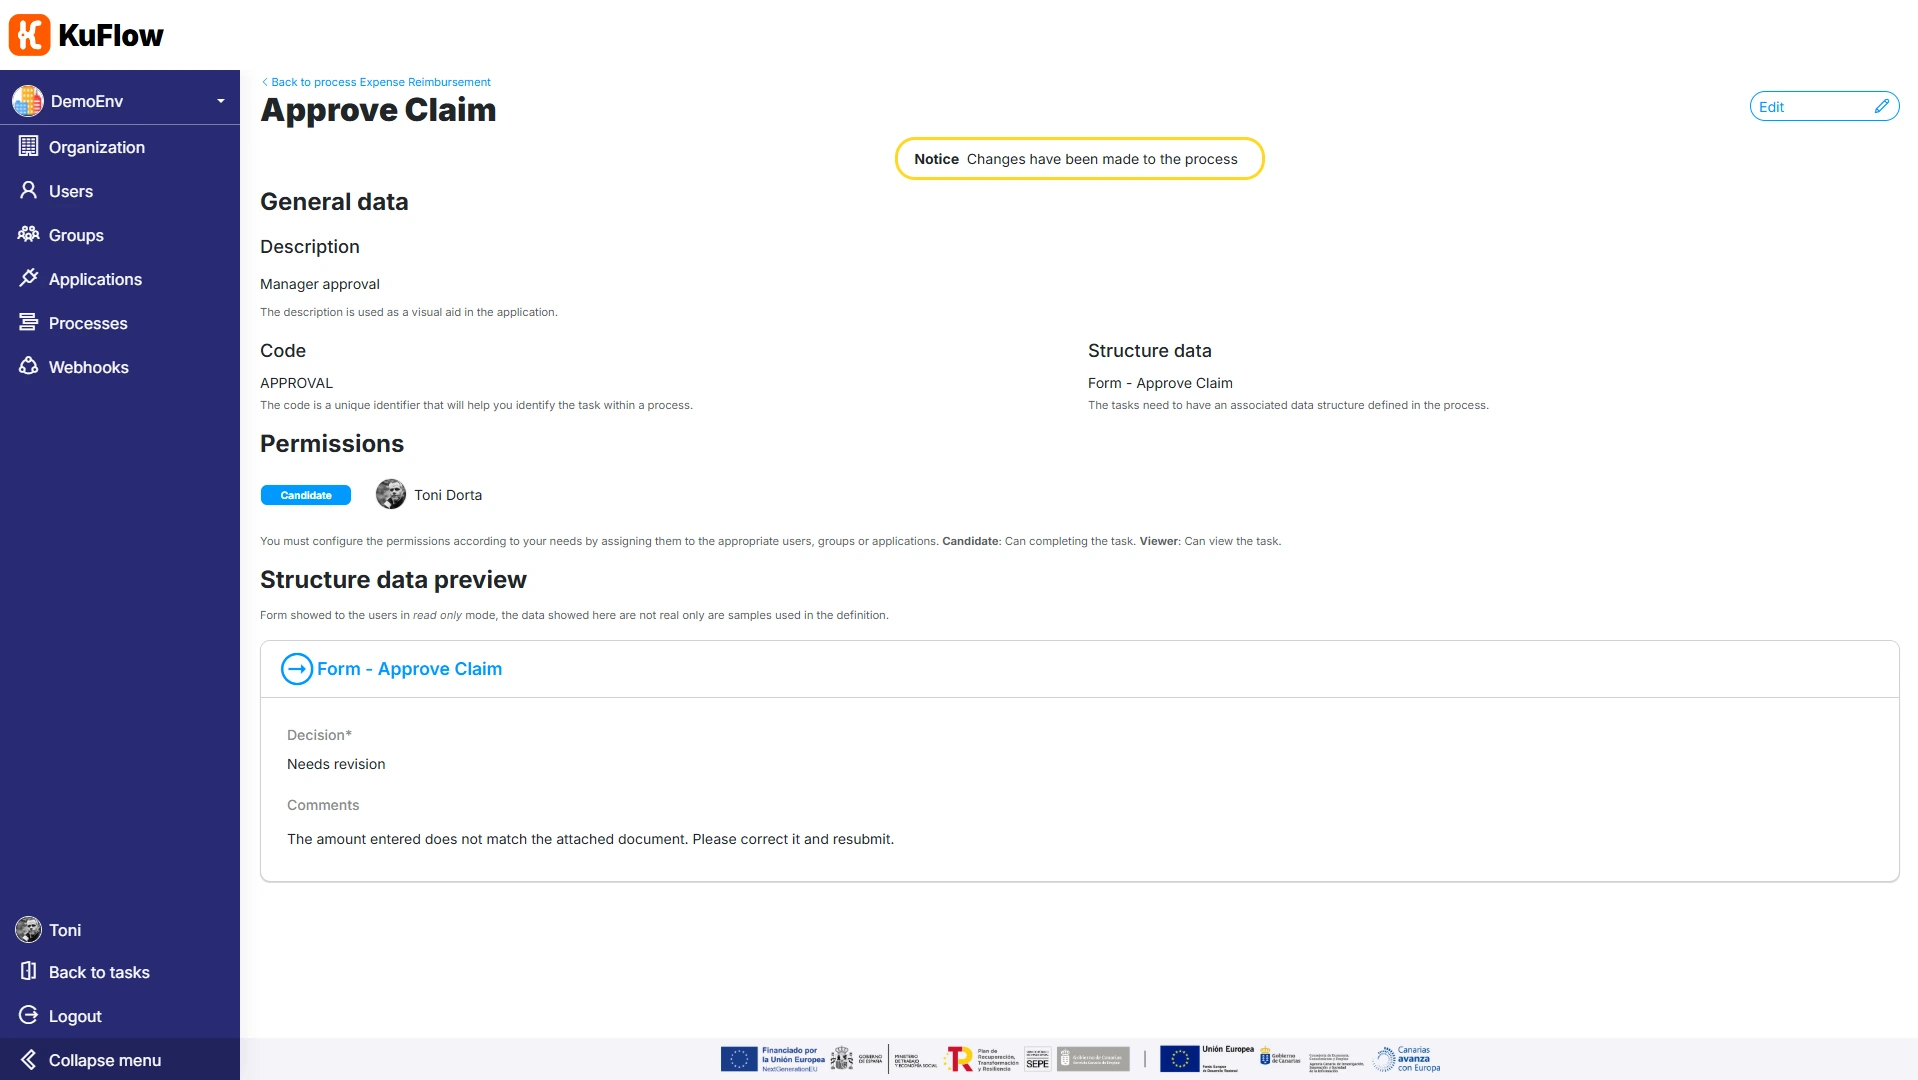
Task 2: Claim Approval
On the Process Definition page, click on “Edit process”, go to the Data Structures section and choose “Add data structure”
Create the following data structure:
- Name: Form - Approve Claim
- Code: SD_APPROVAL
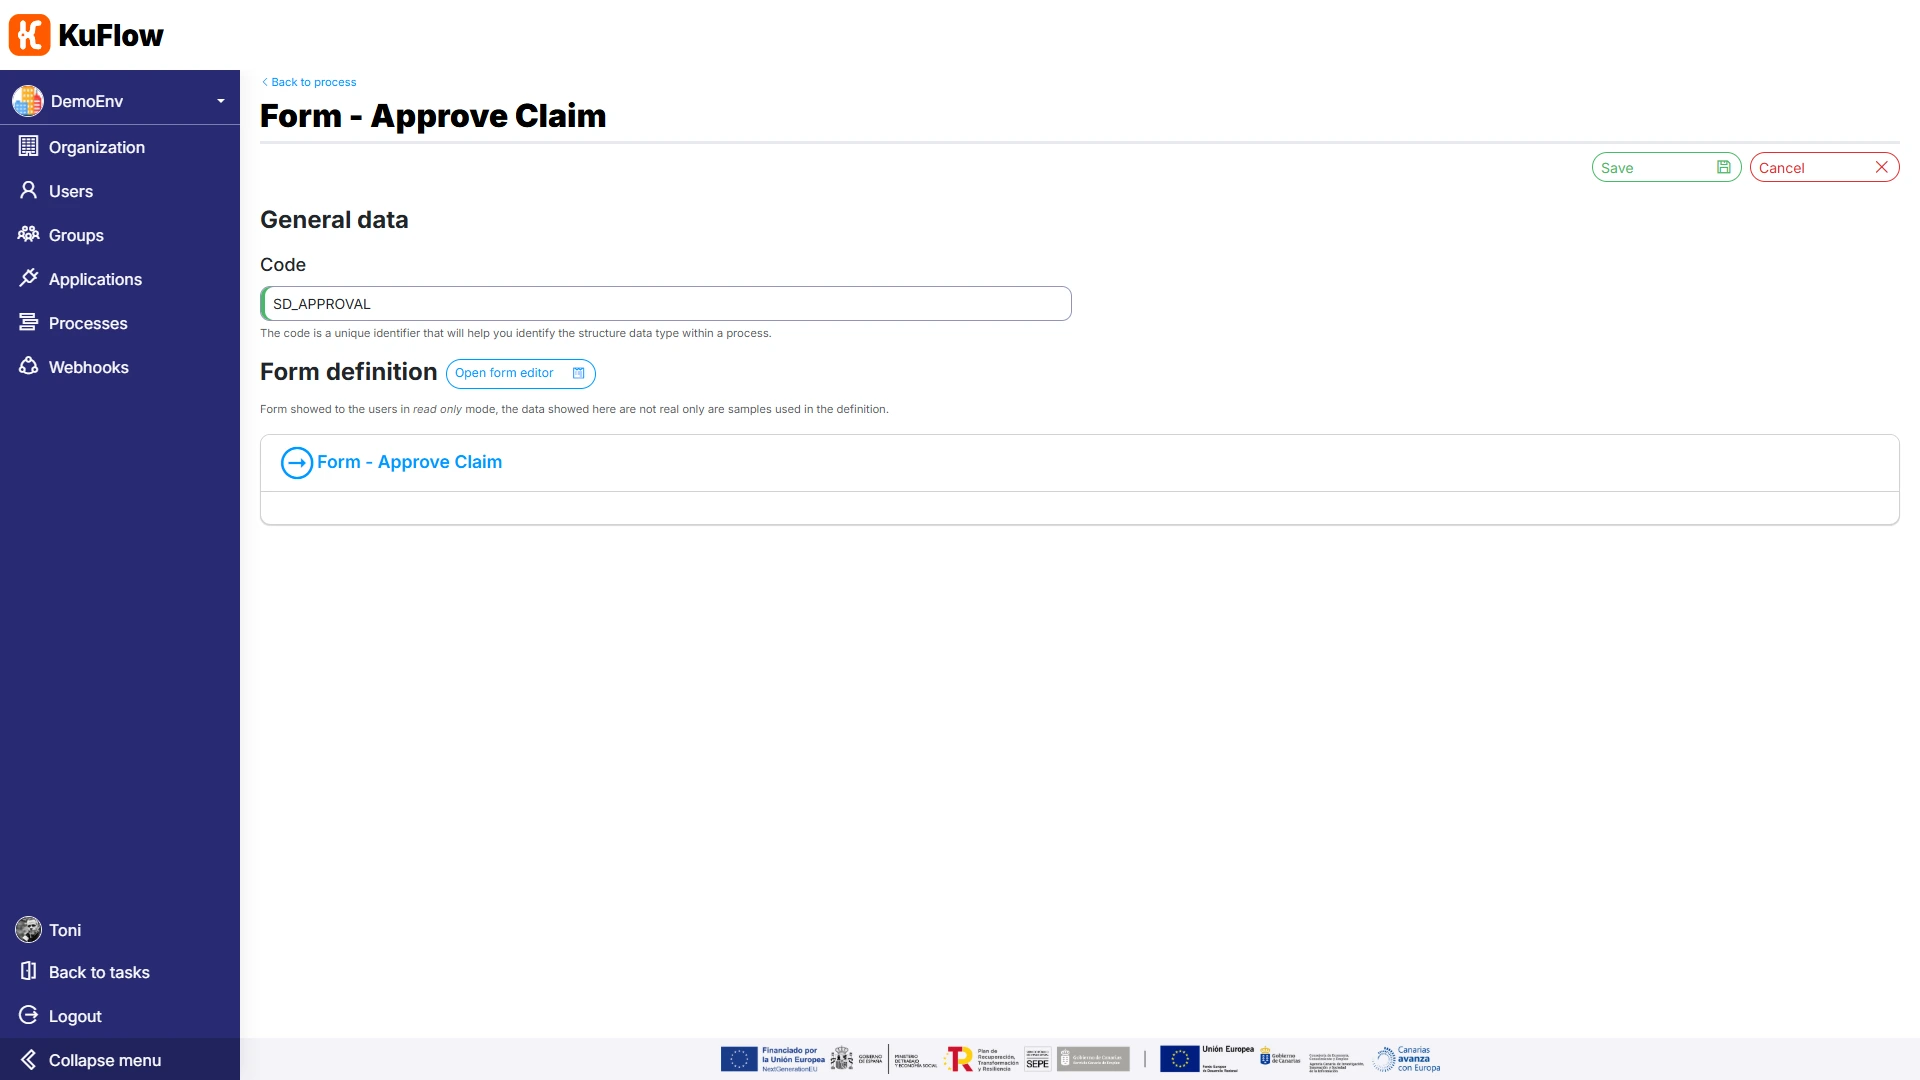
Click on “Open form editor” and specify the following form parameterization:
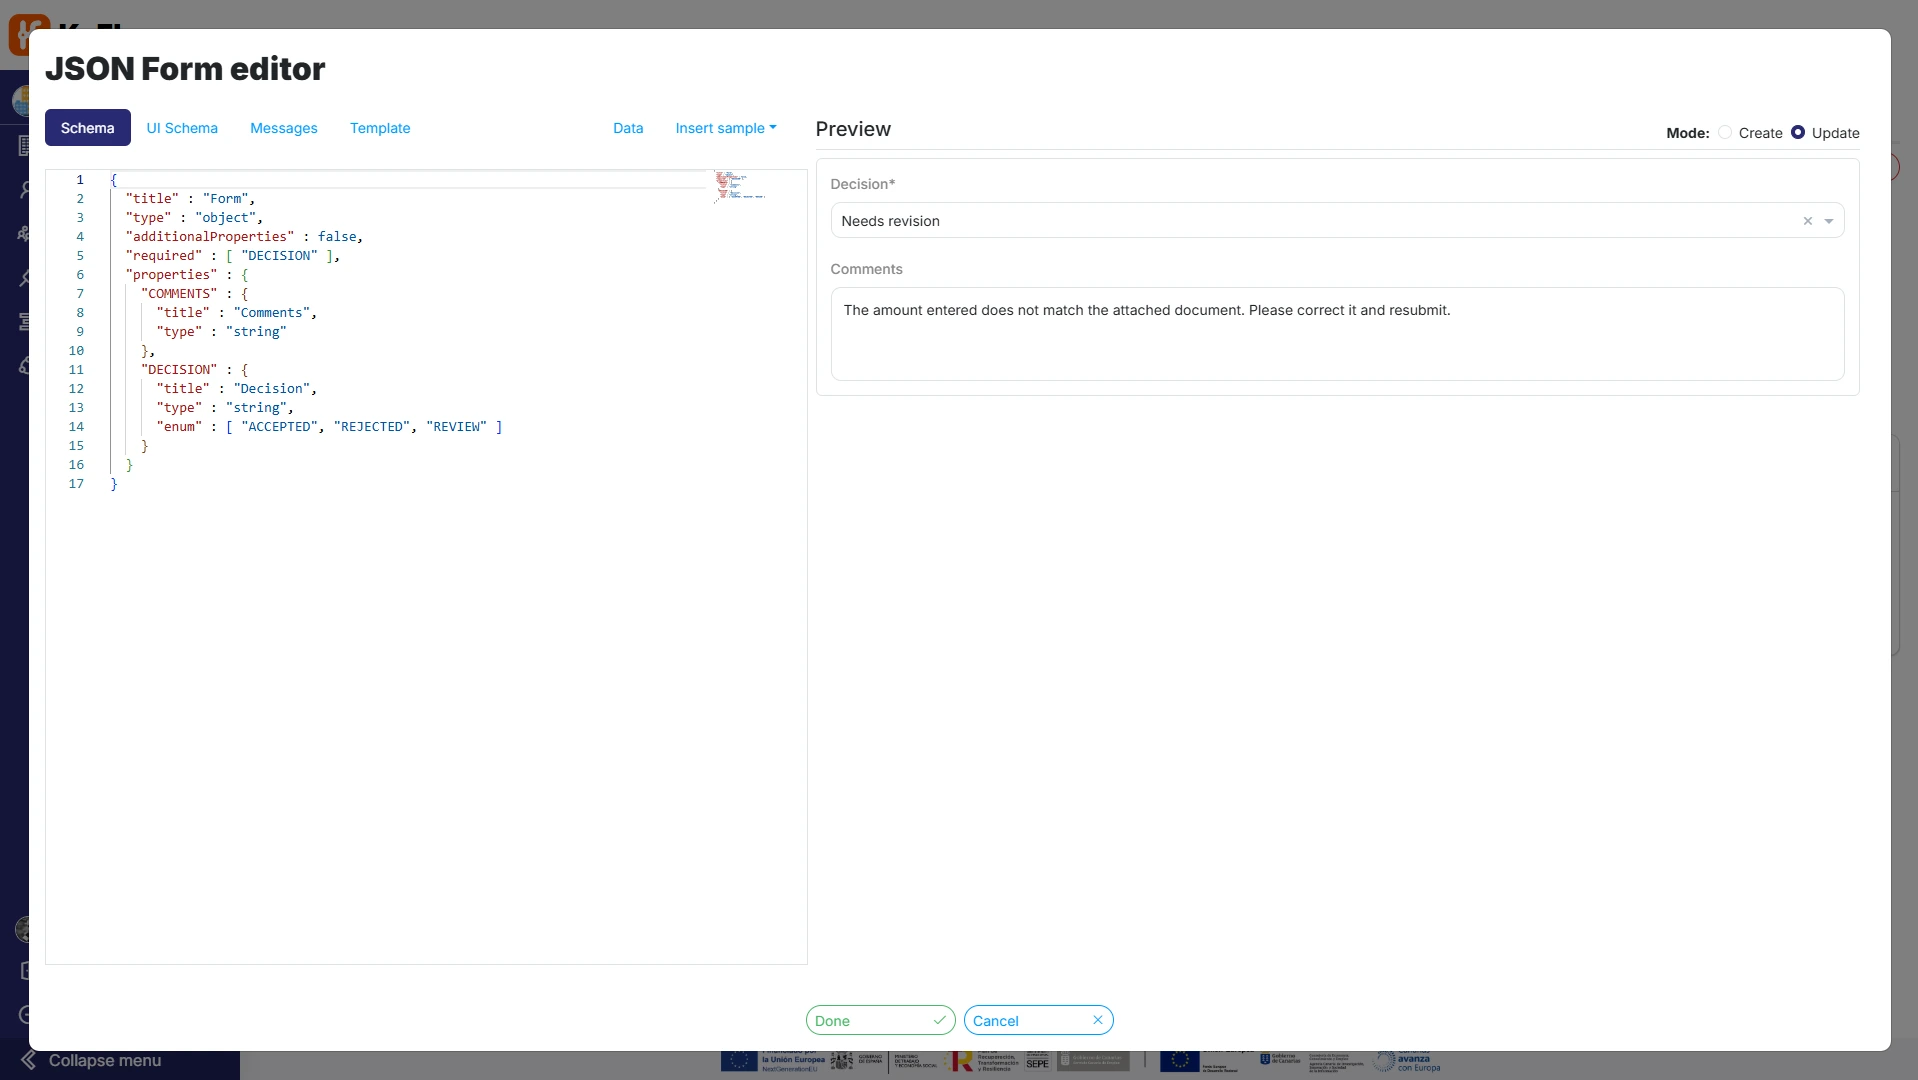
- Schema:
{
  "title" : "Form",
  "type" : "object",
  "additionalProperties" : false,
  "required" : [ "DECISION" ],
  "properties" : {
    "COMMENTS" : {
      "title" : "Comments",
      "type" : "string"
    },
    "DECISION" : {
      "title" : "Decision",
      "type" : "string",
      "enum" : [ "ACCEPTED", "REJECTED", "REVIEW" ]
    }
  }
} - UI Schema:
{
  "type" : "VerticalLayout",
  "elements" : [ {
    "type" : "Control",
    "scope" : "#/properties/DECISION"
  }, {
    "type" : "Control",
    "scope" : "#/properties/COMMENTS",
    "options" : {
      "multi" : true
    }
  } ]
} - Messages:
{
  "DECISION.ACCEPTED" : "Accepted",
  "DECISION.REJECTED" : "Rejected",
  "DECISION.REVIEW" : " Needs revision"
}
Please remember that by choosing example values, we get the system to display them later on the screen, making review and debugging easier.
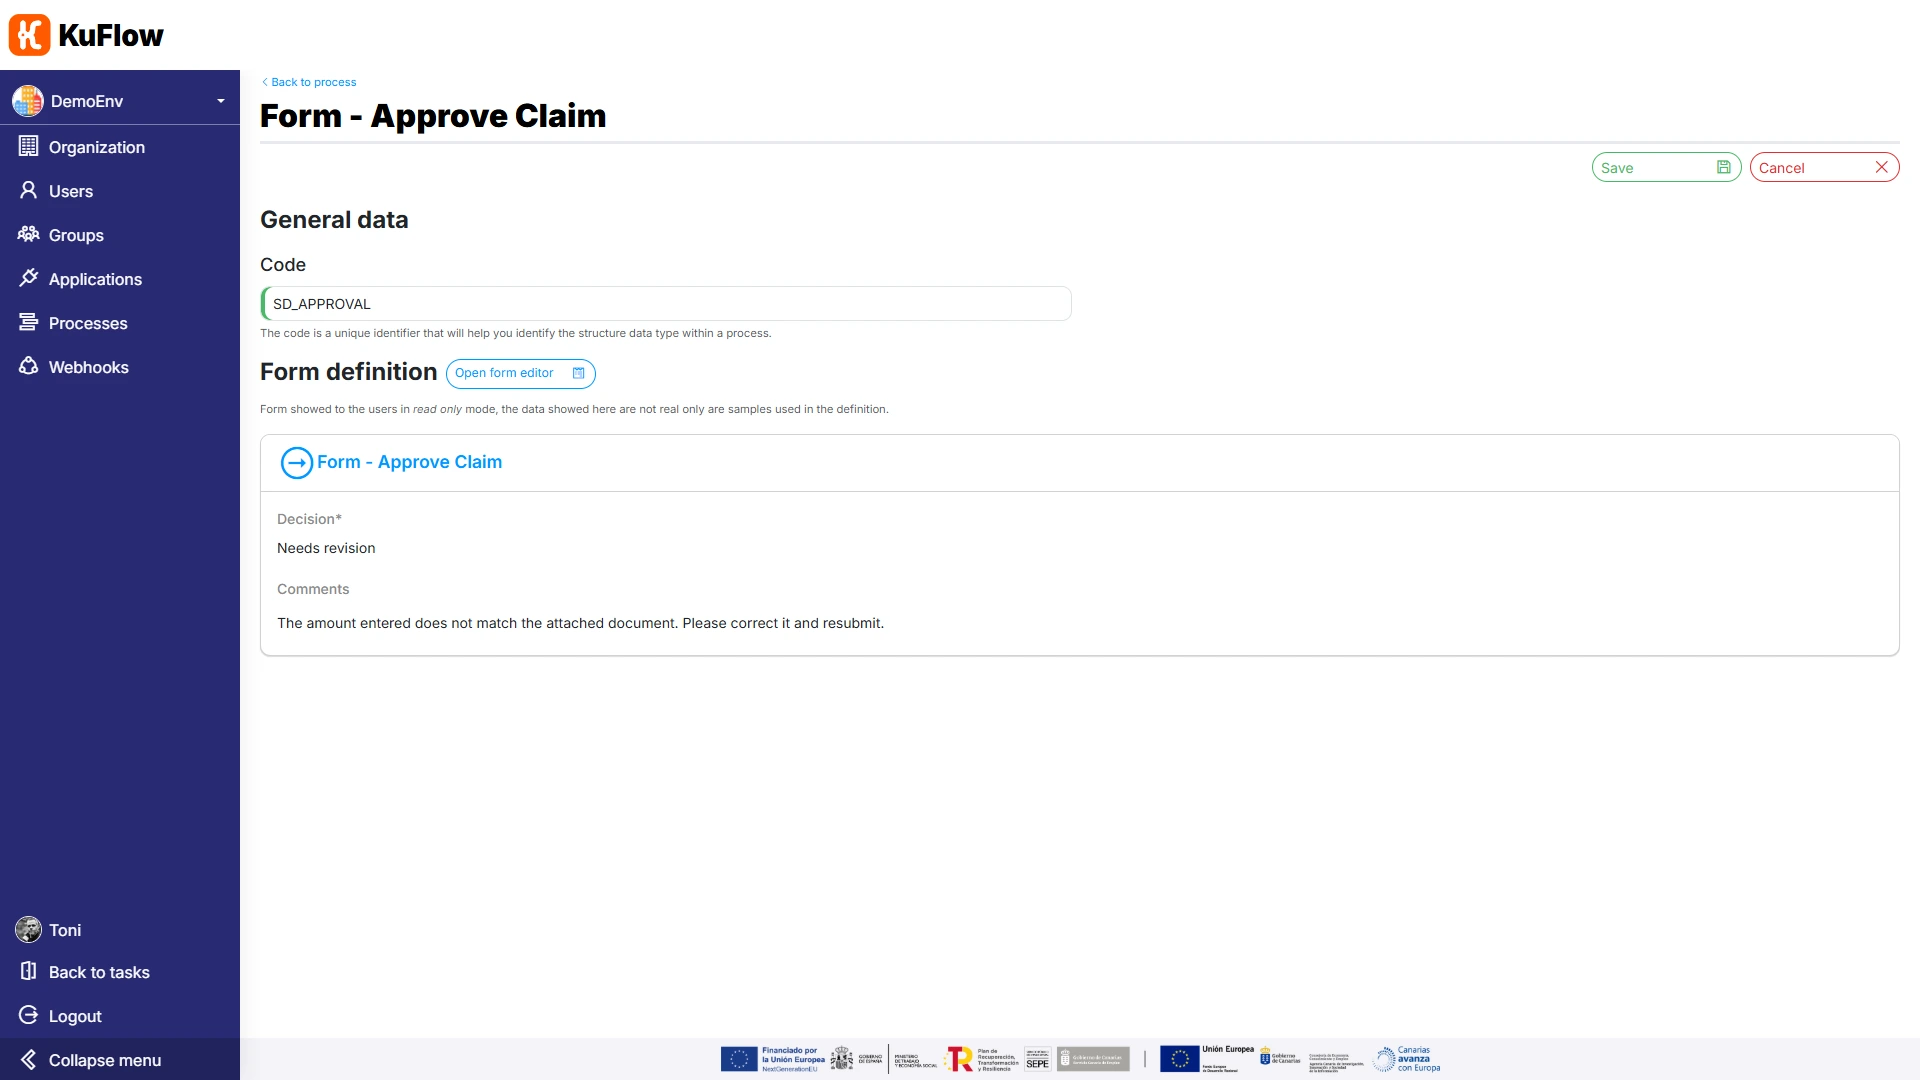
Once we have created the data structure, we are going to create the task itself. On the Process Definition page, click on “Edit process”, go to the Tasks section and choose “Add task”
We define a task with the following information:
- Name: Approve Claim
- Description: Manager approval
- Code: APPROVAL
- Data Structure: Form - Approve Claim
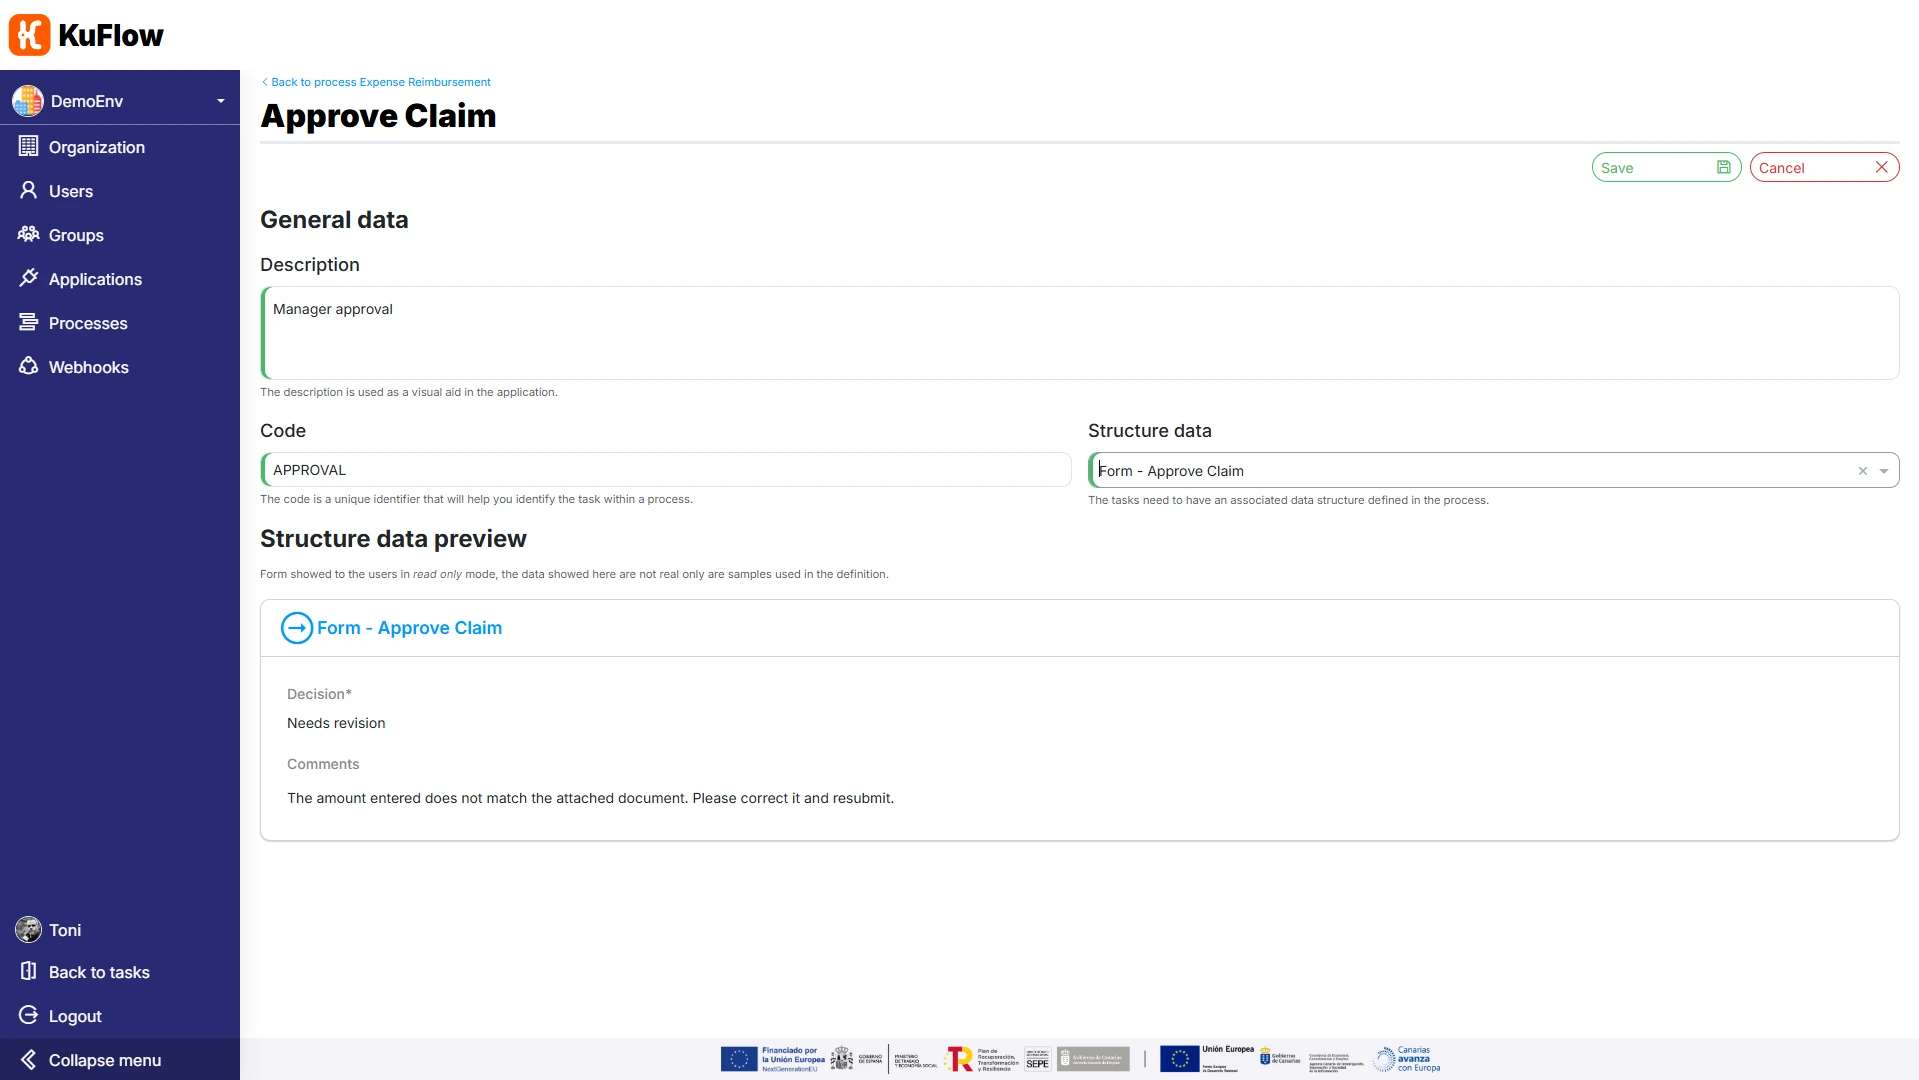
We also define the following permissions:
- Candidate: the specific user that we want to validate the requests
Task 3: Process Reimbursement
On the Process Definition page, click on “Edit process”, go to the Data Structures section and choose “Add data structure”
Create the following data structure:
- Name: Form - Process Reimbursement
- Code: SD_PROCESS
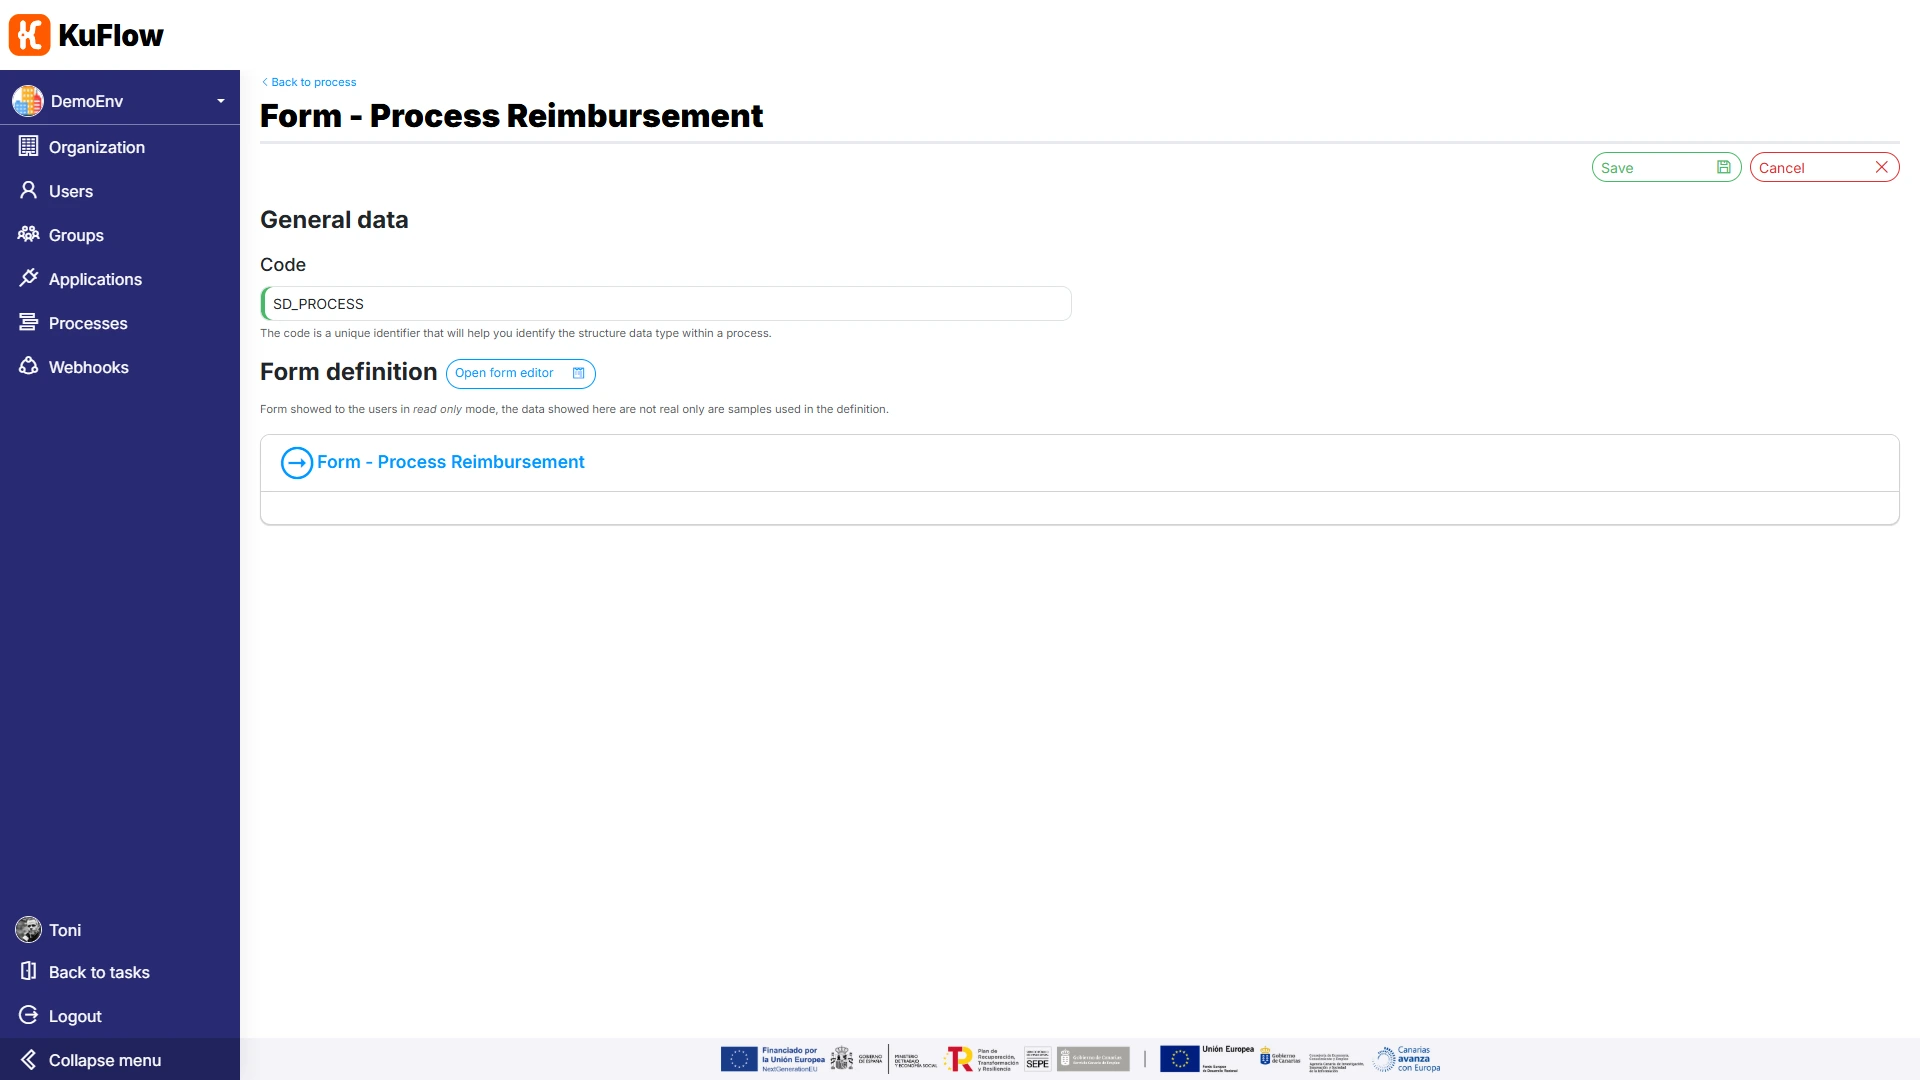
Click on “Open form editor” and specify the following form parameterization:
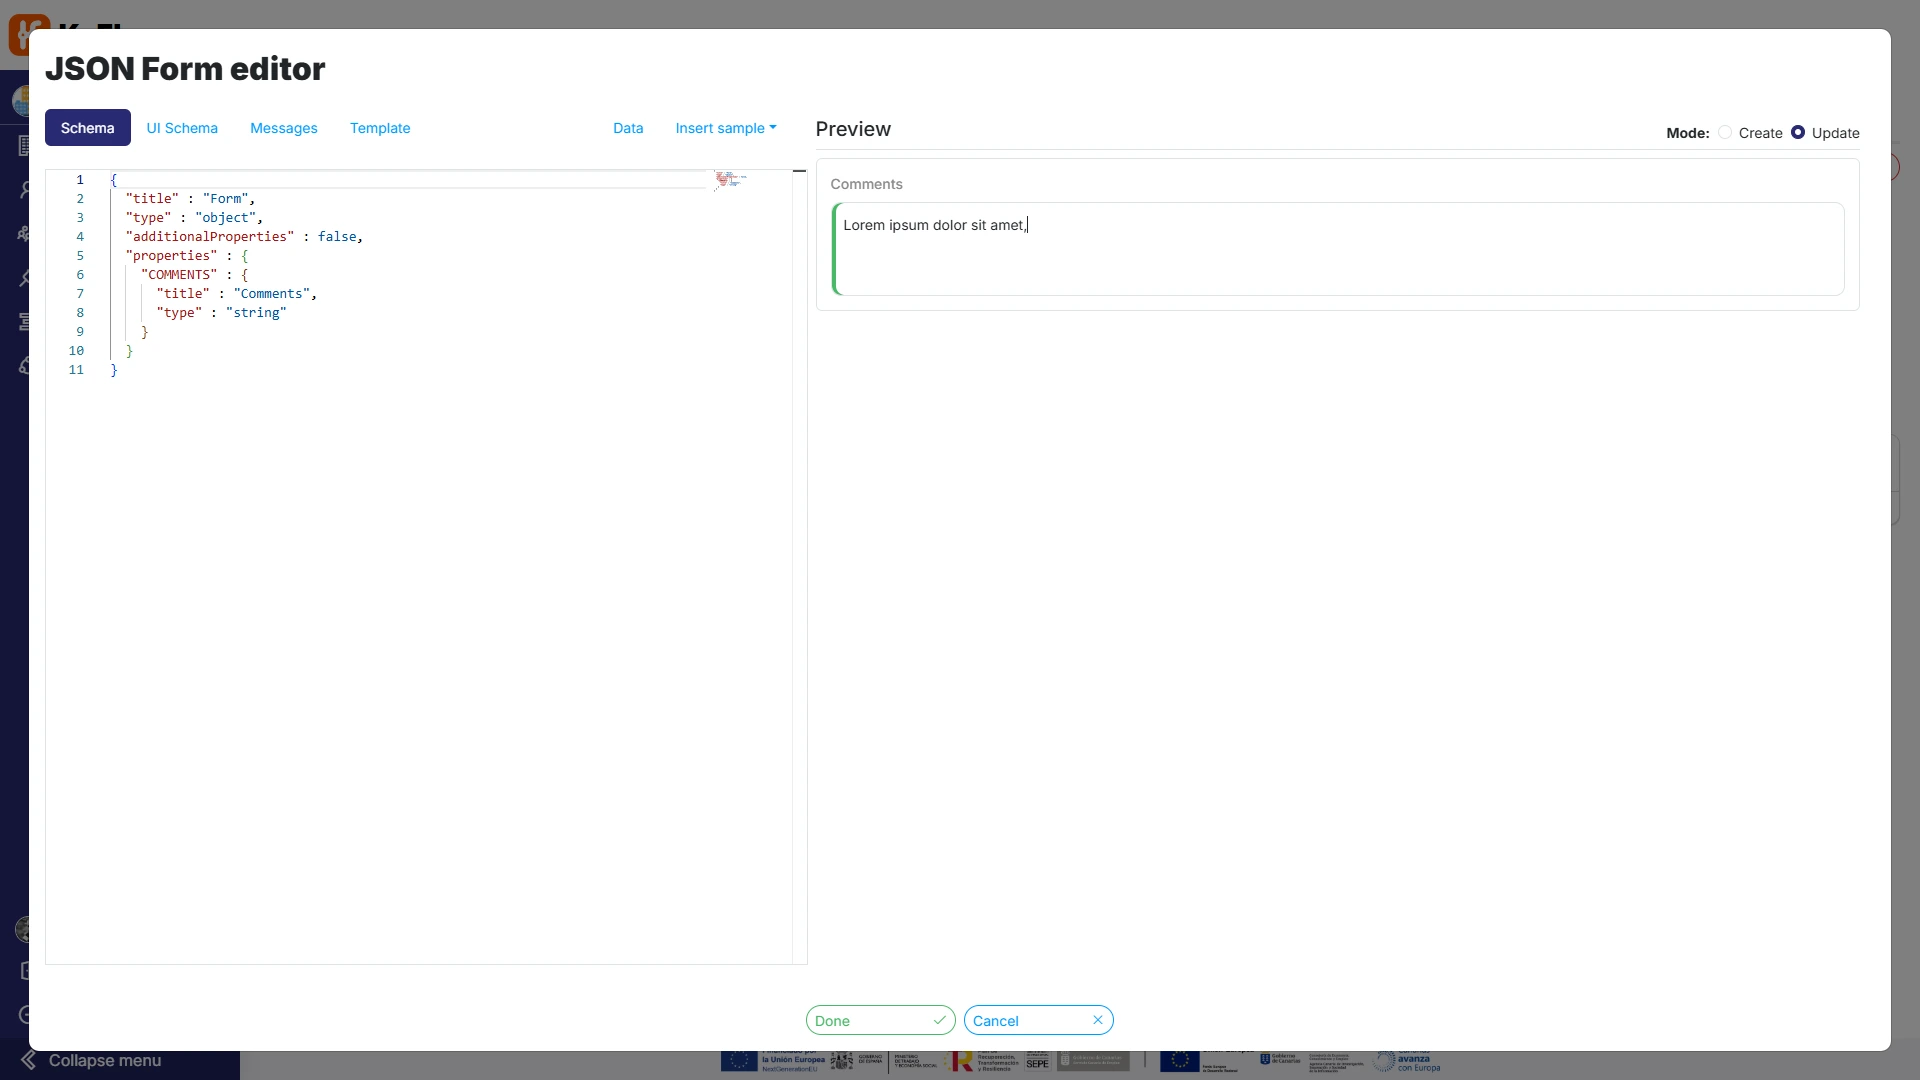
- Schema:
{
  "title" : "Form",
  "type" : "object",
  "additionalProperties" : false,
  "properties" : {
    "COMMENTS" : {
      "title" : "Comments",
      "type" : "string"
    }
  }
} - UI Schema:
{
  "type" : "VerticalLayout",
  "elements" : [ {
    "type" : "Control",
    "scope" : "#/properties/COMMENTS",
    "options" : {
      "multi" : true
    }
  } ]
}
Please remember that by choosing example values, we get the system to display them later on the screen, making review and debugging easier.
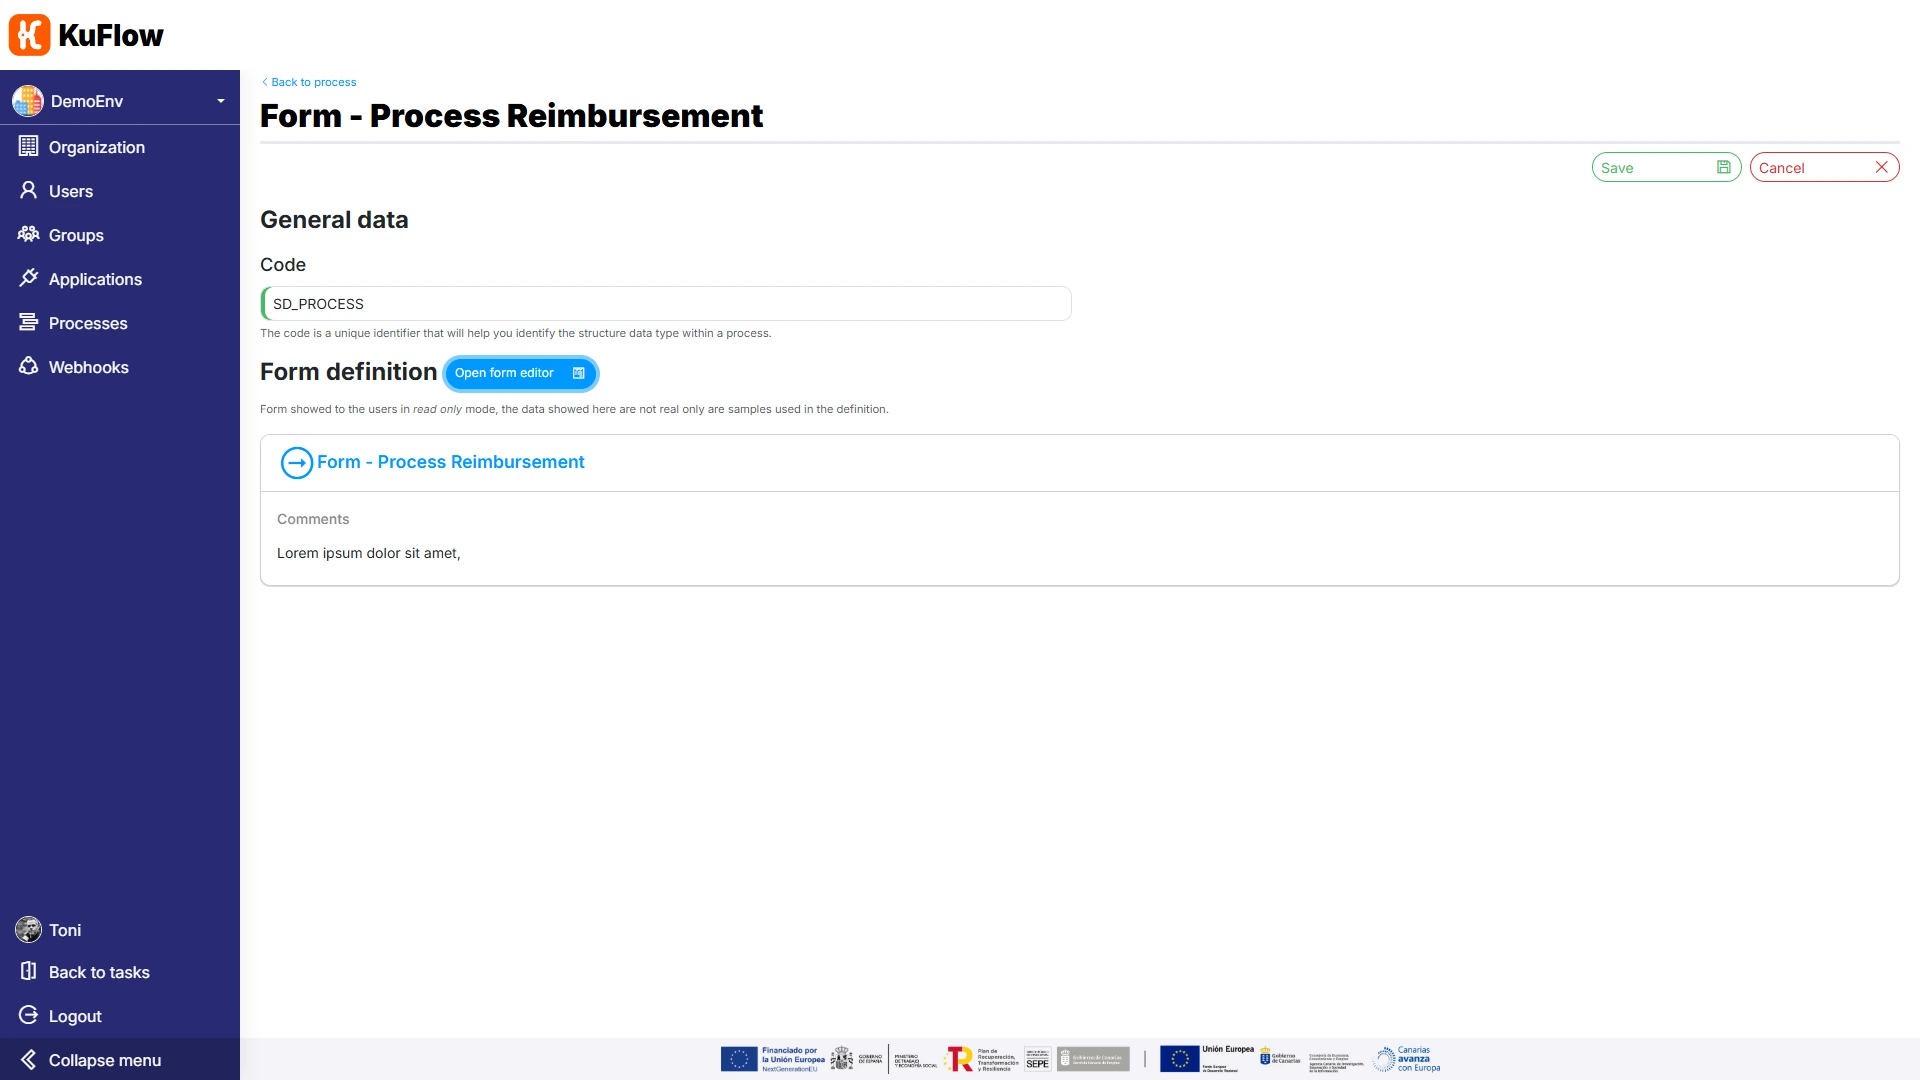
Once we have created the data structure, we are going to create the task itself. On the Process Definition page, click on “Edit process”, go to the Tasks section and choose “Add task”
We define a task with the following information:
- Name: Process Reimbursement
- Description: Process reimbursement
- Code: PROCESS
- Data Structure: Form - Process Reimbursement
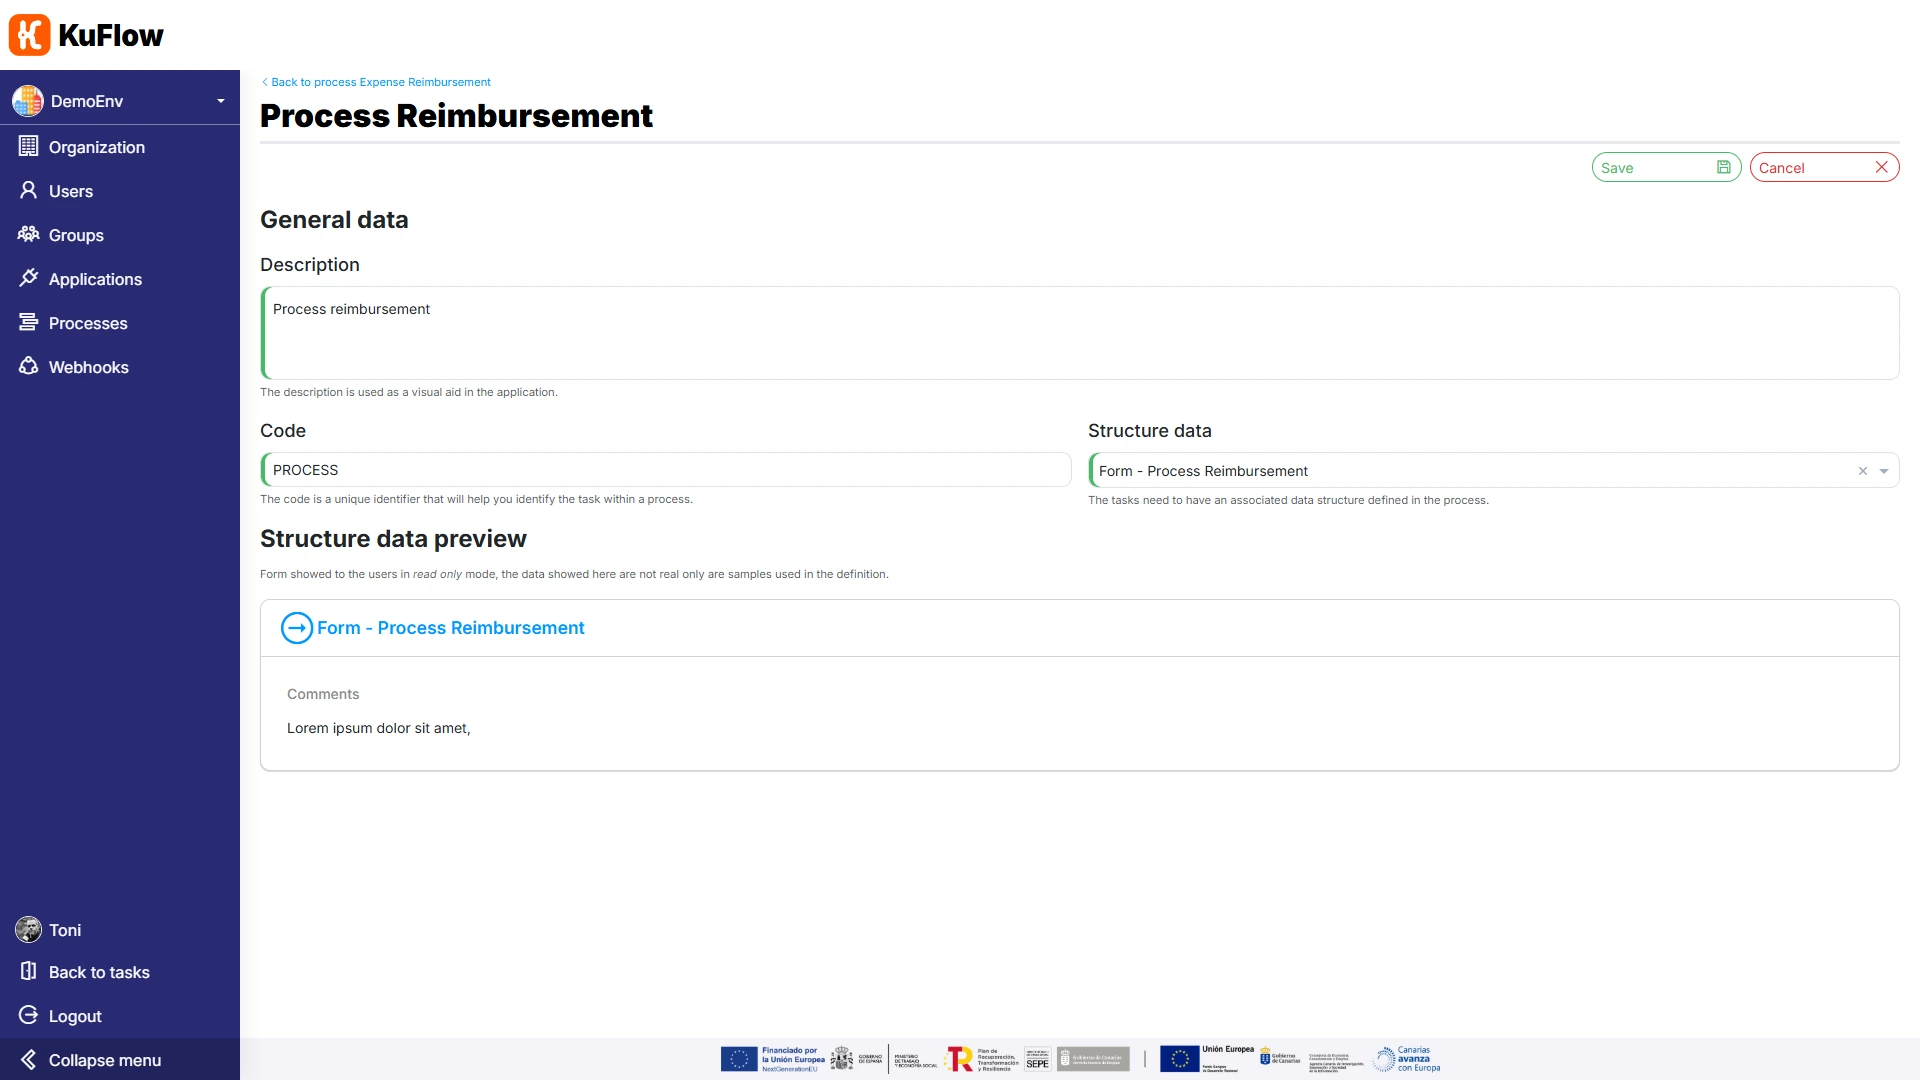
We also define the following permissions:
- Candidate: MyApp_Python (the worker)
- Viewer: Process Initiator
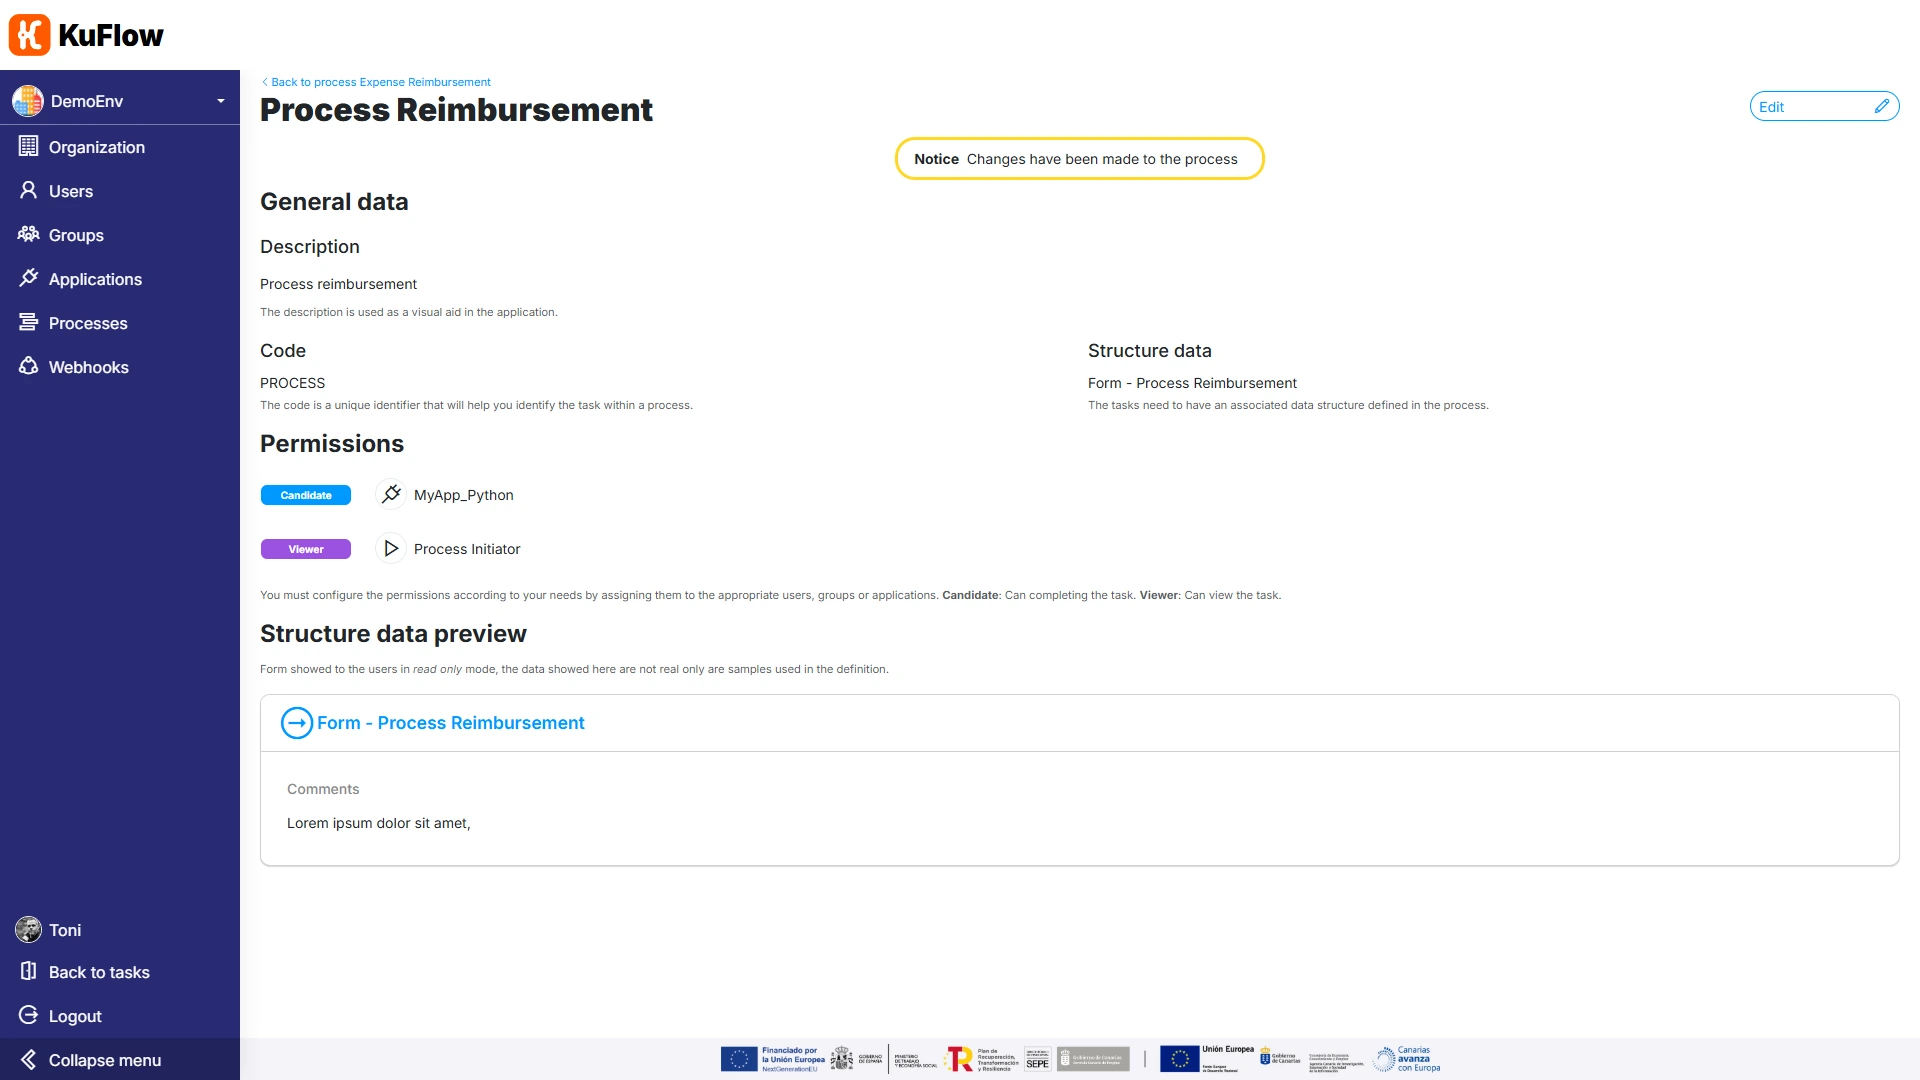
Step 4: Establishing permissions
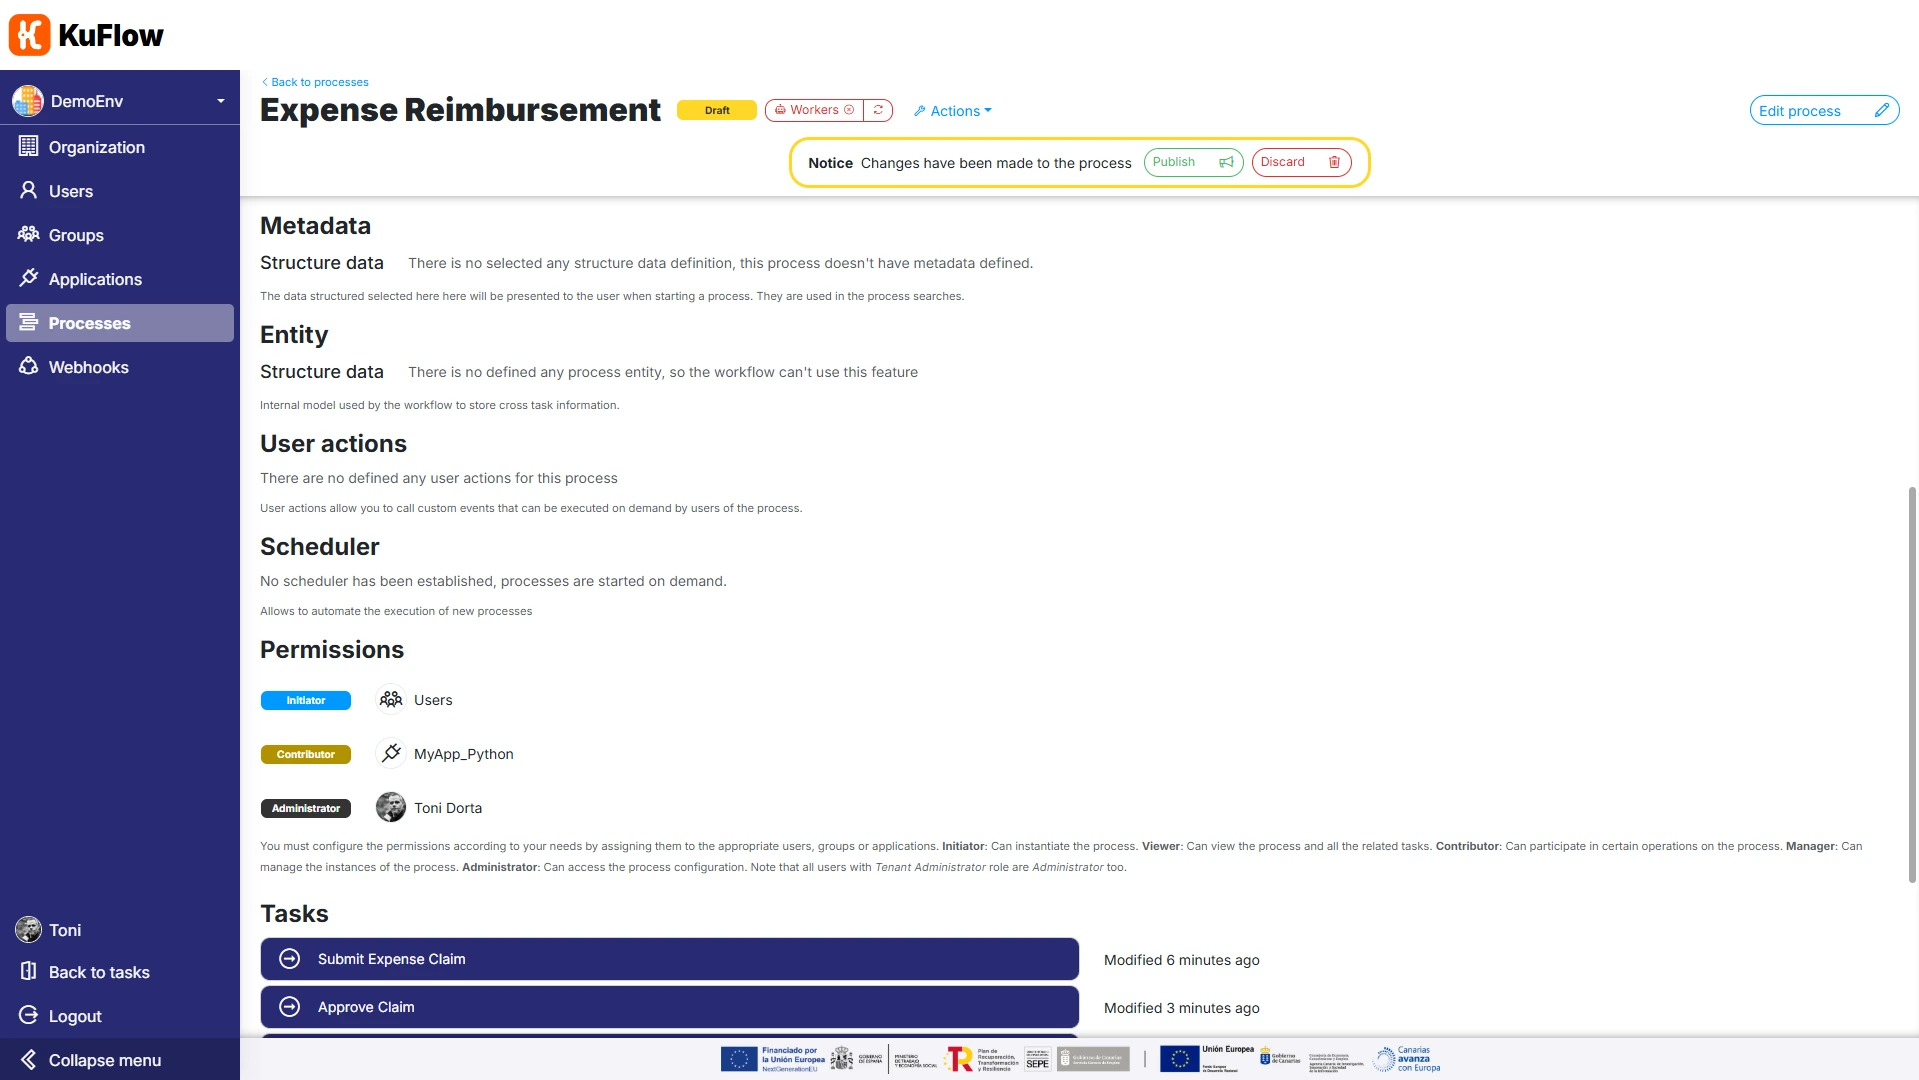
After having defined the tasks and data structures of the process, the It's time to define the global permissions for the workflow.
We set the permissions as follows:
- Initiator: Users group
- Contributor: MyApp_Python (the worker)
Step 5: Download Template for Python
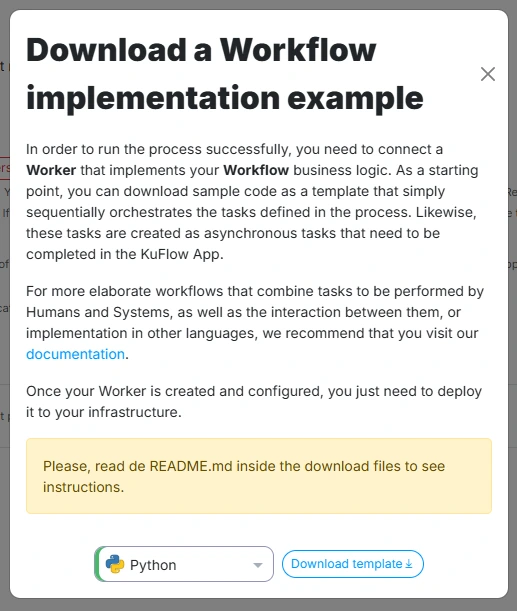
Now it's time to start defining the worker. To do this, we're going to download a template provided by the platform.
On the Process Definition page, click “Yes, please” to download a sample Workflow implementation.
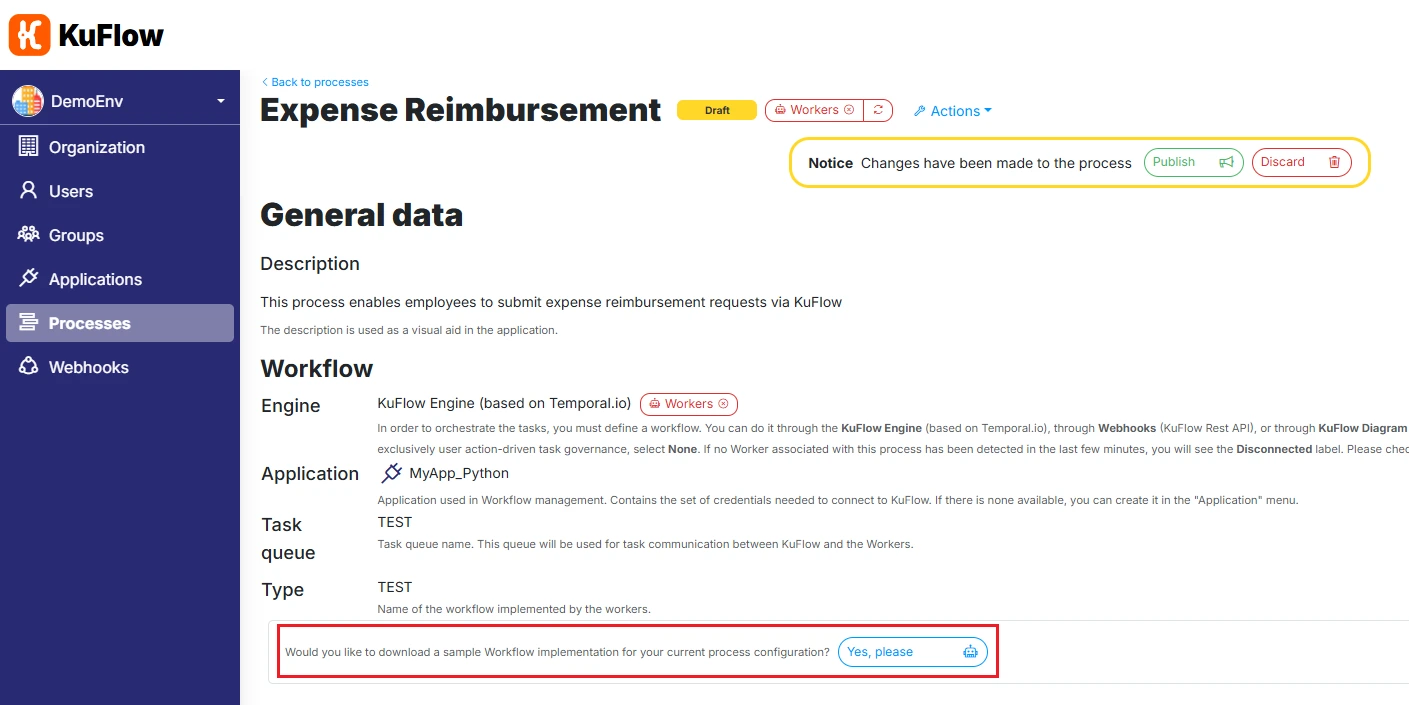
Select the desired language. For this tutorial, we've chosen Python.
Step 6: Preparing the worker
Are you new to developing or don't have much experience developing in Python? Then this section is for you, as it can give you some clues on how to open an IDE environment.
If you're a developer with some experience, then you can skip this step and go straight to the next one.
Below we show the main steps for a Linux environment with asdf already installed. Although it is not essential, we recommend using asdf for greater convenience when developing.
We download the .zip file with the worker template, and unzip it.
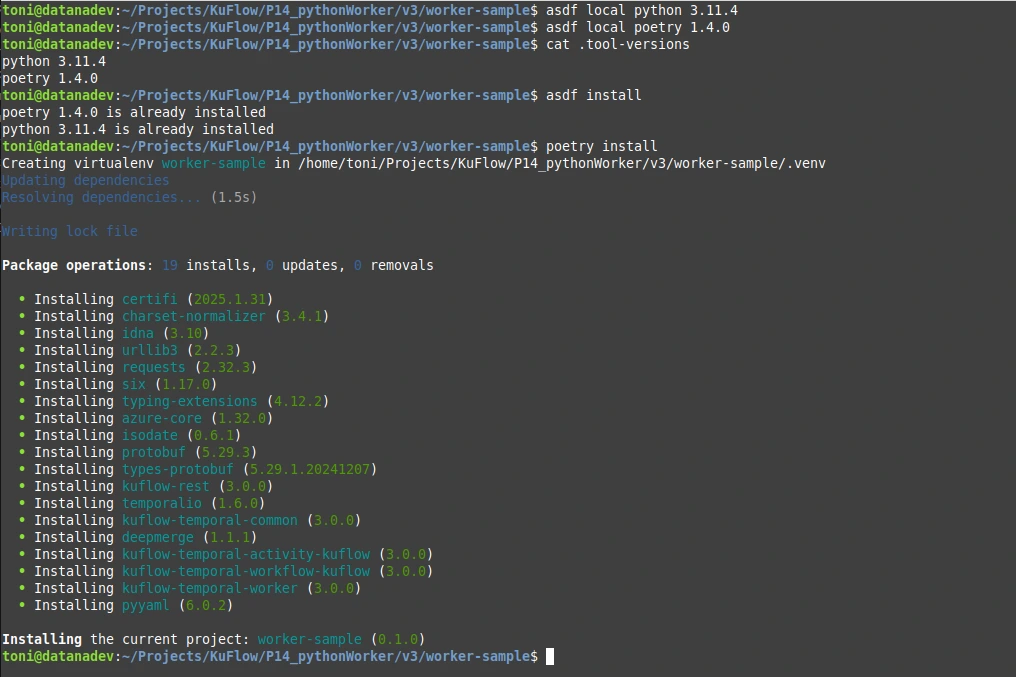
Then, from a Terminal we write the following commands:
asdf local python 3.11.4
asdf local poetry 1.4.0

Next, we finish preparing the local environment by running the following:
asdf install
poetry install
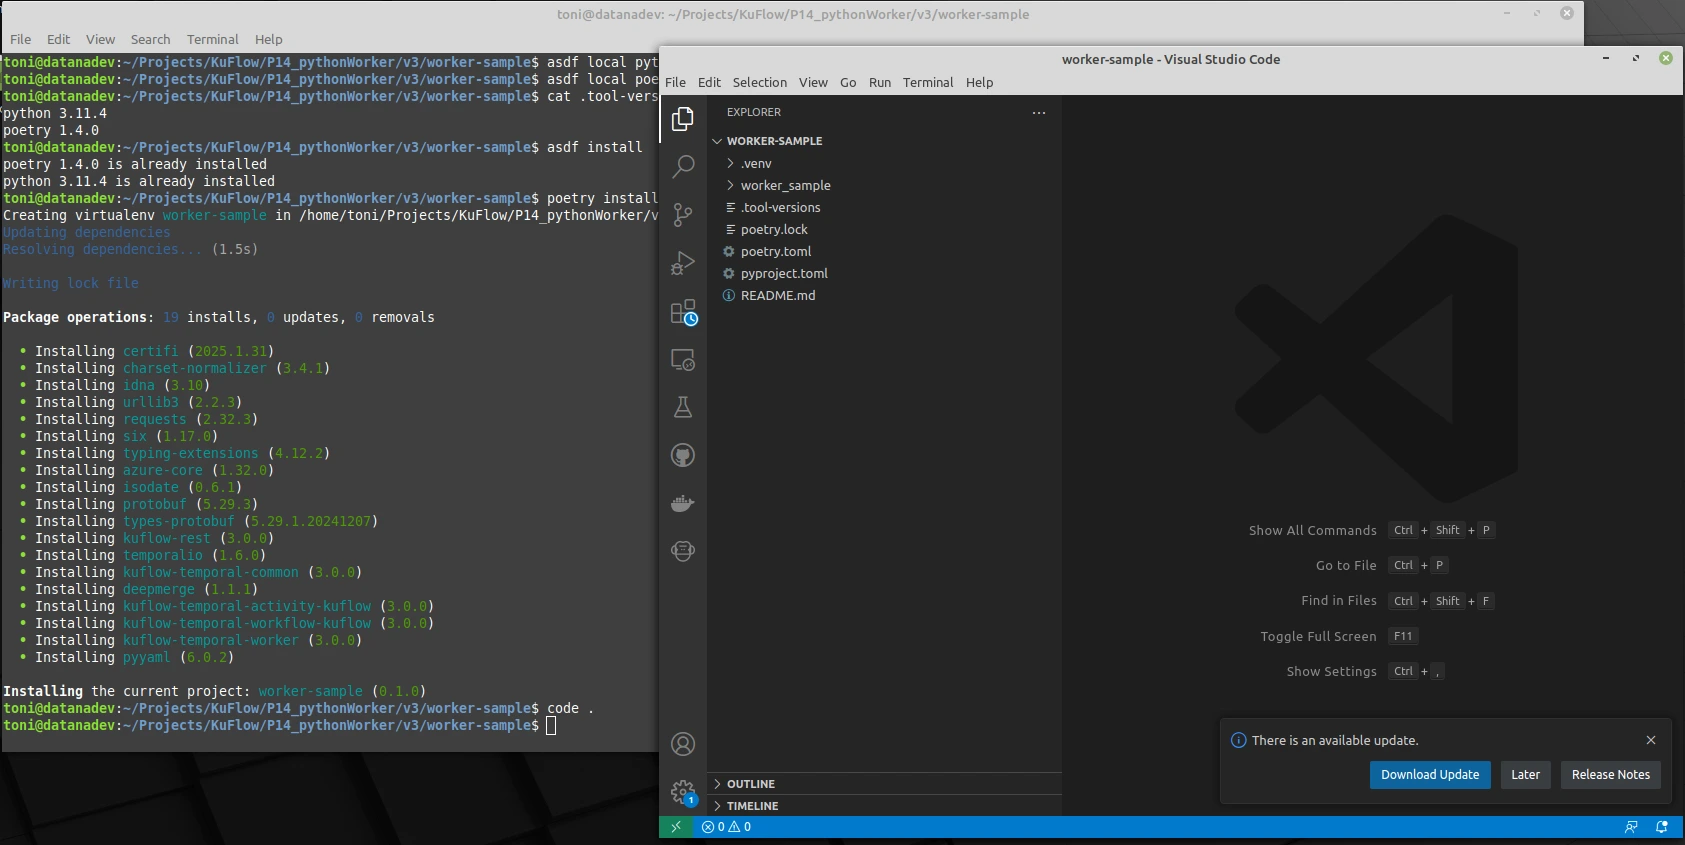
From this folder we run our preferred IDE environment (in our case, Visual Studio Code)
code .
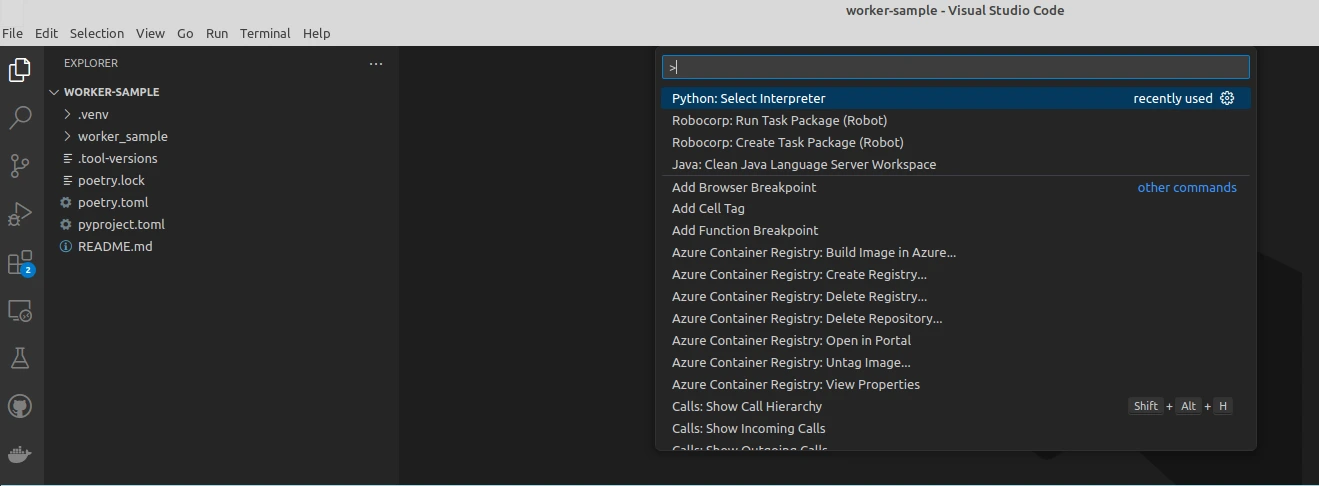
If you work with Visual Studio Code, it is time to select the Python interpreter that we want to apply from the command palette:

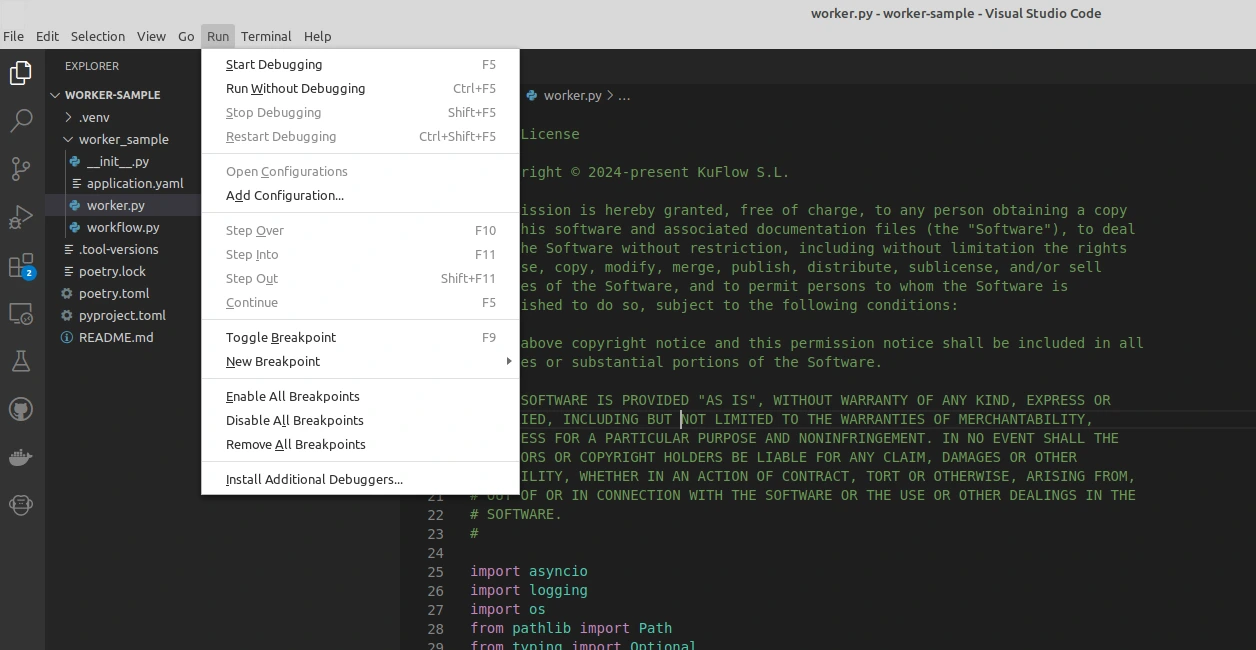
Open the worker.py file and select Start debugging:
A connection error similar to the following should appear: next:
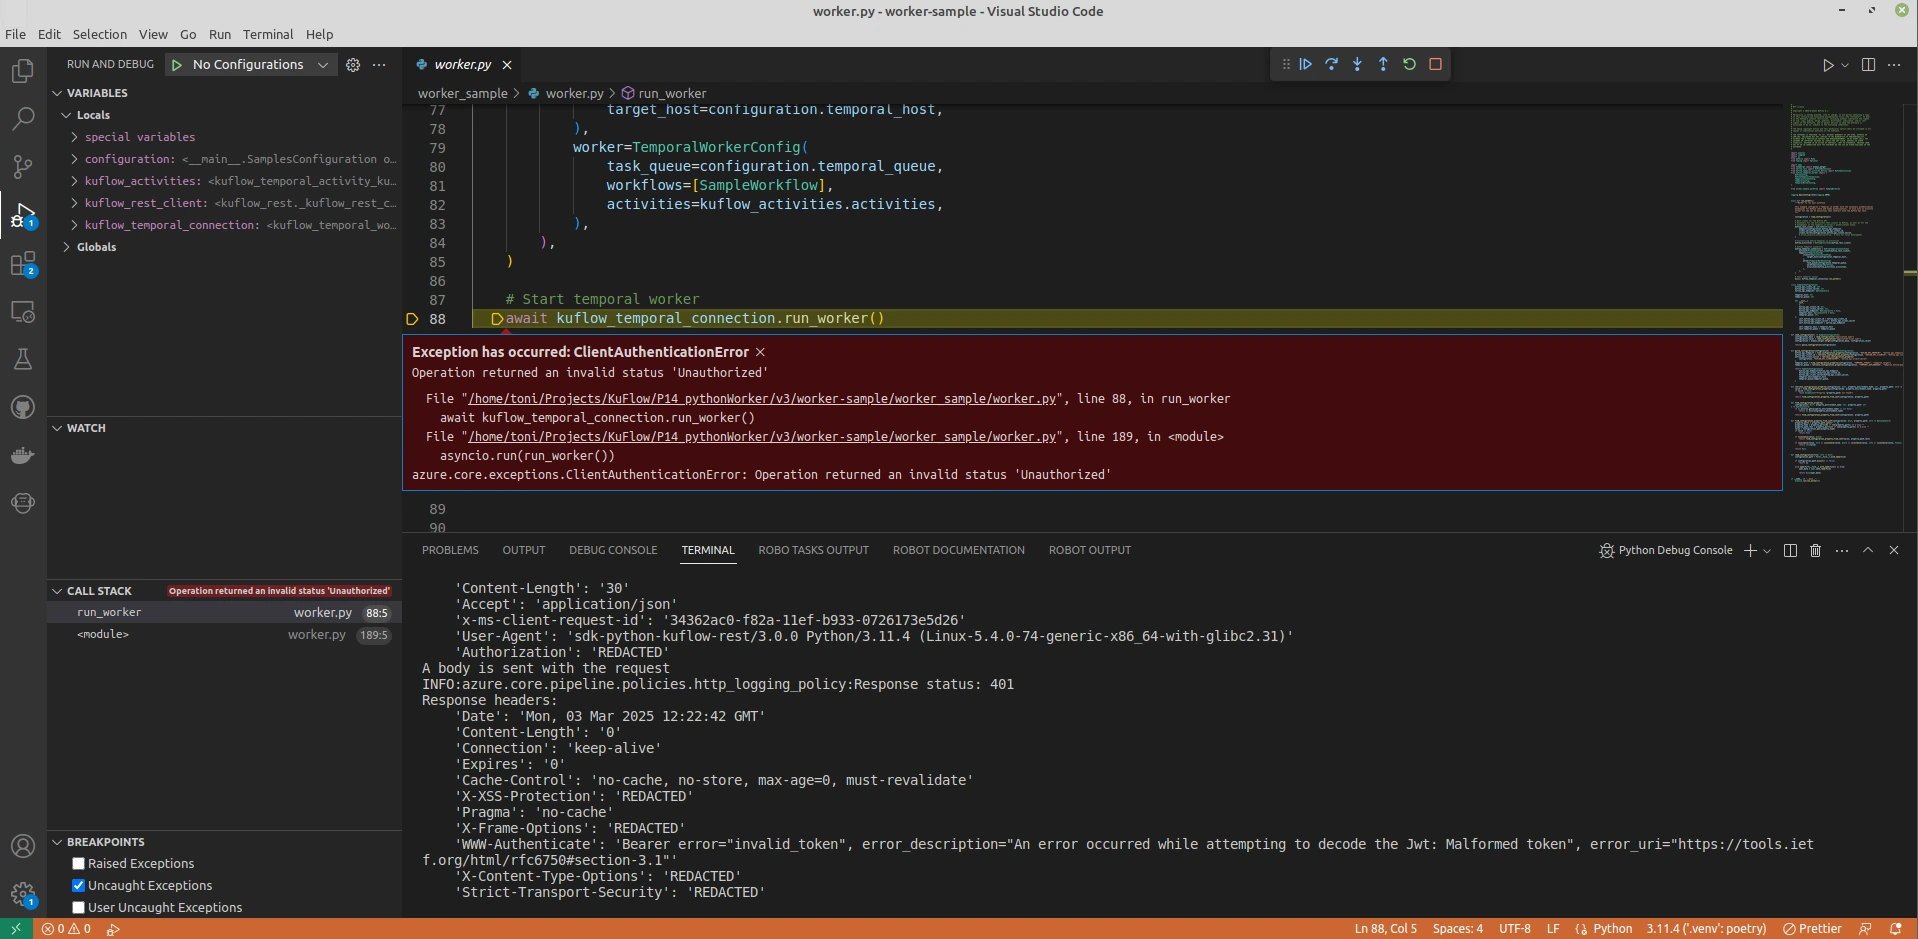
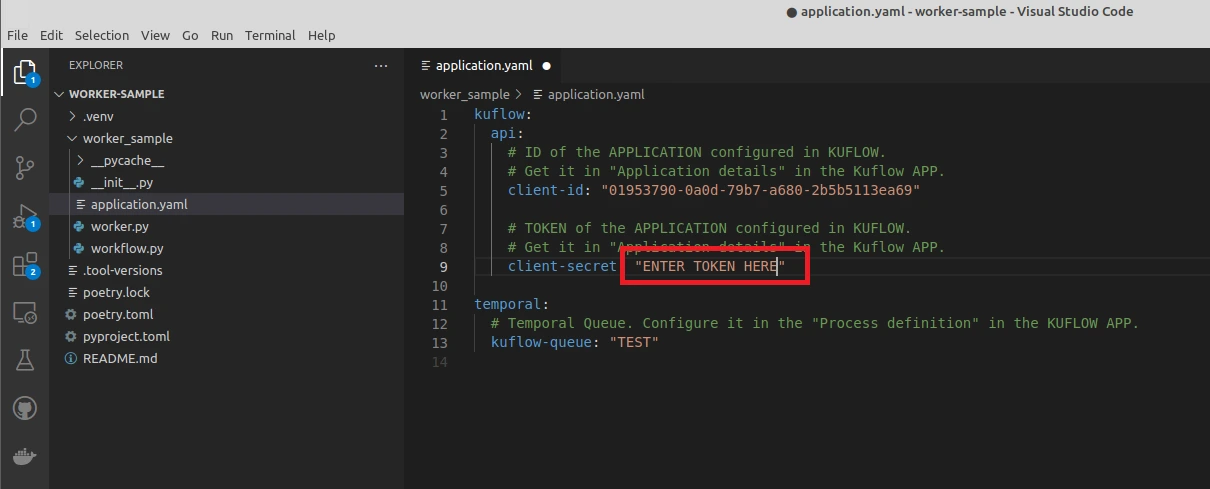
This error is logical, since the template does not have all the necessary connection information. We open the application.yaml file and save the Token value that the KuFlow platform indicated to us when we created the Application (Step 1 of this tutorial).
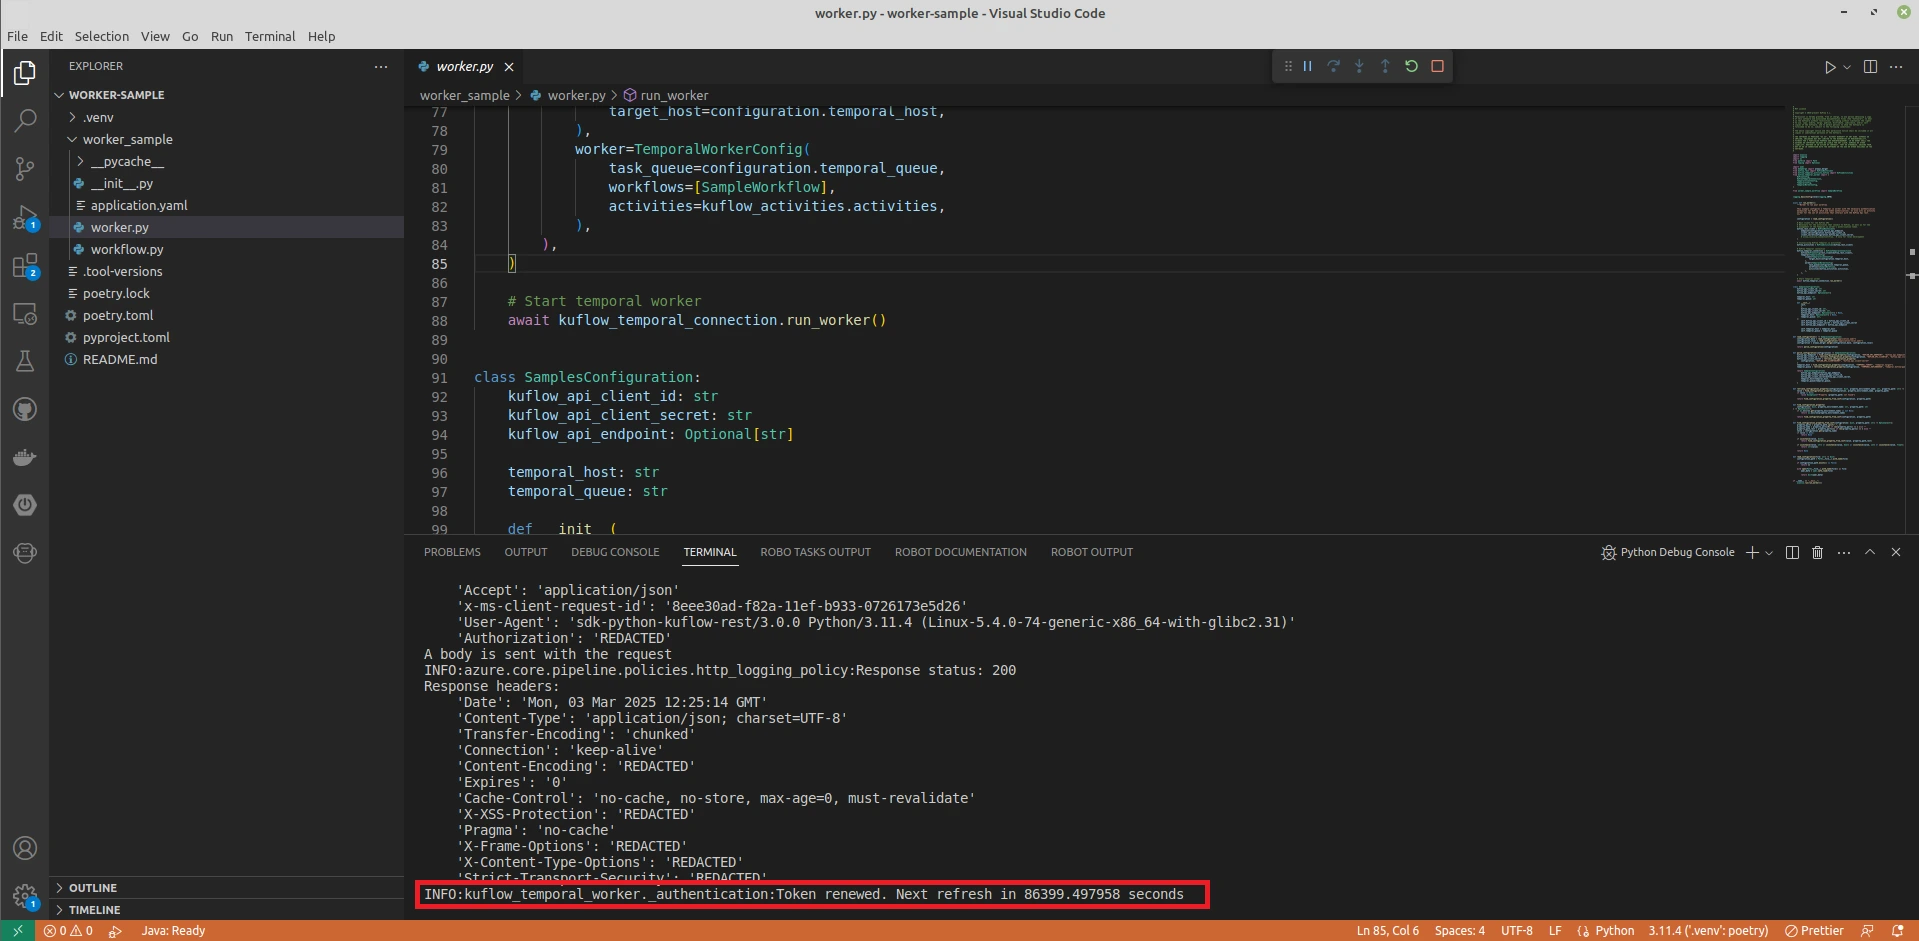
We run the worker again, and now we check that the connection is correct.
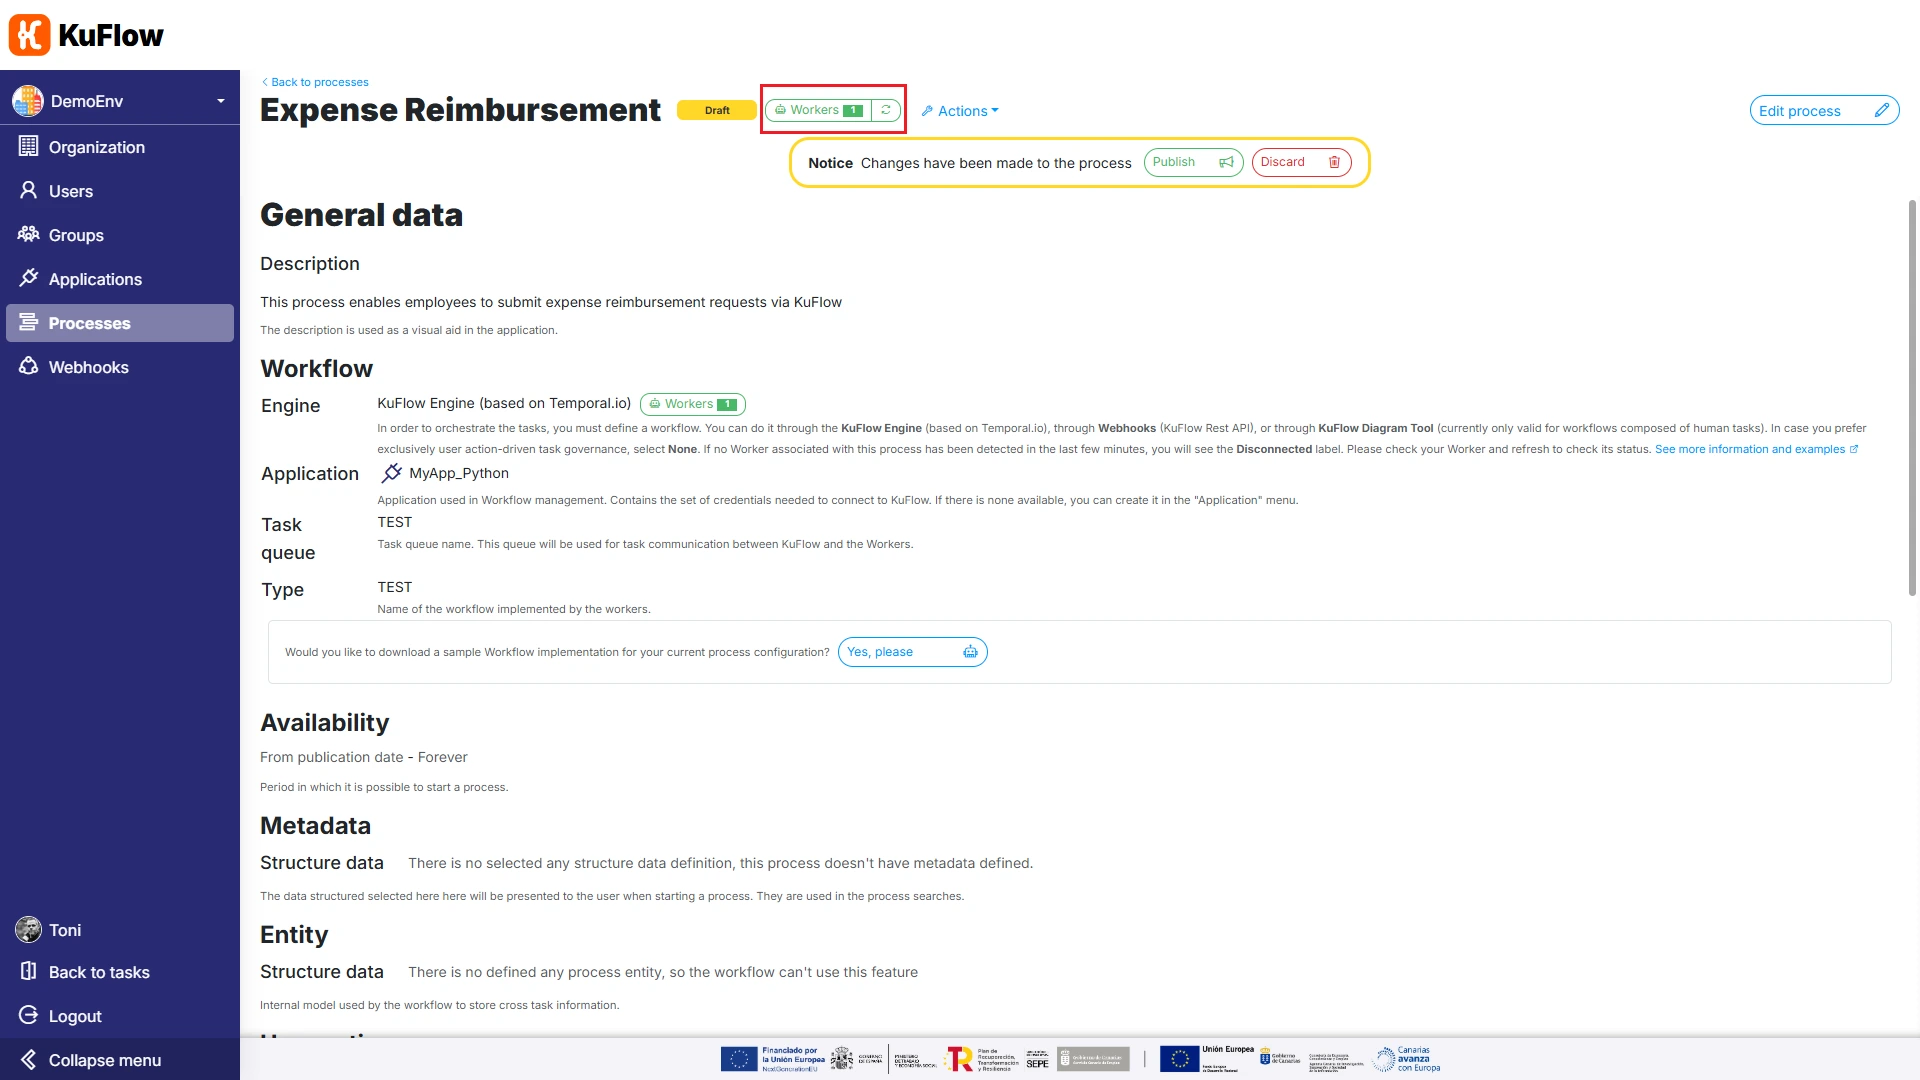
We can also access the Process Definition page, and check that the worker now appears properly connected
Step 7: Coding the worker
After the previous steps, we now have a Workflow defined in KuFlow, which contains all the necessary tasks and data structures, and we also have a first worker structure that connects correctly to KuFlow.
In this step we are going to code that Worker so that it correctly defines the workflow that we want to implement.
7.1. First modifications to the Worker template
Modify the following code:
    @workflow.run
    async def run(self, request: models_workflow.WorkflowRequest) -> models_workflow.WorkflowResponse:
        workflow.logger.info(f"Process {request.process_id} started")

        await self.create_process_item_submit__expense__claim(request.process_id)
        await self.create_process_item_approve__claim(request.process_id)
        await self.create_process_item_process__reimbursement(request.process_id)

        return models_workflow.WorkflowResponse(f"Completed process {request.process_id}")
To the following implementation:
    @workflow.run
    async def run(self, request: models_workflow.WorkflowRequest) -> models_workflow.WorkflowResponse:
        workflow.logger.info(f"Process {request.process_id} started")

        needToRegister = False
        while (True):
            process_item_workflow = await self.create_process_item_submit__expense__claim(request.process_id)

            amount = str(process_item_workflow.task.data.value['AMOUNT'])

            if float(amount) <= 1000:
                needToRegister = True
                break
            else:
                approval_task_workflow = await self.create_process_item_approve__claim(request.process_id)
                decision = approval_task_workflow.task.data.value['DECISION']
                if decision == "ACCEPTED":
                    needToRegister = True
                    break
                if decision == "REJECTED":
                    needToRegister = False
                    break
                # Unnecesary, but we keep it for more legibility
                # if decision == "REVIEW":
                    # continue

        if (needToRegister):
            await self.create_process_item_process__reimbursement(request.process_id)

        return models_workflow.WorkflowResponse(f"Completed process {request.process_id}")
In order to get the amount value, we need to have the process, so in the Expense Claim Submit method, we update this section of code:
        # Wait for its external completion (outside this workflow, usually in the KuFlow APP or via Rest Api)
        # This line is useful if you are orchestrating asynchronous tasks, e.g. those performed by humans.
        # In the case of synchronous tasks, i.e. tasks that are completed by this Workflow itself,
        # you should remove this line and do not forget to add code to complete the task programmatically.
        await workflow.wait_condition(lambda: process_item_id in self._kuflow_completed_task_ids)
To look like this:
        # Wait for its external completion (outside this workflow, usually in the KuFlow APP or via Rest Api)
        # This line is useful if you are orchestrating asynchronous tasks, e.g. those performed by humans.
        # In the case of synchronous tasks, i.e. tasks that are completed by this Workflow itself,
        # you should remove this line and do not forget to add code to complete the task programmatically.
        await workflow.wait_condition(lambda: process_item_id in self._kuflow_completed_task_ids)

        # We need the process item
        retrieve_request = models_activity.ProcessItemRetrieveRequest(
            process_item_id=process_item_id,
        )
        retrieve_response: models_activity.ProcessItemRetrieveResponse = await workflow.execute_activity(
            KuFlowActivities.retrieve_process_item,
            retrieve_request,
            start_to_close_timeout=SampleWorkflow._KUFLOW_ACTIVITY_START_TO_CLOSE_TIMEOUT,
            schedule_to_close_timeout=SampleWorkflow._KUFLOW_ACTIVITY_SCHEDULE_TO_CLOSE_TIMEOUT,
            retry_policy=SampleWorkflow._KUFLOW_ACTIVITY_RETRY_POLICY,
        )

        return retrieve_response.process_item
And we repeat the above for the create_process_item_approve__claim method.
7.2. Having the Worker take over and execute a task
One detail that we need to implement at this point is that the Process Reimbursement task is not properly managed.
This is because we have to tell the Worker that it must claim and complete that task.
In order to achieve this, we are going to indicate the ID of the Worker itself as the owner when creating the task.
To obtain the ID, we will obtain the value that appears in application.yaml, and we will use it as a constant. (Note: There are other ways to specify this ID and even to obtain it at runtime, but in order not to complicate this exercise, we will simply use a constant.)
@workflow.defn(name="TEST")
class SampleWorkflow:
    MYAPP_ID = "01953790-0a0d-79b7-a680-2b5b5113ea69"

    TASK_CODE_SUBMIT_EXPENSE_CLAIM = "FILL_INFO"
    TASK_CODE_APPROVE_CLAIM = "APPROVAL"
    TASK_CODE_PROCESS_REIMBURSEMENT = "PROCESS"
In the create_process_item_process__reimbursement method, we change the ProcessItemCreateRequest call to take into account that the owner of the task is the worker itself:
    async def create_process_item_process__reimbursement(self, process_id: str):
        """Create process item "Process Reimbursement" in KuFlow and wait for its completion"""

        process_item_id = str(uuid7())

        request = models_activity.ProcessItemCreateRequest(
            id=process_item_id,
            process_id=process_id,
            type=models_rest.ProcessItemType.TASK,
            process_item_definition_code=SampleWorkflow.TASK_CODE_PROCESS_REIMBURSEMENT,
            owner_id=SampleWorkflow.MYAPP_ID   # ADAPTATION FROM TEMPLATE: We specify the owner
        )
This way, the worker will claim to execute this task and KuFlow will assign it to it.
Then, we perform the registration operation (a call to a third-party application, launching a bot, etc.). In this example, we will simply complete that step and reflect a comment in the annotation. But please keep in mind that this would be the place in the code to be able to execute the actions that are necessary. The possibilities are endless!
Then, we proceed to close the task. In the create_process_item_process__reimbursement method, we change these lines:
        # Wait for its external completion (outside this workflow, usually in the KuFlow APP or via Rest Api)
        # This line is useful if you are orchestrating asynchronous tasks, e.g. those performed by humans.
        # In the case of synchronous tasks, i.e. tasks that are completed by this Workflow itself,
        # you should remove this line and do not forget to add code to complete the task programmatically.
        await workflow.wait_condition(lambda: process_item_id in self._kuflow_completed_task_ids)
To the following implementation:
        # This is a task that is completed by this Workflow itself, so no need of this line
        # await workflow.wait_condition(lambda: process_item_id in self._kuflow_completed_task_ids)
        # instead we do whatever we need

        # We update the task information
        request: models_activity.ProcessItemTaskDataUpdateRequest = models_activity.ProcessItemTaskDataUpdateRequest(
            process_item_id=process_item_id,
            data=models_rest.JsonValue(
               value={
                    "COMMENTS": "Registered automatically. Transaction ID 1338"
                }
            )
        )
        request: models_activity.ProcessItemTaskDataUpdateResponse = await workflow.execute_activity(
            KuFlowActivities.update_process_item_task_data,
            request,
            start_to_close_timeout=timedelta(days=1),
            schedule_to_close_timeout=timedelta(days=365),
            retry_policy=RetryPolicy(maximum_interval=timedelta(seconds=30)),
        )

        # We complete the task
        request = models_activity.ProcessItemTaskCompleteRequest(
            process_item_id=process_item_id
        )
        await workflow.execute_activity(
            KuFlowActivities.complete_process_item_task,
            request,
            start_to_close_timeout=SampleWorkflow._KUFLOW_ACTIVITY_START_TO_CLOSE_TIMEOUT,
            schedule_to_close_timeout=SampleWorkflow._KUFLOW_ACTIVITY_SCHEDULE_TO_CLOSE_TIMEOUT,
            retry_policy=SampleWorkflow._KUFLOW_ACTIVITY_RETRY_POLICY
        )
7.3. Improving workflow usability
At this point, we already have a workflow that:
- Allows you to enter expense reimbursement claims
- If the expense is less than €1,000, it is automatically processed
- If the expense exceeds €1,000, approval is required
- The expense process allows calls to third-party applications or other types of automatic actions
We still need to improve usability a little, so that users can work better with the process in a smoother way.
Assign a task to the Process Initiator
First, we want the process initiator to be assigned the task directly, as soon as the process is launched. We don't want an employee to start the process and then have to claim the first task, because in this case that would be an unnecessary extra step.
In the create_process_item_submit__expense__claim method, we look for the exact place where the following code is:
        request = models_activity.ProcessItemCreateRequest(
            id=process_item_id,
            process_id=process_id,
            type=models_rest.ProcessItemType.TASK,
            process_item_definition_code=SampleWorkflow.TASK_CODE_SUBMIT_EXPENSE_CLAIM
        )
We are going to get the Process Initiator ID, and specify it as the Owner ID of the task:
        # We get the process initiator id
        process_retrieve_request = models_activity.ProcessRetrieveRequest(
            process_id=process_id
        )
        process_retrieve_response: models_activity.ProcessRetrieveResponse = await workflow.execute_activity(
            KuFlowActivities.retrieve_process,
            process_retrieve_request,
            start_to_close_timeout=SampleWorkflow._KUFLOW_ACTIVITY_START_TO_CLOSE_TIMEOUT,
            schedule_to_close_timeout=SampleWorkflow._KUFLOW_ACTIVITY_SCHEDULE_TO_CLOSE_TIMEOUT,
            retry_policy=SampleWorkflow._KUFLOW_ACTIVITY_RETRY_POLICY,
        )
        owner_id = process_retrieve_response.process.initiator_id

        request = models_activity.ProcessItemCreateRequest(
            id=process_item_id,
            process_id=process_id,
            type=models_rest.ProcessItemType.TASK,
            process_item_definition_code=SampleWorkflow.TASK_CODE_SUBMIT_EXPENSE_CLAIM,
            owner_id=owner_id
        )
Load data from a previous task into a task
A second usability improvement arises when the manager asks to review or adjust the content of the request:
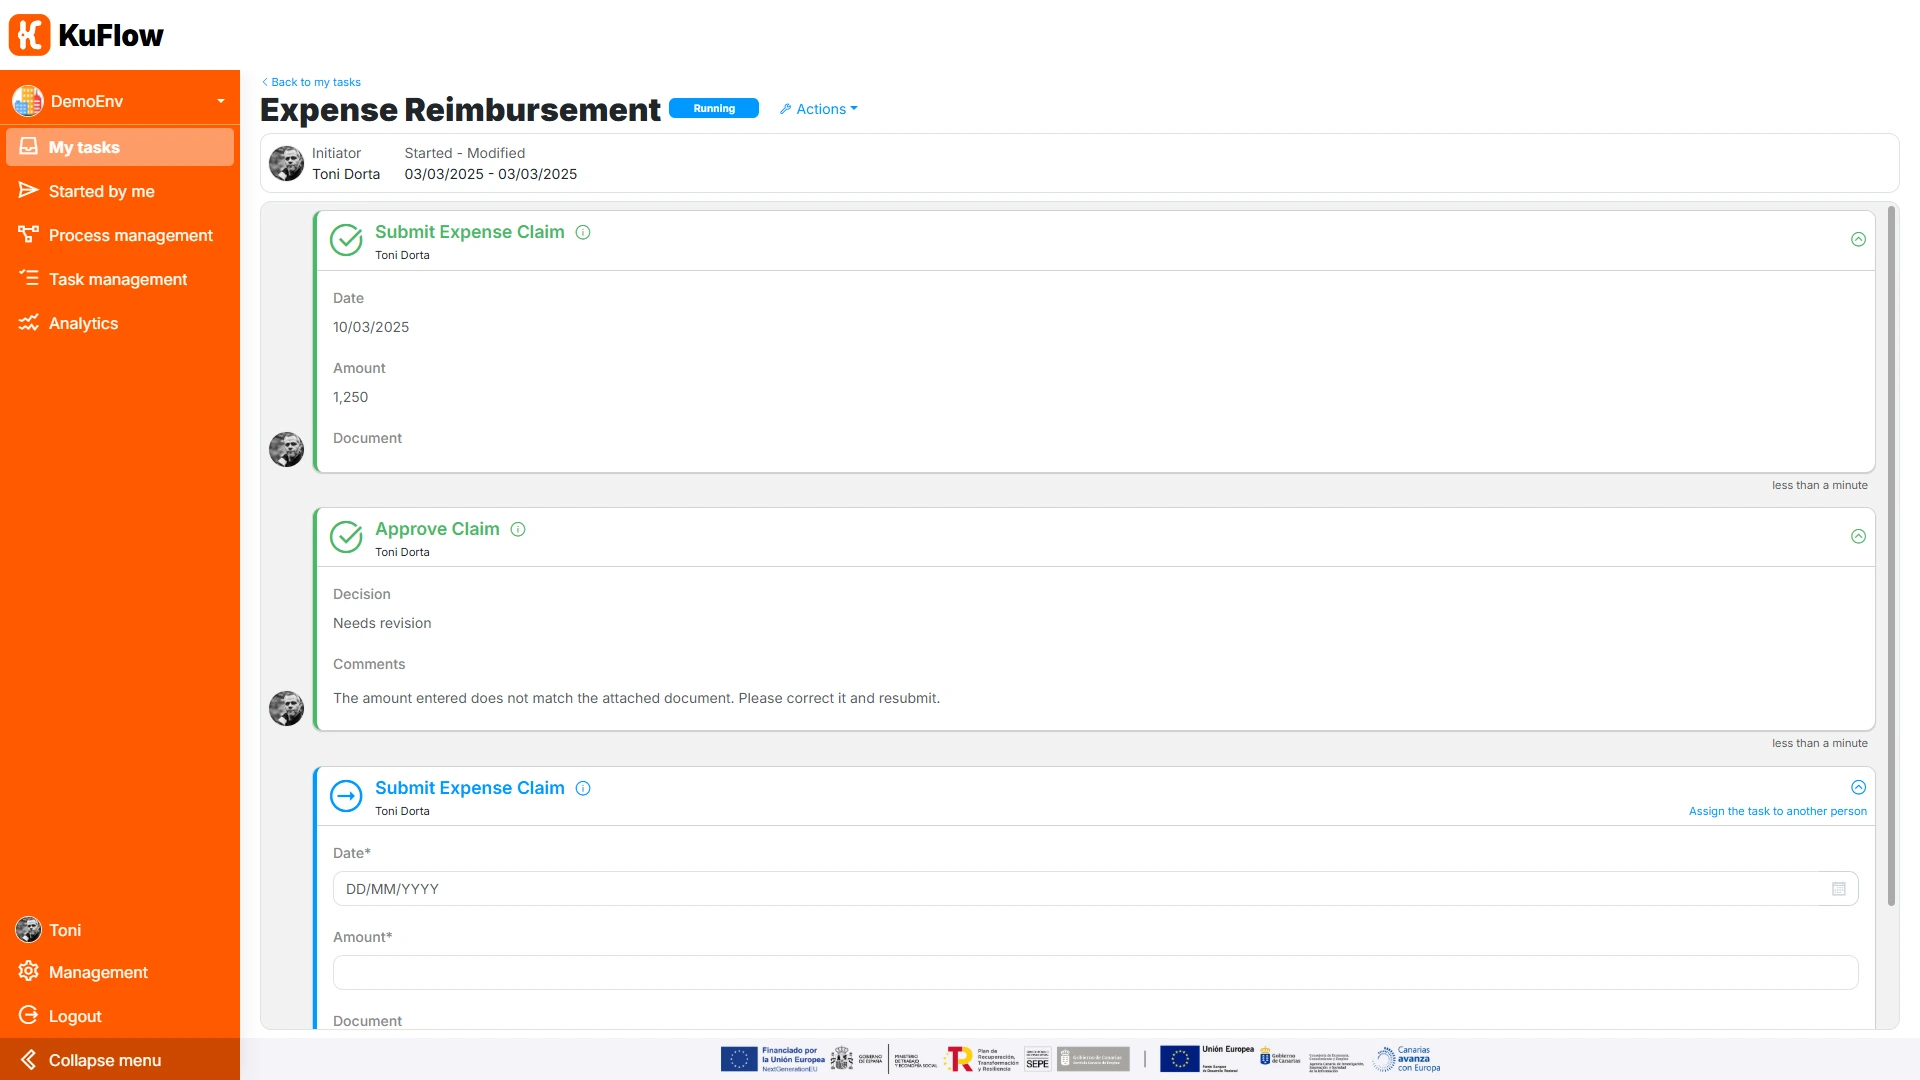
As the workflow works, the worker must re-enter all the information every time the process returns to the initial task. This can sometimes be very annoying. We are going to modify the worker so that it is able to retain the information already entered.
We change the method so that we can pass it the existing ProcessItem, something that happens in the subsequent iterations of that validation loop:
async def create_process_item_submit__expense__claim(self, process_id: str, previous_task):
Before creating the task, in case previous_task contains information, we get its data:
        task = None
        if (previous_task is not None):
            task=models_rest.ProcessItemTaskCreateParams(
                data=previous_task.task.data
            )
And in the call to create the task, we specify both the owner and the task data:
        request = models_activity.ProcessItemCreateRequest(
            id=process_item_id,
            process_id=process_id,
            type=models_rest.ProcessItemType.TASK,
            process_item_definition_code=SampleWorkflow.TASK_CODE_SUBMIT_EXPENSE_CLAIM,
            owner_id=owner_id,  # ADAPTED FROM TEMPLATE
            task=task           # ADAPTED FROM TEMPLATE
        )
Finally in the create_process_item_submit__expense__claim method call, we include the existing information:
@workflow.run
    async def run(self, request: models_workflow.WorkflowRequest) -> models_workflow.WorkflowResponse:
        workflow.logger.info(f"Process {request.process_id} started")

        process_item_workflow = None
        needToRegister = False
        while (True):
            process_item_workflow = await self.create_process_item_submit__expense__claim(request.process_id, process_item_workflow)
Step 8: Testing the Workflow
After implementing all the previous steps, we can test the correct functioning of the worker.
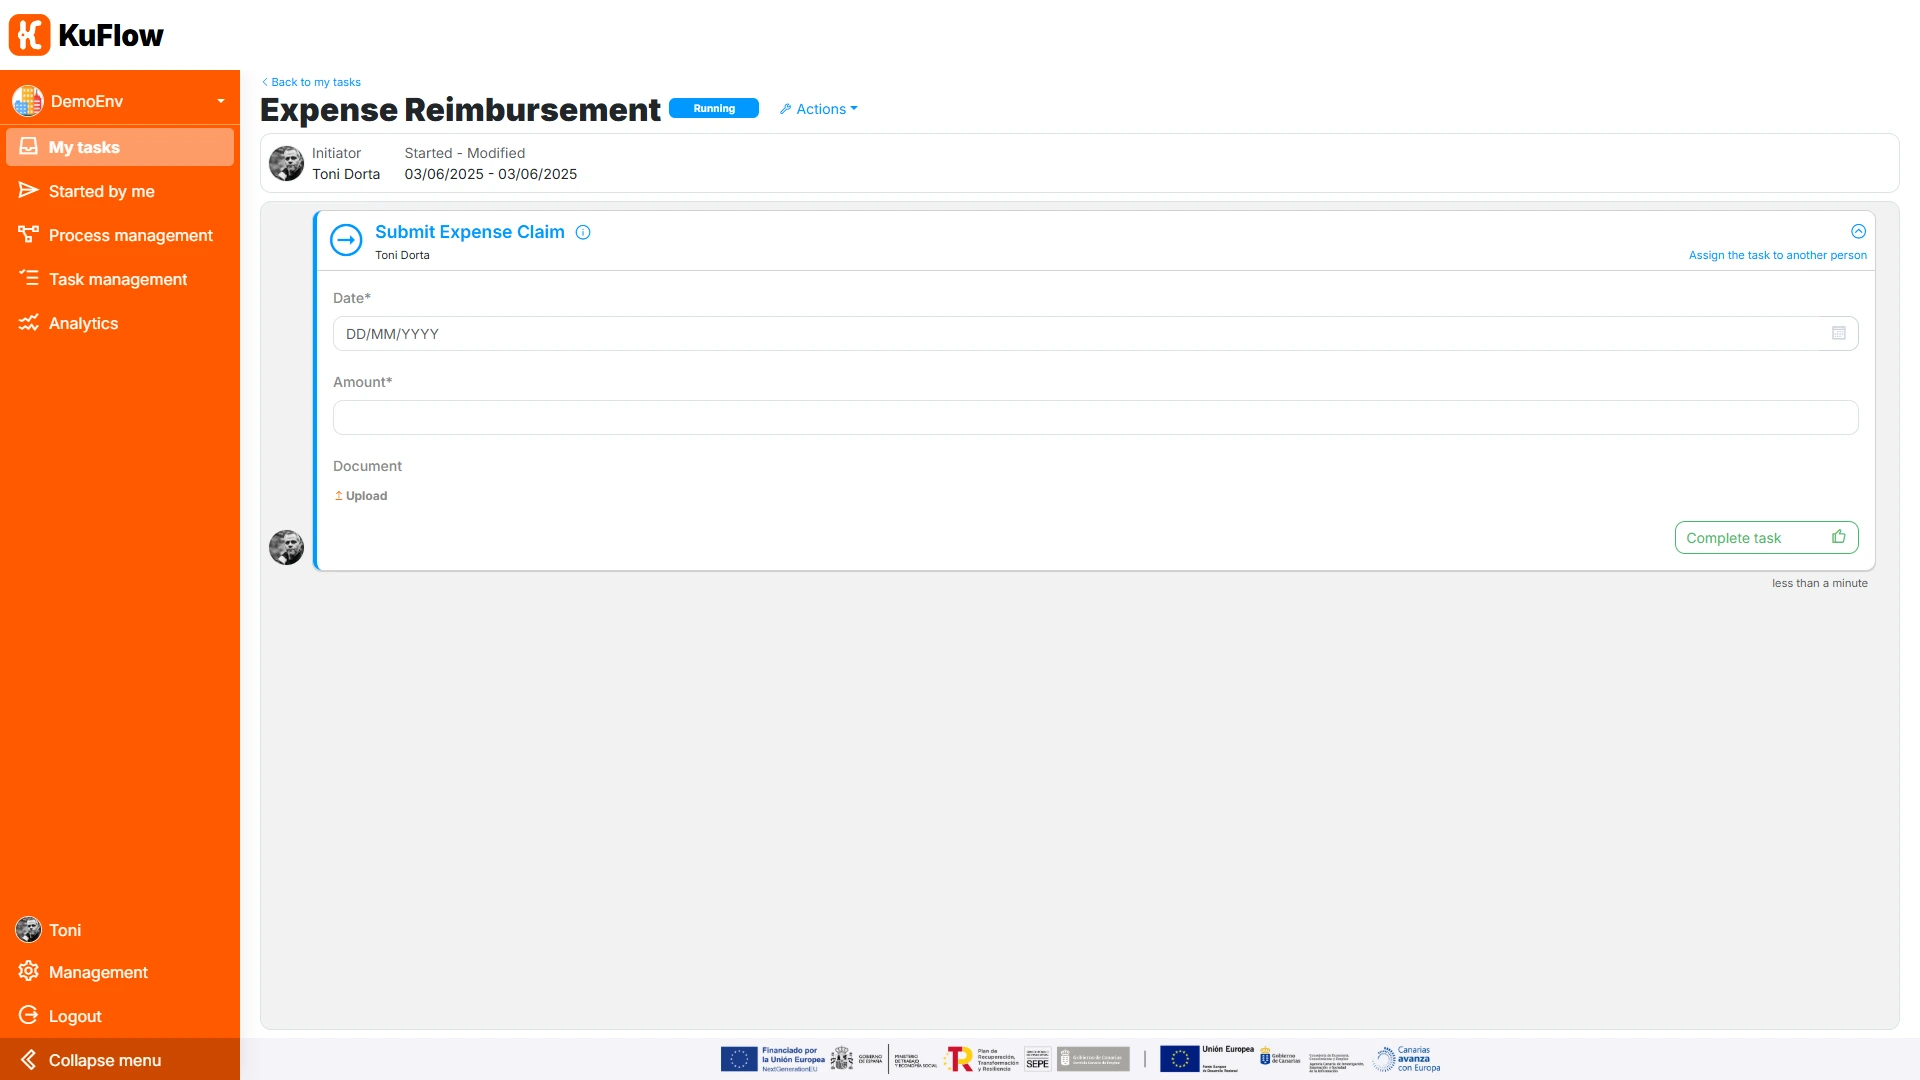
When an employee initiates the Expense Reimbursement Claim process, a first task is automatically assigned to him/her:
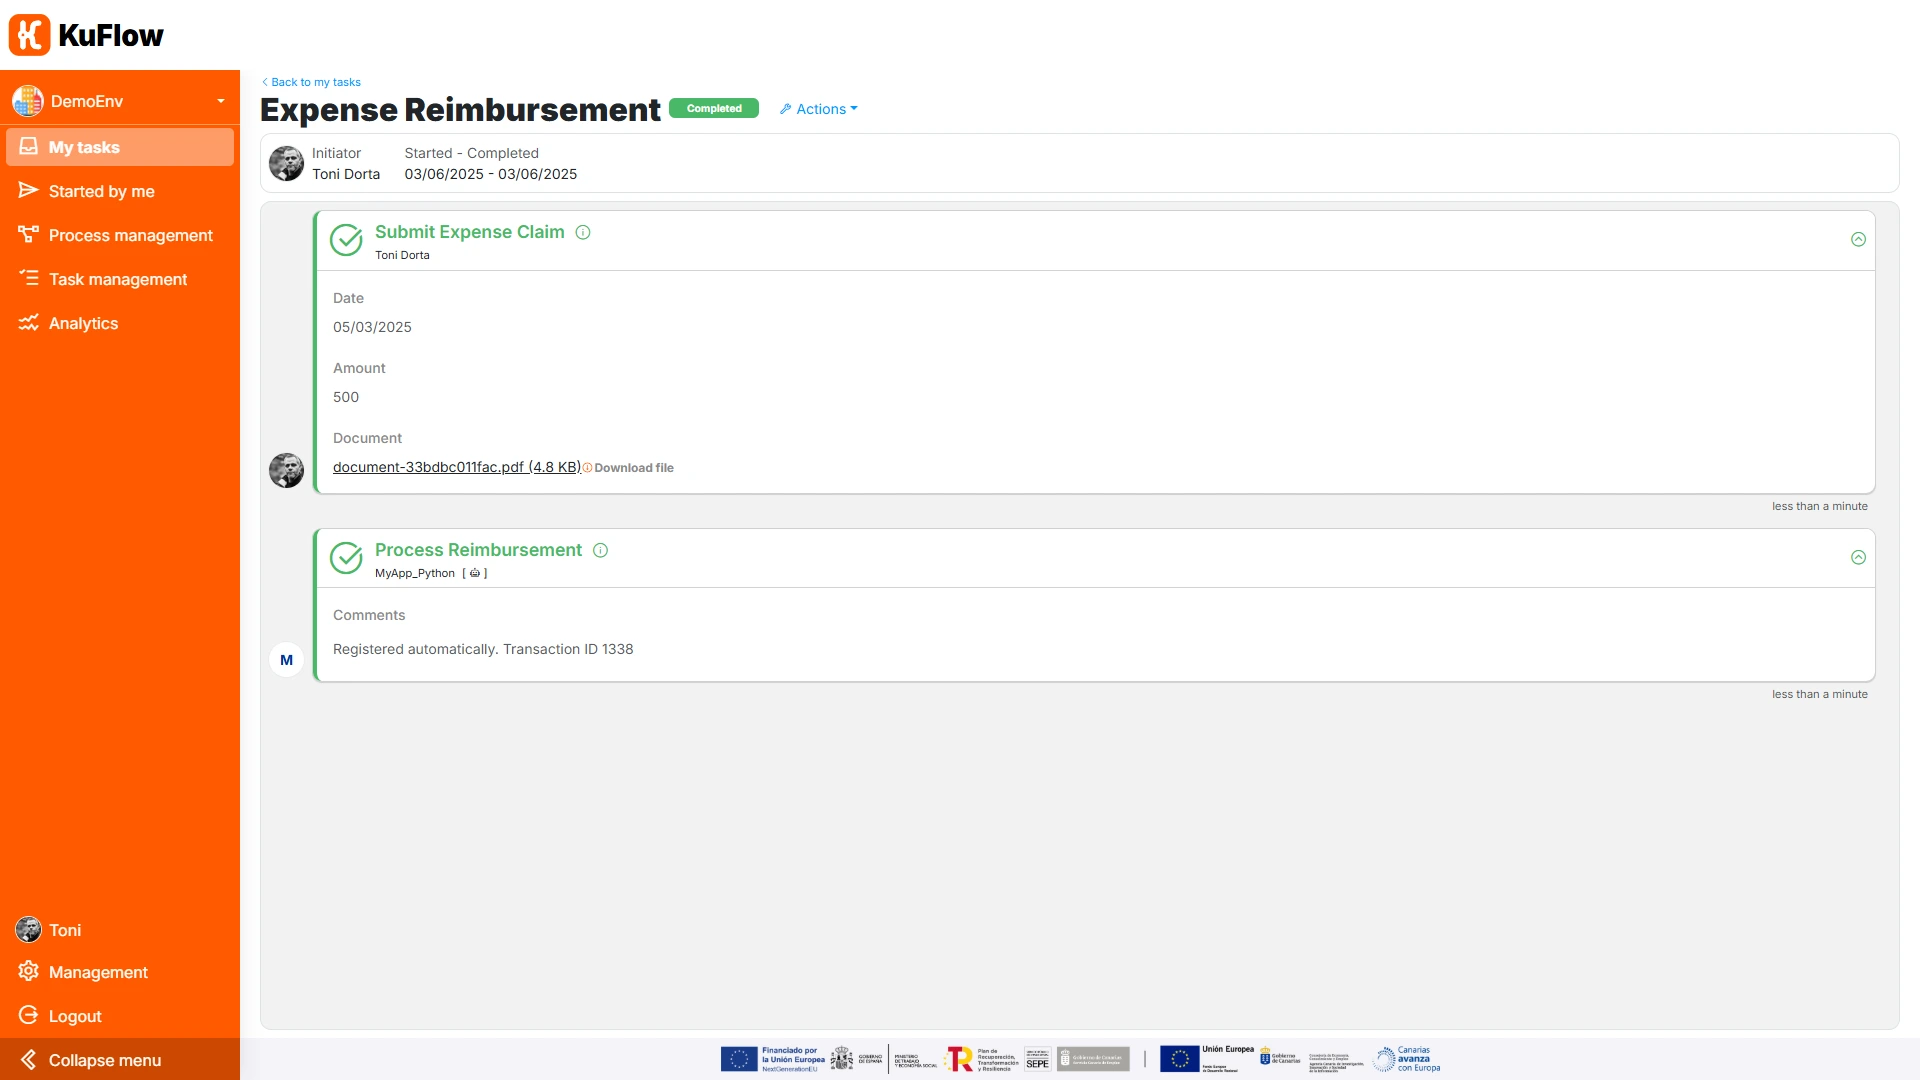
If the amount is not greater than €1,000, the system automatically processes it and the workflow is completed:
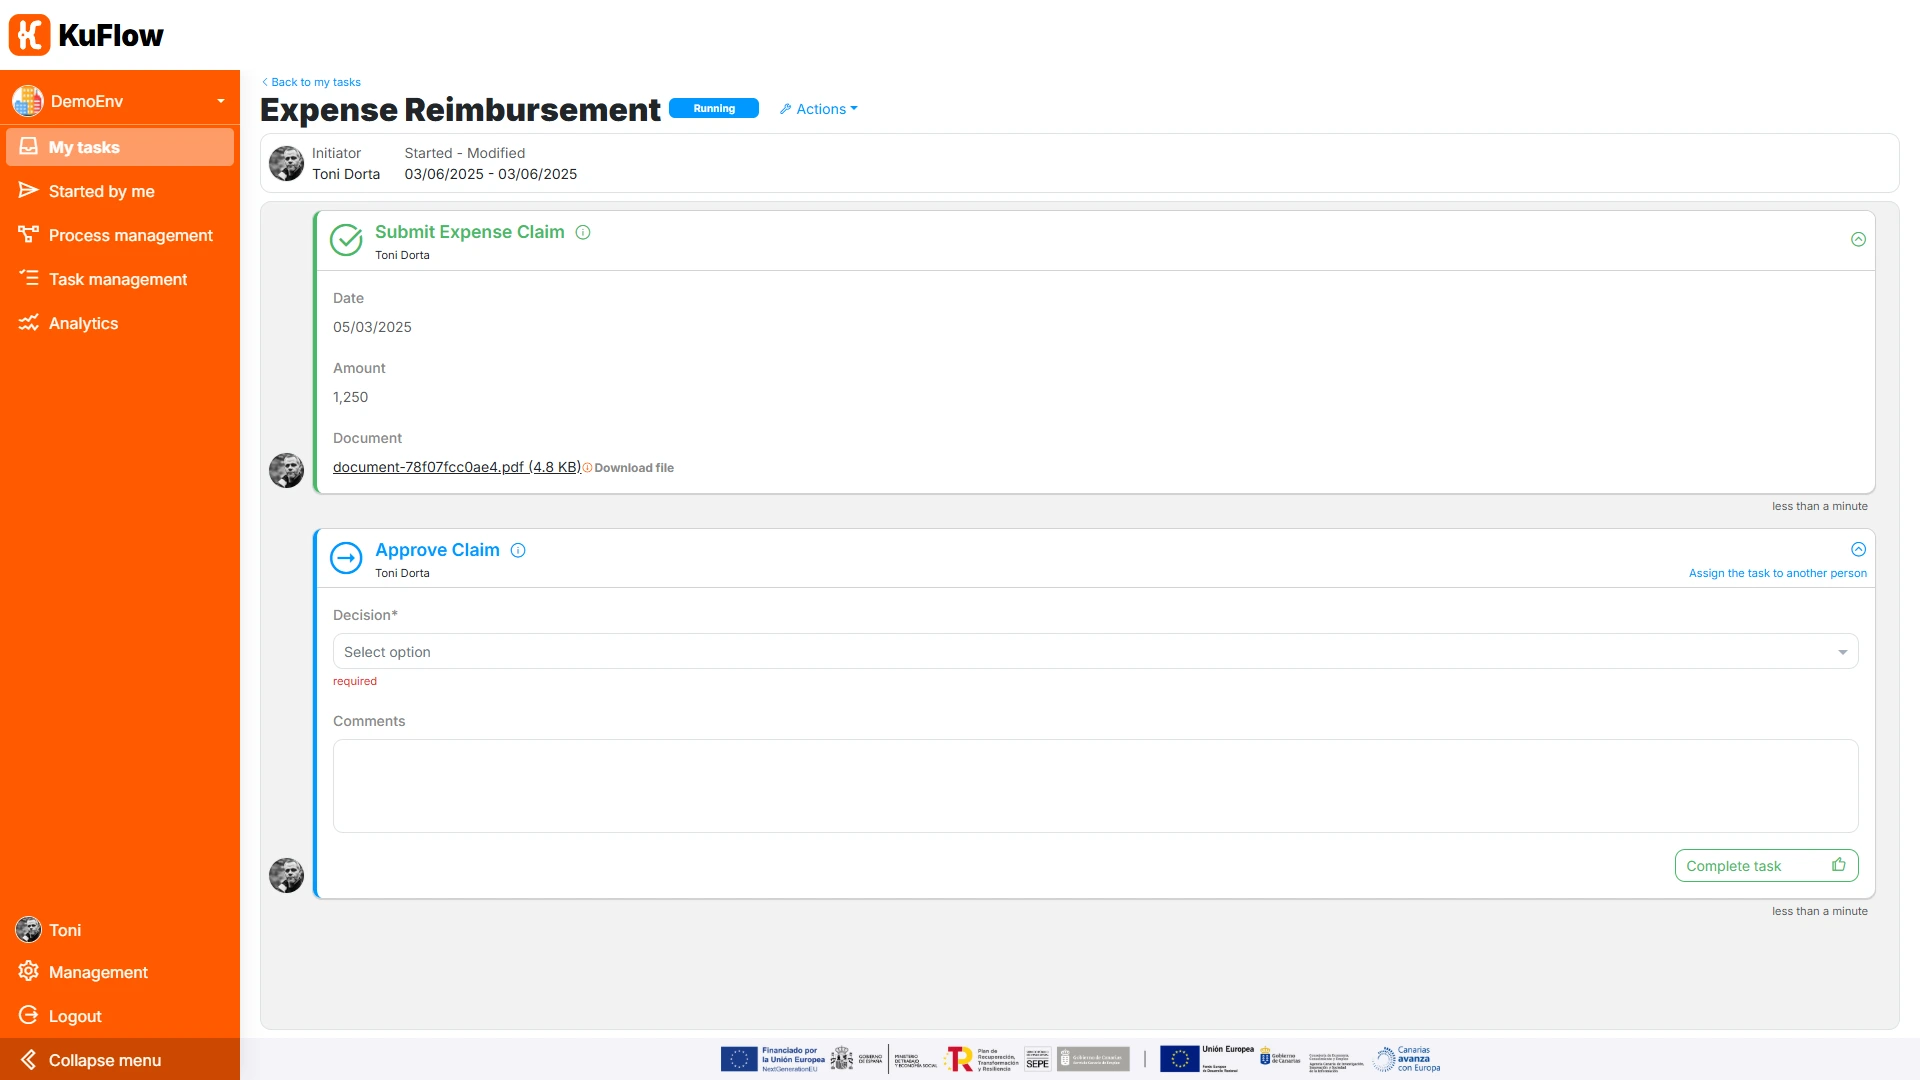
If the amount is greater than €1,000, the next step in the workflow is the approval of the person in charge
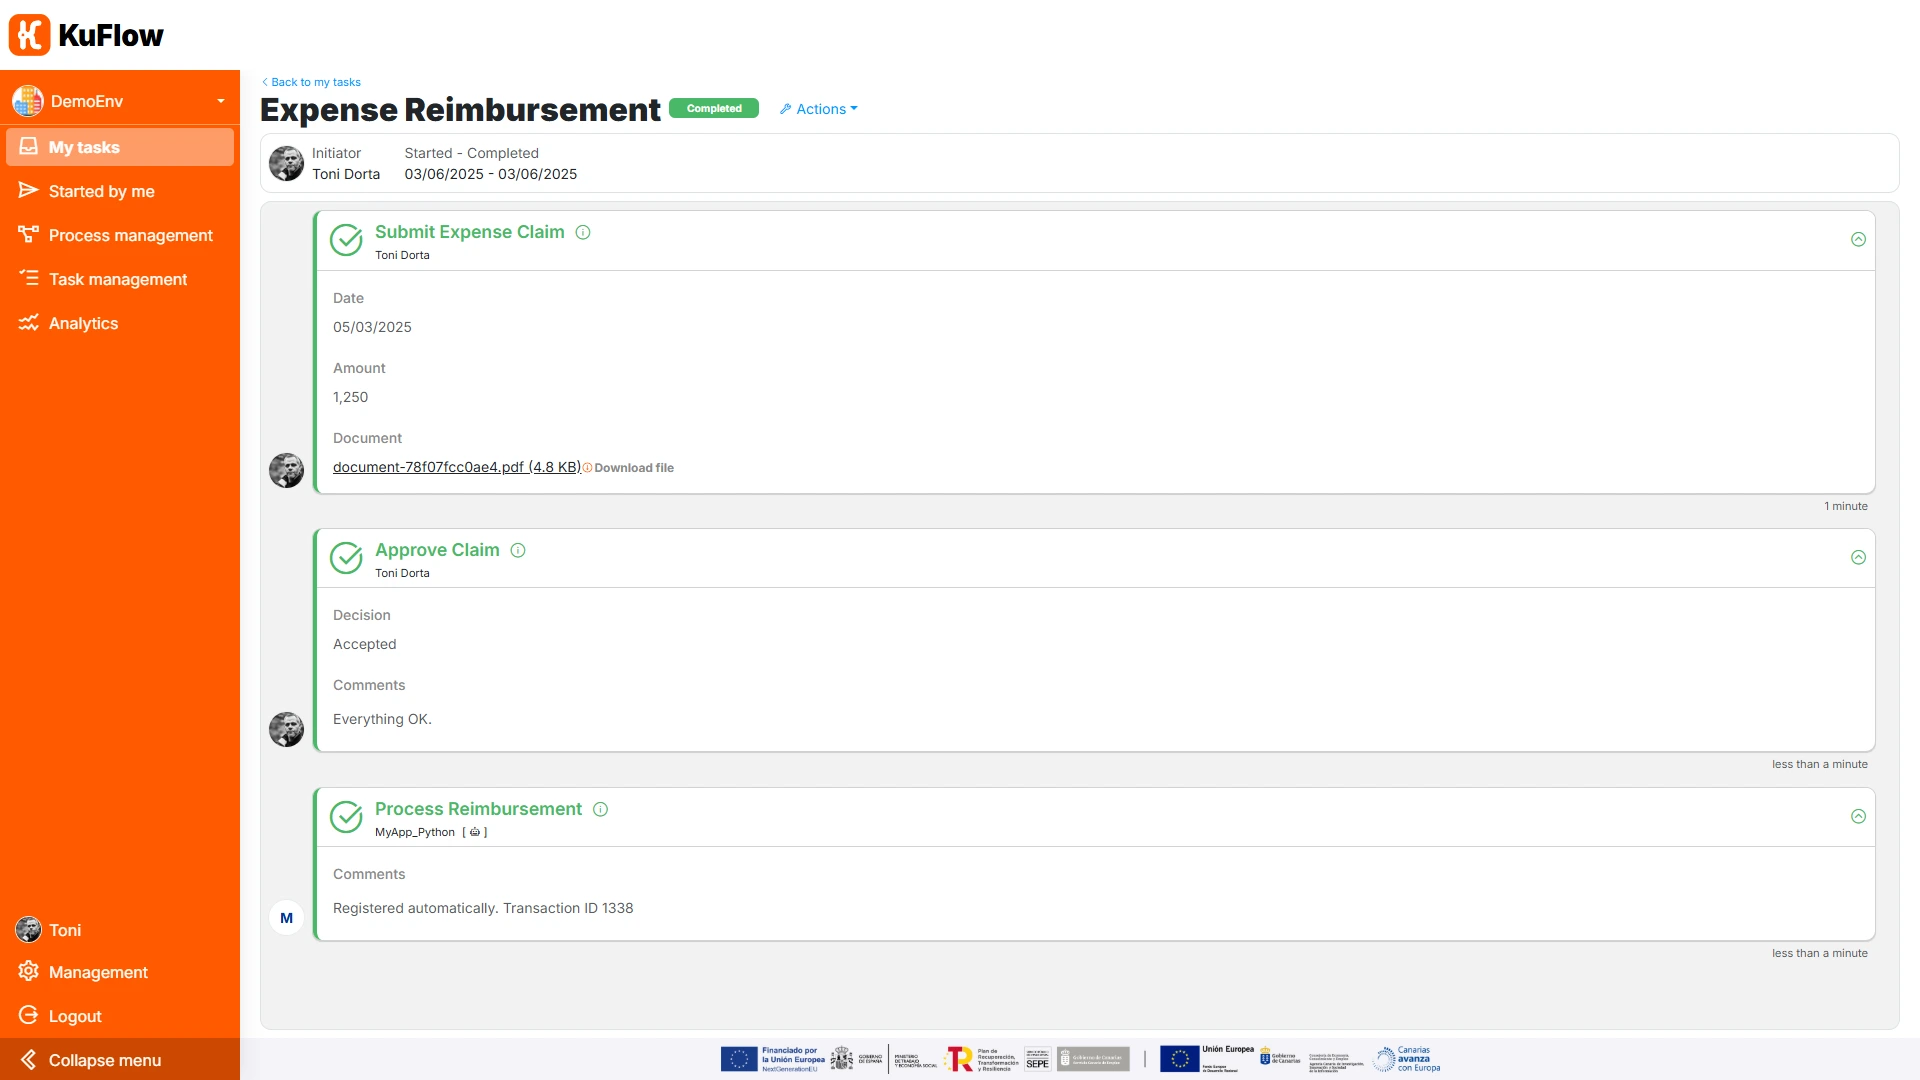
If the person in charge accepts the expense claim, the system automatically processes it and the workflow is completed.
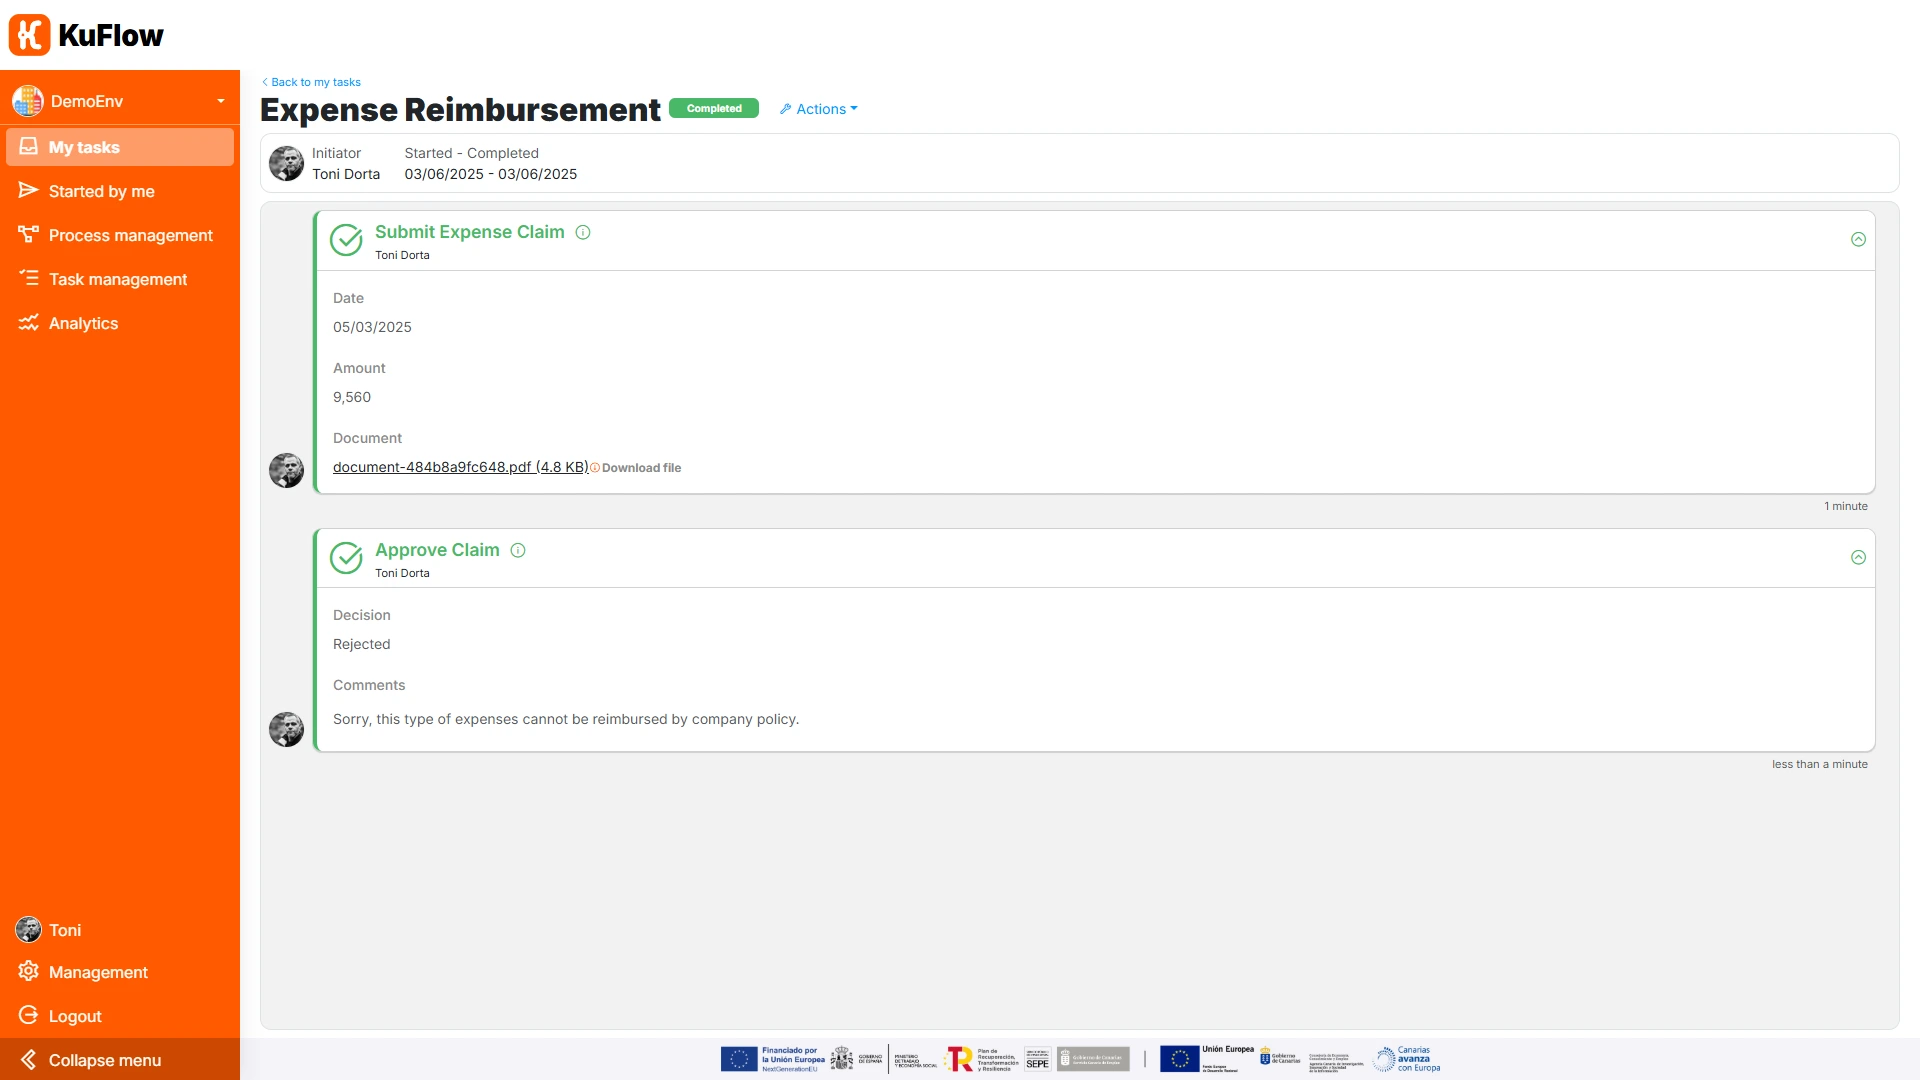
If the person in charge rejects the expense claim, the system completes the workflow without any further steps.
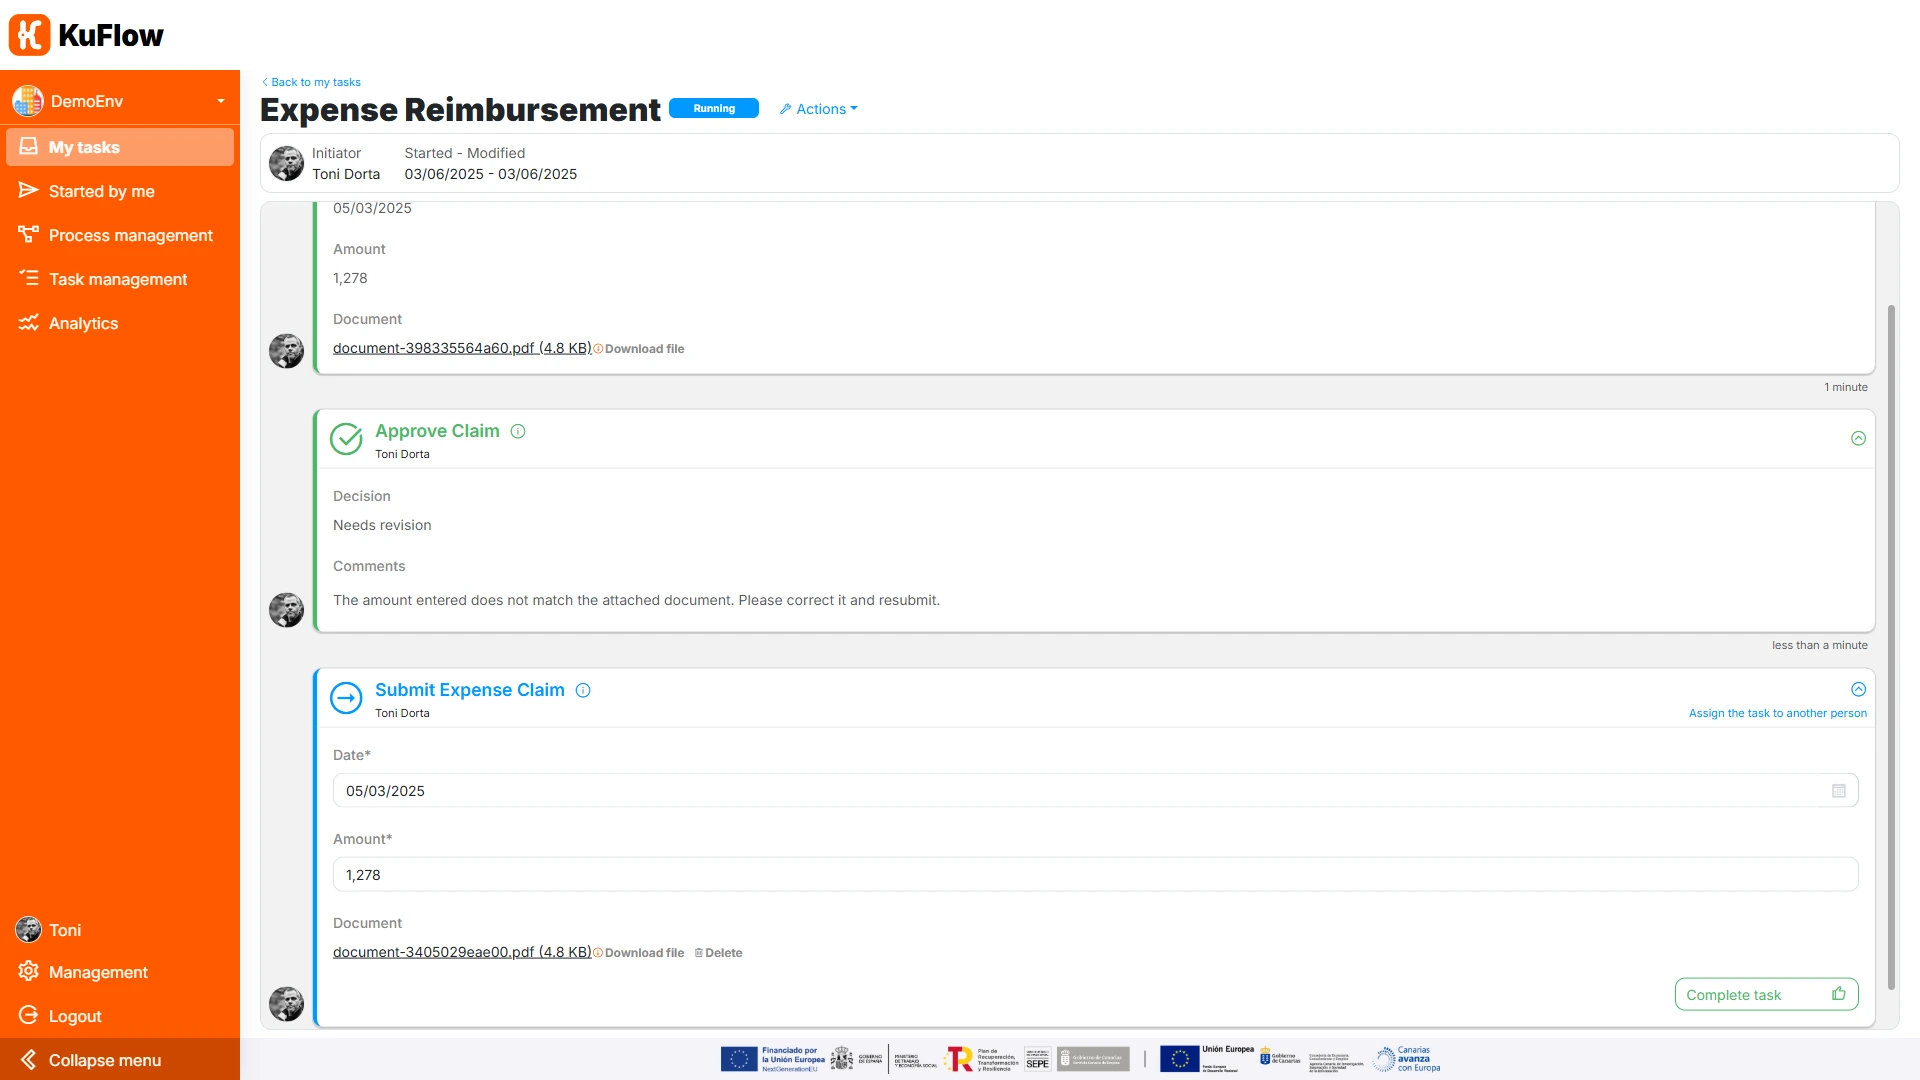
If the person in charge indicates that a review is necessary, the system returns the task to the employee who initiated the workflow, including the data entered previously so that he/she can make the relevant changes:
Recap and Key Takeaways
To summarize, in this example:
- We have developed a worker to operate within KuFlow, using the “workflow as code” approach with Python.
- We have implemented an expense approval workflow that includes:
- Submitting expense claims
- Approving or rejecting expenses
- Automatic approval for amounts below a defined threshold
- A correction loop allowing managers to request adjustments before finalizing a decision
- And we have also covered key technical aspects, including:
- Building a KuFlow worker (agent) from scratch
- Reading and updating task data
- Defining workflow conditions based on business rules
- Transferring task data to avoid redundant user input
- Claiming and executing tasks within the worker
- Assigning tasks to specific users, such as the process initiator
This example showcases the potential of KuFlow for process automation, demonstrating how developers can implement workflows efficiently without deep expertise in workflow engines. Additionally, it serves as a practical reference for handling common worker actions such as retrieving task data, updating tasks, and managing task execution.
Why Implement This Workflow with KuFlow?
One of the key advantages of using KuFlow for this business case is the abstraction it provides. Developers can focus on the business logic without worrying about secondary concerns such as:
- Building and maintaining a custom UI for expense submission and approval.
- Managing task assignments based on user roles and permissions.
- Handling process orchestration challenges, including asynchronous execution, queue management, and scalability.
By leveraging KuFlow, developers can streamline complex approval workflows, ensuring seamless integration with corporate systems while reducing manual effort. This makes KuFlow a powerful tool for automating business processes in a scalable and maintainable way.
